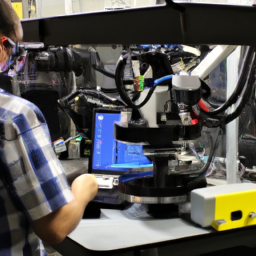
You may think that operating a laser cutter is a straightforward task, but have you considered the essential maintenance required to keep it running smoothly?
While it may be tempting to overlook regular maintenance, neglecting these tasks can lead to costly repairs and decreased efficiency.
In this article, we will guide you through the ten essential laser cutter maintenance tasks that you need to do regularly.
Now, you might argue that your laser cutter is functioning just fine without maintenance, but trust us when we say that prevention is better than cure.
By taking the time to clean the lens and mirrors, check and adjust laser alignment, lubricate moving parts, inspect and clean the ventilation system, monitor and replace consumable parts, and perform regular calibration and testing, you can ensure optimal performance and extend the lifespan of your laser cutter.
So, let’s delve into these vital maintenance tasks and keep your laser cutter in top-notch condition.
Key Takeaways
- Regular maintenance tasks are crucial for keeping a laser cutter running smoothly and preventing costly repairs.
- Cleaning the lens and mirrors is essential for optimal performance and clear project outcomes.
- Regularly checking and adjusting laser alignment ensures proper beam alignment and calibration.
- Calibrating the laser power is important for achieving precise and clean cuts.
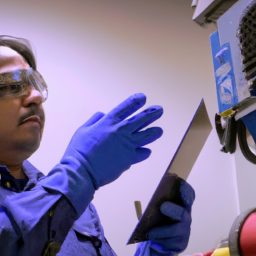
Clean the Lens and Mirrors
You need to make sure you clean the lens and mirrors regularly to keep your laser cutter running smoothly and to ensure your projects come out as crisp and clear as a freshly picked apple.
Cleaning techniques for the lens and mirrors are essential for maintaining the optimal performance of your laser cutter. Start by removing any dust or debris from the lens and mirrors using a soft, lint-free cloth. Be careful not to scratch the surfaces.

Next, use a specialized lens cleaning solution to gently remove any smudges or fingerprints. Avoid using harsh chemicals or abrasive materials that could damage the lens or mirrors.
Regular lens care will prevent buildup and maintain the clarity of the laser beam. With the lens and mirrors clean and in proper condition, you can now move on to the next maintenance task: checking and adjusting the laser alignment.
Check and Adjust Laser Alignment
To ensure proper beam alignment in your laser cutter, it’s important to regularly check and adjust the laser alignment. This involves aligning the laser beam with the center of the cutting nozzle or focusing lens.
Additionally, it’s crucial to calibrate the laser power to ensure optimal cutting and engraving results. By following these maintenance tasks, you can maintain the efficiency and accuracy of your laser cutter.
Ensure Proper Beam Alignment

Maintain proper beam alignment by regularly checking and adjusting it to ensure optimal performance. Proper beam alignment is crucial for the laser cutter to function effectively and produce accurate cuts. Regularly checking the beam alignment helps to identify and address any issues promptly, preventing potential damage to the machine and ensuring consistent results. Common beam alignment issues include misaligned mirrors, beam divergence, and beam clipping. Troubleshooting tips for these issues may involve adjusting mirror positions, cleaning dirty mirrors, or replacing damaged mirrors. By addressing these issues promptly, you can maintain the quality and precision of your laser cuts. In the next section, we will discuss how to calibrate the laser power for optimal performance.
Calibrate the Laser Power
Calibrating the laser power is crucial to achieving optimal performance. It ensures that the laser cutter operates at its maximum efficiency, resulting in precise and clean cuts comparable to a surgeon’s incisions.
Laser power calibration involves making precise adjustments to the laser power settings to match the specific material being cut. This process typically involves testing different power levels on a sample piece, analyzing the results, and making necessary adjustments until the desired cutting outcome is achieved.
It is important to regularly calibrate the laser power as different materials may require different power levels for optimal cutting. Proper laser power calibration ensures that the laser cutter delivers consistent and accurate results, minimizing the need for rework or wasted materials.
Once the laser power has been calibrated, it’s time to move on to the next maintenance task: lubricating the moving parts.
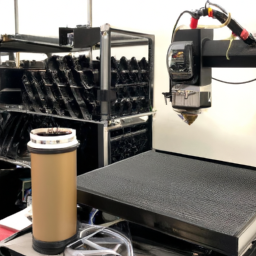
Lubricate Moving Parts
Regularly lubricating the laser cutter’s moving parts ensures optimal performance and extends its lifespan. Here are the benefits of using a laser cutter for lubricating moving parts:
-
Reduced friction: Lubrication reduces friction between moving parts, minimizing wear and tear.
-
Smooth operation: Proper lubrication allows the laser cutter to move smoothly, ensuring precise cuts and engraving.
-
Prevents rust and corrosion: Lubricants create a protective barrier, preventing rust and corrosion on metal components.
-
Noise reduction: Lubrication reduces noise generated by moving parts, creating a quieter working environment.
When choosing a lubricant for laser cutter maintenance, consider the following tips:
-
Compatibility: Ensure the lubricant is compatible with the laser cutter’s materials and components.
-
Viscosity: Opt for a lubricant with the appropriate viscosity for the specific moving parts.
-
Temperature resistance: Select a lubricant that can withstand the high temperatures generated during laser cutting.
-
Longevity: Choose a lubricant that provides long-lasting protection without frequent reapplication.
Regularly lubricating the laser cutter’s moving parts is crucial for optimal performance. Once you’ve completed this task, it’s important to inspect and clean the ventilation system to maintain a safe working environment.
Inspect and Clean the Ventilation System
After lubricating the laser cutter’s moving parts, take a moment to inspect and clean the ventilation system. This is important to ensure a clean and safe working environment, as well as to maintain the performance and longevity of the laser cutter.
Start by visually inspecting the ventilation system for any signs of damage or blockages. Look for loose or damaged ductwork, as well as any debris or dust accumulation that may obstruct the airflow.
Next, use a soft brush or compressed air to remove any dirt or debris from the ventilation system. This will help to keep the system clean and functioning properly.
Additionally, check the filters and replace them if necessary. This will ensure optimal airflow and prevent any potential issues with overheating.
Remember, a well-maintained ventilation system is crucial for the efficient operation of the laser cutter.
Transitioning to the next section about monitoring and replacing consumable parts, it is important to keep track of the laser cutter’s overall performance and address any issues promptly.
Monitor and Replace Consumable Parts
To ensure the optimal performance of your laser cutter, it’s crucial to regularly check the optics and replace them if necessary. This will help maintain the quality of your cuts and prevent any potential damage to the machine.
Additionally, it’s important to replace the cutting bed as needed. A worn-out bed can affect the accuracy and precision of your cuts.
By monitoring and replacing these consumable parts, you can ensure the longevity and efficiency of your laser cutter.
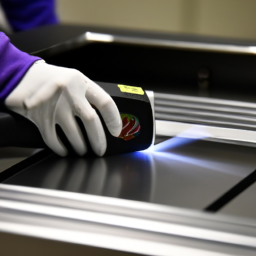
Check Optics and Replace if Necessary
Check the optics and replace them if necessary to ensure optimal laser cutting performance. The optics in a laser cutter play a crucial role in directing the laser beam accurately and efficiently. Over time, these components can become dirty or damaged, leading to decreased performance and potential errors in cutting.
To maintain the quality of your laser cutter, it’s important to regularly check the optics for any signs of dirt, dust, or damage. If you notice any issues, you should promptly replace the affected components.
To effectively check the optics, follow these steps:
- Inspect the lenses and mirrors for any signs of dirt or debris.
- Clean the optics using a lint-free cloth and a mild cleaning solution.
- Test the laser cutter after cleaning to ensure proper functionality.
By regularly checking and replacing the optics as needed, you can ensure that your laser cutter operates at its best.
Next, we’ll discuss the importance of replacing the cutting bed as needed.
Replace Cutting Bed as Needed
If your laser cutting performance is starting to decline, it may be time to consider replacing the cutting bed. The cutting bed is an essential part of laser cutter maintenance and plays a crucial role in ensuring accurate and precise cuts. Over time, the cutting bed can become worn out or damaged, leading to decreased performance and potential safety hazards.
When replacing the cutting bed, it’s important to choose a high-quality replacement that’s compatible with your laser cutter model. Follow the manufacturer’s instructions for installation and make sure to properly align the new cutting bed to ensure optimal performance.
By regularly inspecting and replacing the cutting bed as needed, you can maintain the efficiency and effectiveness of your laser cutter.
Moving on to the next section, it’s important to perform regular calibration and testing to further optimize your laser cutting operations.
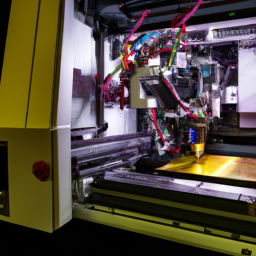
Perform Regular Calibration and Testing
To ensure optimal performance of your laser cutter, it’s crucial to regularly calibrate and test its various components.
Start by checking the power levels and beam quality to ensure they’re within the specified range for accurate cutting and engraving.
Additionally, test the cutting and engraving accuracy to identify any deviations or inconsistencies that may require adjustment or maintenance.
By performing these calibration and testing tasks regularly, you can ensure that your laser cutter delivers precise and reliable results.
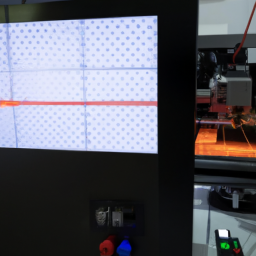
Check Power Levels and Beam Quality
Ensure you’re prepared to witness the mesmerizing precision and flawless execution of each laser beam by regularly monitoring power levels and beam quality. To optimize power level adjustment and beam quality, follow these steps:
-
Measure the power output of the laser cutter using a power meter. Adjust the power level as needed to ensure consistent and accurate cutting and engraving results.
-
Inspect the beam quality by examining the beam profile and checking for any irregularities or distortions. Make necessary adjustments to improve the beam quality.
-
Clean the laser optics regularly to maintain optimal beam quality. Dust, debris, and residue can affect the clarity and precision of the laser beam.
-
Perform periodic beam alignment tests to ensure the laser beam is properly focused and aligned.
By monitoring power levels and beam quality, you can guarantee the utmost accuracy and effectiveness in your laser cutting and engraving projects.
Moving on to the next section, it’s crucial to test cutting and engraving accuracy to ensure consistent results.
Test Cutting and Engraving Accuracy
Testing cutting and engraving accuracy is key to achieving consistent and precise results in your laser projects. To ensure optimal performance, it’s important to regularly test the cutting speed and evaluate engraving depth.
Start by selecting a test design that includes intricate details, curves, and straight lines to thoroughly evaluate the accuracy of your laser cutter. Adjust the cutting speed and observe the results closely, noting any irregularities or inconsistencies.
Additionally, evaluate the engraving depth by engraving a test pattern on various materials. Measure the depth with precision tools and compare it to the desired depth. This’ll help you identify any issues with the laser beam focus or power settings, allowing you to make the necessary adjustments for optimal cutting and engraving accuracy.
Frequently Asked Questions
How often should the lens and mirrors be cleaned?
To maintain optimal performance, it’s recommended to clean the lens and mirrors of your laser cutter regularly. By doing so, you ensure that dust and debris don’t compromise the laser’s accuracy and efficiency. It is recommended to clean the lens and mirrors at least once a week or more frequently if you notice a decrease in cutting quality. When cleaning, adhere to best practices, such as using lint-free wipes and isopropyl alcohol, to avoid damaging these delicate components.
What are the signs that indicate the need for laser alignment adjustment?
To troubleshoot laser alignment, look out for signs such as inconsistent cutting, charring of edges, or distorted shapes in your laser cutter.
Laser alignment is crucial in the cutting process as it ensures precise and accurate cuts. Misalignment can result in wasted materials and compromised quality.
Regularly checking and adjusting the laser alignment will help maintain optimal performance and minimize production issues.
Which parts of the laser cutter should be lubricated and how frequently?
To ensure optimal performance, you must regularly lubricate specific components of the laser cutter. The recommended lubrication frequency varies depending on the part.
For instance, the linear bearings and ball screws should be lubricated every 500 hours of operation using a light oil.
The guide rails and belts, on the other hand, require lubrication every 100 hours using a dry lubricant.
Following these guidelines will help maintain the longevity and efficiency of your laser cutter.
How can the ventilation system be inspected and cleaned effectively?
To effectively clean and inspect your ventilation system, start by shutting off the laser cutter and disconnecting the power supply.
Remove any debris or dust from the system using compressed air or a vacuum cleaner.
Inspect the air filters for dirt or damage and replace them if necessary.
Check the exhaust fan and motor for any signs of wear or malfunction.
Finally, ensure that all ductwork is properly connected and free from blockages.
Remember, a well-maintained ventilation system is crucial for the safe operation of your laser cutter.
What are some common consumable parts that need to be monitored and replaced regularly?
To ensure optimal performance and longevity of your laser cutter, it’s crucial to monitor and replace common consumable parts regularly. These parts, such as laser tubes, mirrors, lenses, and cutting nozzles, are prone to wear and tear due to high-intensity laser usage.
By regularly inspecting and replacing these components as needed, you can maintain precise and efficient cutting capabilities, preventing potential damage and costly repairs.
Laser cutter maintenance involves diligent monitoring and timely replacement of these common consumable parts.
Conclusion
In the realm of laser cutter maintenance, your diligence is paramount. By diligently attending to essential tasks, such as cleaning lenses and mirrors, aligning the laser, lubricating moving parts, inspecting the ventilation system, and replacing consumable parts, you ensure the smooth operation and longevity of your machine.
Just as a skilled conductor orchestrates a symphony, your careful attention to these maintenance tasks orchestrates a symphony of precision and efficiency, allowing your laser cutter to perform at its peak potential.
Stay committed to this maintenance routine, and your laser cutter will continue to shine brilliantly in your creative endeavors.