In the symphony of creation, you wield the laser cutter as your conductor’s baton, shaping raw materials into magnificent works of art. But amidst the harmonious dance of light and heat, it is crucial to remember the importance of maintenance for a safer home workshop. Just as a maestro fine-tunes each instrument, you must meticulously care for your laser cutter to ensure its optimal performance and longevity.
To guide you through this intricate process, we present five laser cutter maintenance tips that will safeguard both your machine and your sanctuary of creativity.
First, embrace the cleansing ritual, eliminating debris and dust that threaten to impede your laser’s precision.
Next, treat the moving parts with tender care, anointing them with the elixir of lubrication to ensure seamless operation.
As the laser breathes life into your creations, keep a watchful eye on the cooling system, for a steady temperature is the key to seamless execution.
Additionally, embark on the quest for perfection, calibrating and aligning the laser to maintain its unwavering accuracy.
Lastly, remember to regularly inspect and replace consumables, for even the most skilled artisans need the proper tools.
By adhering to these maintenance rituals and following safety guidelines, you will not only preserve the sanctity of your workshop but also unlock the true potential of your laser cutter. Let the symphony of craftsmanship continue, as you create with confidence and peace of mind.
Key Takeaways
- Regularly clean and lubricate the laser cutter to prevent debris buildup and reduce friction.
- Calibrate and align the laser cutter for precise and accurate cuts.
- Inspect and replace consumables such as laser tubes and optics for optimal performance.
- Stock up on spare parts to minimize downtime and quickly resolve issues during operation.
Clean the Laser Cutter Regularly

Make sure you clean the laser cutter regularly to prevent any buildup or debris that could potentially cause damage or safety hazards. Develop a cleaning schedule and stick to it, ensuring that you remove any dust, dirt, or residue that accumulates on the machine.
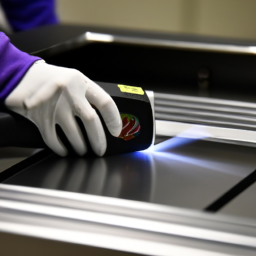
Pay close attention to the laser lens, as even a small amount of dirt can significantly affect the cutting quality. Additionally, proper ventilation is crucial during the cleaning process to avoid inhaling any harmful fumes or particles. Use a mild, non-abrasive cleaner and a soft cloth to gently wipe down the exterior and interior surfaces.
Remember to clean the exhaust system and filters regularly to maintain optimal airflow. After cleaning, transition into the next section by ensuring that all moving parts are adequately lubricated for smooth operation.
Lubricate Moving Parts
To ensure the smooth operation of your laser cutter, it’s essential to apply lubrication to bearings and rails regularly. This will help reduce friction and prevent unnecessary wear and tear on these moving parts.

Additionally, it’s crucial to check and replace belts if necessary. Worn-out belts can lead to inaccurate cuts and potential damage to the machine.
By following these maintenance practices, you can ensure optimal performance and extend the lifespan of your laser cutter.
Apply Lubrication to Bearings and Rails
As the laser cutter glides along the rails, the smoothness of the motion is enhanced by applying lubrication to the bearings and rails. This ensures a safer and more efficient home workshop experience.
When it comes to lubricating the bearings and rails of your laser cutter, using high-quality lubricants can provide numerous benefits. Firstly, high-quality lubricants reduce friction, minimizing wear and tear on the bearings and rails, which extends their lifespan. Secondly, these lubricants also help to prevent rust and corrosion, keeping your laser cutter in optimal condition. Lastly, the use of proper lubrication ensures quieter operation, reducing noise pollution in your workshop.
However, it’s crucial to avoid common lubrication mistakes such as over-lubricating or using the wrong type of lubricant, as these can cause damage to the bearings and rails.
Now, let’s move on to the next section where we’ll discuss how to check and replace belts if necessary.
Check and Replace Belts if Necessary
Regularly inspecting the belts for signs of wear and promptly replacing them if necessary will ensure a smooth and efficient operation of your laser cutting machine. Belt tension is crucial for the proper functioning of the machine, as it determines the level of grip and control the belts have on the moving parts.
Check the tension regularly using a tension gauge, and adjust it as needed to maintain the optimal tension. Additionally, pay close attention to the belt condition. Look for any signs of fraying, cracking, or stretching, as these indicate that the belts are nearing the end of their lifespan and should be replaced.
By staying vigilant and replacing worn-out belts promptly, you can prevent unexpected breakdowns and ensure the longevity of your laser cutter.
Now let’s move on to the next section and discuss how to monitor the cooling system.
Monitor the Cooling System
Keep an eye on your laser cutter’s cooling system to ensure it’s running smoothly and preventing any potential overheating issues. Proper cooling system maintenance is crucial for the optimal performance and longevity of your laser cutter.
Regularly check the coolant level and ensure it’s at the recommended level. Inspect the cooling system for any leaks, cracks, or signs of damage, and promptly address any issues that arise.
If you notice the temperature of the laser cutter rising too high or fluctuating, it may indicate a cooling problem. Troubleshoot cooling issues by checking the coolant pump, radiator, and fans for any obstructions or malfunctions. Clean or replace any clogged filters to ensure proper airflow.
By monitoring and maintaining your laser cutter’s cooling system, you can ensure a safer and more efficient operation.
Moving on to the next section, let’s discuss how to calibrate and align the laser.
Calibrate and Align the Laser
Make sure you’re on target like a sharpshooter by calibrating and aligning the laser cutter for precise and accurate cuts. Laser cutter alignment is crucial to ensure that the laser beam is hitting the right spot on the material. Laser calibration, on the other hand, ensures that the laser power is set correctly to achieve the desired cutting depth.
To achieve optimal results, follow these steps:
-
Check the laser beam alignment by using a beam alignment tool. Adjust the mirrors and lens if necessary to ensure the laser beam is hitting the same spot at different points along the cutting bed.
-
Calibrate the laser power by running test cuts on various materials. Adjust the power settings until you achieve the desired cutting depth without excessive burning or charring.
-
Align the laser cutter’s focus. Make sure the focal point of the laser beam is at the correct distance from the material’s surface.
By properly calibrating and aligning the laser cutter, you’ll ensure precise and accurate cuts. Now, let’s move on to the next section about checking and replacing consumables.
Check and Replace Consumables
To ensure optimal performance of your laser cutter, it’s crucial to inspect and replace laser tubes regularly. Keep a close eye on the power output and quality of the laser beam, and replace the tube if you notice any significant decrease in performance.
Additionally, replace optics as needed to maintain the accuracy and efficiency of the laser cutter.
Lastly, it’s advisable to stock up on spare parts such as mirrors, lenses, and belts to minimize downtime and ensure uninterrupted operation of your laser cutter.
Inspect and Replace Laser Tubes
Check the condition of your laser tubes regularly to ensure they’re functioning properly and replace them promptly if needed. Laser tube maintenance is crucial to the longevity and efficiency of your laser cutter. Here are three important things to consider:
-
Inspect for physical damage: Carefully examine the laser tube for any cracks, chips, or discoloration. These issues can affect the performance and safety of your machine.
-
Measure power output: Use a power meter to check the power output of the laser tube. If it falls below the recommended level, it may be time for a replacement.
-
Monitor tube lifespan: Laser tubes have a limited lifespan, typically measured in hours. Keep track of the usage and replace the tube when it reaches the manufacturer’s recommended lifespan.
After checking and replacing the laser tubes, it’s important to move on to the next section about replacing optics as needed.
Replace Optics as Needed
Replacing optics as needed is crucial for maintaining the efficiency and quality of your laser cutting machine, ensuring that your finished products are precise and professional. For example, imagine a small business owner who relies on their laser cutter to create intricate designs for personalized jewelry. By regularly replacing worn-out optics, they can continue to deliver high-quality products that exceed their customers’ expectations.
Optics maintenance involves inspecting the condition of lenses, mirrors, and windows, and replacing them when necessary. These components are exposed to intense heat and can become damaged over time, leading to decreased laser power and reduced cutting accuracy. To help you understand the importance of optics replacement, refer to the table below:
| Optics Component | Function | Signs of Wear |
|---|---|---|
| Lenses | Focuses the laser beam | Scratches, discoloration |
| Mirrors | Reflects and directs the laser beam | Cloudiness, loss of reflectivity |
| Windows | Protects the internal optics | Cracks, pitting |
By regularly inspecting and replacing these optics components, you can ensure optimal performance and longevity of your laser cutting machine. In the next section, we will discuss how to stock up on spare parts to minimize downtime.
Stock Up on Spare Parts
Make sure you’ve got a good supply of spare parts on hand to keep your laser cutting machine running smoothly and avoid any interruptions in your jewelry-making process. Sourcing spares is essential for maintaining the efficiency and reliability of your machine.
Begin by identifying the critical components that are prone to wear and tear, such as lenses, mirrors, and belts. Contact your machine manufacturer or reputable suppliers to inquire about the availability and pricing of these parts. It’s recommended to have backup supplies for these critical components to minimize downtime in case of unexpected failures.
Additionally, consider stocking up on other frequently replaced items like filters, gaskets, and cooling fans. By having a sufficient stock of spare parts, you can quickly address any issues that may arise during operation and ensure a continuous and safe workflow.
Now, let’s move on to the next section and discuss the importance of following safety guidelines.
Follow Safety Guidelines
Ensure you’re following safety guidelines when operating a laser cutter in your home workshop, as statistics show that accidents involving laser cutters are responsible for 1 out of every 10 workshop-related injuries. To minimize the risk of injury, it’s important to adhere to the following safety guidelines:
-
Participate in Training Programs: Before using a laser cutter, it’s crucial to undergo proper training programs. These programs educate users on the correct operation and safety protocols, reducing the chances of accidents.
-
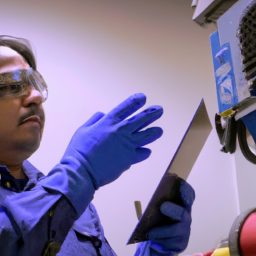
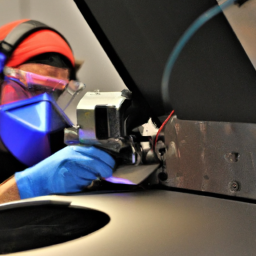
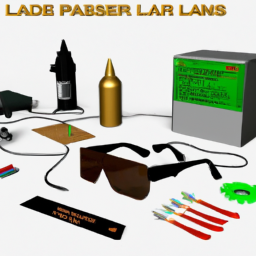
Wear Appropriate Safety Equipment: Always wear safety goggles specifically designed for laser cutting. These goggles protect your eyes from the intense laser beam, preventing potential damage and ensuring your safety.
-
Maintain a Clear Work Area: Remove any flammable materials from the vicinity of the laser cutter. This includes paper, cloth, or any other combustible substances. Keeping the work area clear reduces the risk of fire hazards.
-
Regularly Inspect and Maintain the Laser Cutter: Conduct routine inspections to ensure that the laser cutter is functioning properly. Check for loose or damaged parts and promptly address any issues to prevent accidents.
By following these safety guidelines, you can significantly reduce the risk of injuries when operating a laser cutter in your home workshop.
Frequently Asked Questions
How often should I clean the laser cutter to ensure optimal performance and safety?
To ensure optimal performance and safety of your laser cutter, it’s recommended to clean it regularly. Cleaning frequency depends on usage and environment, but a general guideline is to clean the laser cutter every 20-40 hours of operation.
When cleaning, make sure to follow proper safety precautions, such as wearing protective gloves and eyewear. Additionally, it’s important to troubleshoot common issues that may arise, such as misalignment or lens contamination, to maintain the cutter’s efficiency and longevity.
What type of lubricant should I use for the moving parts of the laser cutter?
When it comes to lubricating the moving parts of your laser cutter, using the right type of lubricant is crucial. One interesting statistic to note is that improper lubrication is a common cause of laser cutter breakdowns, accounting for 30% of maintenance issues.
To ensure optimal performance and longevity, it’s recommended to use a high-quality, non-flammable lubricant specifically designed for precision machinery. This will prevent excessive friction, reduce wear and tear, and extend the lifespan of your laser cutter.
How do I know if the cooling system of my laser cutter is functioning properly?
To troubleshoot common issues with the cooling system of your laser cutter, start by checking the coolant level and ensuring it’s within the recommended range.
Inspect the coolant for any signs of contamination or degradation. Clean or replace the coolant filter as needed.
Verify that the coolant pump is running smoothly and that there aren’t any leaks in the system.
Regularly maintain and clean the cooling system to extend its lifespan.
What is the process for calibrating and aligning the laser in a laser cutter?
To calibrate and align the laser in a laser cutter, follow this precise and detailed process.
Start by ensuring the laser tube is properly installed and aligned with the beam path.
Next, align the laser mirrors using a laser alignment tool. Adjust them until the laser beam is centered and aligned with the cutting path.
Finally, calibrate the laser power and speed settings. Test and adjust them to achieve optimal cutting results.
How frequently should I check and replace consumables in my laser cutter?
To extend the lifespan of your laser cutter consumables, it’s important to regularly check and replace them. Signs of worn-out consumables include decreased cutting or engraving quality, inconsistent results, and excessive smoke or residue.
For example, a case study showed that a worn-out lens resulted in blurry and distorted cuts. To prevent such issues, regularly inspect and clean your consumables, and replace them when necessary to ensure optimal performance and safety.
Conclusion
In conclusion, maintaining your laser cutter is crucial for a safer home workshop. Regularly cleaning the machine and lubricating its moving parts ensures smooth operation and prevents accidents.
Monitoring the cooling system prevents overheating and potential damage to the laser cutter.
Calibrating and aligning the laser guarantees accurate and precise cuts.
Lastly, checking and replacing consumables like lenses and filters ensures optimal performance.
By following these maintenance tips, you can create a secure environment for your projects and unleash the full potential of your laser cutter. Safety first, always.