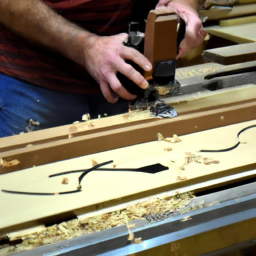


Did you know that laser cutting machines have become an indispensable tool in the world of woodworking, with an estimated 70% of woodworking businesses now using them?
If you’re a woodworker looking to achieve the best results with your laser cutting machine, then you’ve come to the right place. In this article, we will provide you with five expert tips to help you get the most out of your machine.
From properly calibrating your machine to choosing the right type of wood, preparing your design files, securing your material, and testing and adjusting settings, we will cover all the essential steps to ensure precision and efficiency in your woodworking projects.
Additionally, we will emphasize the importance of practicing proper safety measures to protect yourself and your work.
So, let’s dive in and discover how you can optimize your laser cutting machine for woodworking success!
Key Takeaways
- Properly calibrate the machine for precise cuts
- Choose the right type of wood for optimal results
- Use appropriate cutting settings for different wood types
- Test power and speed settings on scrap material
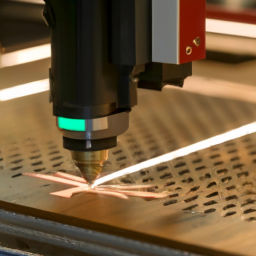
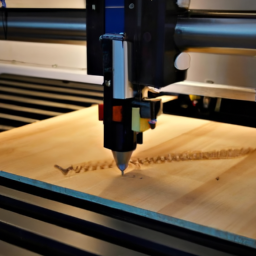
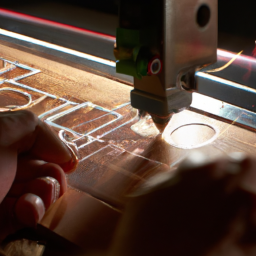
Properly Calibrate Your Machine
Properly calibrating your machine is crucial for achieving optimal results. It ensures precise and accurate cuts that enhance the overall quality of your woodworking projects. Machine calibration involves adjusting the laser alignment to ensure that it’s perfectly aligned with the cutting path. This ensures that the laser cuts through the wood at the desired depth and angle, resulting in clean and sharp edges.
By taking the time to properly calibrate your machine, you can avoid issues such as uneven cuts or burning of the wood. This step is essential for achieving professional-level results and maximizing the potential of your laser cutting machine.
Once you’ve calibrated your machine, you can move on to the next step of choosing the right type of wood for your project.
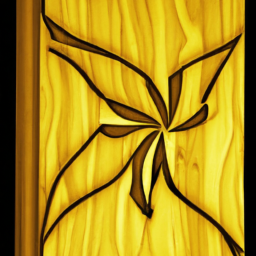
Choose the Right Type of Wood
When choosing the right type of wood for your laser cutting machine in woodworking, there are a few key points to consider.
First, take into account the density and thickness of the wood, as this will affect how the laser interacts with the material.
Next, make sure to use appropriate cutting settings for different wood types, as each wood has its own characteristics and requires specific settings for optimal results.
Finally, it’s important to avoid using wood with high moisture content, as this can lead to warping and uneven cuts.
By keeping these considerations in mind, you can ensure that you achieve the best results with your laser cutting machine.
Consider the Density and Thickness of the Wood
Density and thickness of the wood greatly impact the mind-blowing precision and flawless cuts that can be achieved with a laser cutting machine. When it comes to woodworking, choosing the right wood density and thickness is crucial for optimal results. To help you make informed decisions, consider the following table:
| Wood Density | Wood Thickness |
|---|---|
| Low Density | Thin |
| Medium Density | Medium |
| High Density | Thick |
Wood density refers to the weight of the wood per unit volume, while wood thickness determines the depth of the cuts. Different wood types have varying densities and thicknesses, so it’s essential to choose the right combination for your project. By considering these factors, you can ensure that your laser cutting machine delivers exceptional results. In the next section, we will discuss the importance of using appropriate cutting settings for different wood types.
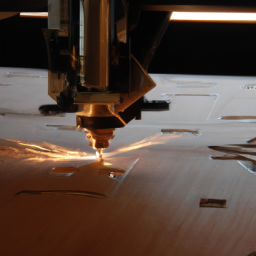
Use Appropriate Cutting Settings for Different Wood Types
To achieve optimal outcomes, it’s crucial to use the right cutting settings for different types of wood. Here are three cutting techniques to consider when working with wood:
-
Adjust the cutting speed: Different wood types have varying densities and grain patterns, which affect how the laser interacts with the material. Slower cutting speeds are ideal for denser woods, allowing the laser to penetrate more effectively. Conversely, faster speeds work well for softer woods, preventing excessive charring or scorching.
-
Set the power level: The power level should also be adjusted based on the wood type. Hardwoods require higher power settings to achieve clean cuts, while lower power settings are suitable for softer woods to avoid burning or melting the material.
-
Consider the wood grain: The direction of the wood grain can affect the quality of the cut. For clean and precise cuts, it’s essential to align the laser with the grain direction.
By using these cutting techniques, you can ensure the best results from your laser cutting machine.
Now, let’s move on to the next section and discuss why it’s important to avoid using wood with high moisture content.
Avoid Using Wood with High Moisture Content
It’s important to steer clear of using wood with high moisture content in order to avoid potential issues and ensure optimal outcomes.
When wood with high moisture content is used in laser cutting, it can lead to undesirable effects such as excessive charring, warping, and inconsistent cuts. The moisture in the wood can cause the laser to heat the water within the material, resulting in an uneven and messy cut.
To prevent this, it is crucial to properly dry the wood before using it in your laser cutting machine. There are various drying techniques available, such as air-drying, kiln-drying, or using a moisture meter to determine the wood’s moisture content.
By using properly dried wood, you can achieve cleaner cuts and more precise results.
Now that you understand the importance of avoiding high moisture content in wood, let’s move on to the next section and learn how to prepare your design files.
Prepare Your Design Files
To prepare your design files for laser cutting, you should use vector graphics software, which allows for precise and accurate designs. This will ensure that your cuts are clean and precise.
Additionally, converting text to outlines will help you avoid any font issues that may arise, as the laser cutter may not have access to the same fonts you used in your design.
Lastly, optimizing your design for efficient cutting will save you time and materials, allowing you to get the best results from your laser cutting machine.
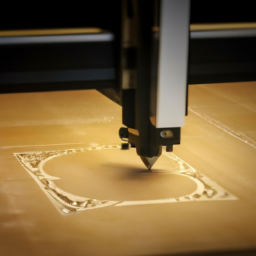
Use Vector Graphics Software for Precise Designs
Get the most precise and detailed designs for your woodworking projects by using vector graphics software with your laser cutting machine.
When it comes to designing for laser cutting, it’s important to understand the difference between raster and vector graphics. Raster images are made up of pixels and can result in a loss of quality when scaled, while vector graphics are based on mathematical equations and can be scaled infinitely without losing any detail.
By using vector graphics software, you can create clean and accurate designs that will translate perfectly onto your wood material. This is especially beneficial when working with intricate patterns or fine details.
Additionally, vector graphics software allows you to convert text to outlines, avoiding any font issues that may arise during the cutting process. So, make sure to convert your text to outlines to ensure a smooth and hassle-free experience.
Convert Text to Outlines to Avoid Font Issues
By converting your text to outlines, you’ll avoid any font issues that could potentially arise while using vector graphics software with a laser cutting machine for precise woodworking designs. Converting text to outlines means that the text is converted into a vector shape, allowing the laser cutter to treat it like any other design element. This ensures that the final result will be exactly as intended, without any unexpected changes due to font compatibility issues. To convert text to outlines, simply select the text and choose the "Create Outlines" option in your vector graphics software. This step is crucial for achieving the best results in laser cutting woodworking projects. Once you have converted your text to outlines, you can proceed to optimize the design for efficient cutting, ensuring that every detail is precisely cut with the laser.
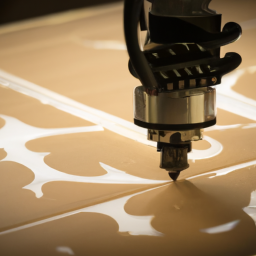
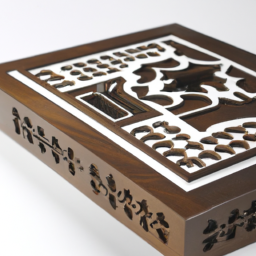
Optimize the Design for Efficient Cutting
Can you ensure that every detail is precisely cut with the laser by optimizing the design for efficient cutting? Absolutely! By employing efficient cutting techniques and maximizing material utilization, you can achieve the best results from your laser cutting machine in woodworking. Here are a few tips to help you optimize your design:
- Nest your parts closely together to minimize wasted material and reduce cutting time.
- Use tab and slot joints to increase the stability and accuracy of your assembled pieces.
- Consider using kerf compensation to account for the material removed during cutting, resulting in more accurate dimensions.
- Utilize vector-based designs to ensure clean, smooth lines and avoid pixelated or jagged edges.
By implementing these strategies, you can enhance the efficiency and precision of your laser cutting process, ultimately saving time and materials.
Now, let’s move on to the next section and discuss how to secure your material.
Secure Your Material
To ensure the best results for your laser cutting machine in woodworking, it’s crucial to properly secure your material. Use clamps or tape to prevent any movement during the cutting process, as even the slightest shift can ruin your design.
Additionally, using a sacrificial layer on the cutting bed will protect it from any potential damage caused by the laser.
Lastly, make sure your material is flat and level to avoid any inconsistencies in the cutting depth. Taking these precautions will help you achieve precise and accurate cuts with your laser cutting machine.
Use Clamps or Tape to Prevent Movement
Secure your workpiece with clamps or tape to ensure it stays firmly in place during the laser cutting process, preventing any unwanted movement that could compromise the precision of your woodworking masterpiece. Using clamps or tape is essential, especially when working with alternative materials or exploring different cutting techniques.
These materials can be more prone to shifting during the cutting process, so it’s crucial to secure them properly. Clamps provide a strong grip, holding the workpiece in place and minimizing any potential movement, while tape can be used to secure smaller pieces or delicate materials.
By utilizing these methods, you can maintain the stability of your workpiece throughout the laser cutting process, ensuring accurate and clean cuts.
Now, let’s move on to the next section where we will discuss the importance of using a sacrificial layer to protect the cutting bed.
Use a Sacrificial Layer to Protect the Cutting Bed
Ensure the longevity of your cutting bed by incorporating a sacrificial layer, which acts as a protective barrier against potential damage caused by the laser cutting process. By implementing this simple yet effective technique, you can extend the lifespan of your machine and optimize its performance.
Here are four key benefits of using a sacrificial layer:
-
Protection: The sacrificial layer shields the cutting bed from direct contact with the laser beam, preventing any burns or marks on the surface.
-
Easy Replacement: Instead of replacing the entire cutting bed, you can easily replace the sacrificial layer when it becomes worn or damaged.
-
Cost-effective: Investing in a sacrificial layer is more economical than constantly replacing the entire cutting bed.
-
Versatility: The sacrificial layer can be made from various materials like plywood, MDF, or acrylic, allowing you to choose the one that best suits your needs.
By incorporating a sacrificial layer, you ensure the protection of your cutting bed while optimizing the laser cutting process.
Now, let’s move on to the next step: ensuring the material is flat and level.
Ensure the Material is Flat and Level
Make sure your material is nice and flat before starting the laser cutting process, so that you can achieve the best possible results. Checking machine alignment is crucial to ensure that the laser cuts precisely where you want it to. Misalignment can lead to uneven cuts and wasted material. To minimize material waste, it is important to have a flat and level surface for your workpiece. This will prevent the laser from cutting at an angle or unevenly, resulting in a clean and accurate cut.
To check the alignment of your machine, you can use a straight edge or a laser alignment tool. Place the straight edge or alignment tool on the cutting bed and check if it is parallel to the laser beam. Adjust the machine accordingly to achieve perfect alignment.
By ensuring a flat and level material, you can maximize the efficiency of your laser cutting machine and minimize material waste. Once you have checked the alignment, you can move on to the next step of testing and adjusting the settings for optimal results.
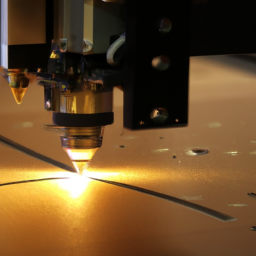
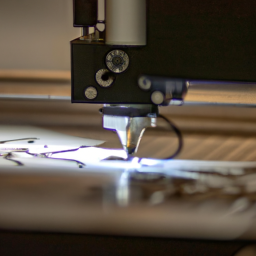
Test and Adjust Settings
Adjusting and fine-tuning your laser cutting settings will help you achieve precise and clean cuts in your woodworking projects. To optimize cutting efficiency, it’s essential to test and adjust your laser machine’s settings.
Follow these steps to get the best results:
-
Begin by testing the power and speed settings on a scrap piece of the same material you’ll be cutting. This will allow you to determine the optimal combination for clean and accurate cuts.
-
Experiment with the focus of the laser beam. Adjusting the focus depth can significantly impact the quality of the cut, so take the time to find the sweet spot.
-
Pay attention to the air assist and exhaust settings. Proper ventilation and airflow can help prevent scorching or charring of the wood, ensuring a clean finish.
By testing and adjusting your settings, you can achieve the desired precision in your laser cutting. Remember to practice proper safety measures when operating the machine, such as wearing protective eyewear and ensuring a well-ventilated workspace.
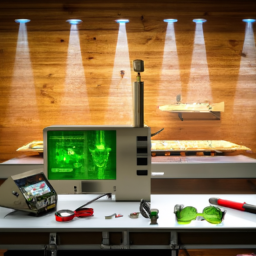
Practice Proper Safety Measures
To laser cut with precision, prioritize safety by securing protective gear and maintaining a well-ventilated workspace. Safety equipment such as safety glasses, gloves, and ear protection are essential to protect yourself from potential hazards. Additionally, it is crucial to receive proper safety training to understand the correct operation and handling of the laser cutting machine. This training will cover topics like material handling, emergency procedures, and fire prevention.
To give you a visual understanding, refer to the table below that outlines the necessary safety equipment and training for laser cutting:
| Safety Equipment | Safety Training |
|---|---|
| Safety glasses | Material handling procedures |
| Gloves | Emergency procedures |
| Ear protection | Fire prevention techniques |
| Protective clothing | Proper machine operation |
| Ventilation system | Maintenance and troubleshooting |
By implementing these safety measures, you can ensure a safe working environment and get the best results from your laser cutting machine in woodworking.
Frequently Asked Questions
What are some common mistakes to avoid when calibrating a laser cutting machine for woodworking?
Common calibration mistakes in laser cutting machines for woodworking can lead to troubleshooting laser cutting issues. To avoid these mistakes, make sure the laser head is properly aligned and the focal distance is set correctly. Also, ensure the machine’s power and speed settings are adjusted accurately for the specific material being cut. Regularly inspect and clean the lens and mirrors to maintain optimal performance. Lastly, always double-check the calibration before starting any project to achieve the best results.
How can I determine the best type of wood to use for my laser cutting project?
When it comes to laser cutting projects, choosing the right type of wood is crucial for achieving the best results. Factors to consider when selecting wood for laser cutting include its density, moisture content, and resin content.
Dense woods like maple and birch are great choices, as they provide clean and precise cuts. Additionally, woods with low moisture and resin content, such as plywood, are ideal to prevent burning and produce smooth edges.
Are there any specific file formats that are recommended for laser cutting machine designs?
For laser cutting machine designs, it’s recommended to use vector file formats such as AI, DXF, or SVG. These formats offer several advantages over raster files.
Vector files contain precise mathematical data, allowing for scalability without losing quality. They also result in cleaner and more accurate cuts, as the laser follows the vector paths.
Additionally, vector files are smaller in size, making them easier to work with and load onto the laser cutting machine.
What are some effective ways to secure wood materials during the laser cutting process?
To ensure optimal results with your laser cutting machine in woodworking, it’s crucial to securely clamp your wood materials. Different wood clamping techniques, such as using clamps or jigs, can help prevent movement and ensure accurate cuts.
Additionally, using a laser cutting bed is of utmost importance. It provides a stable surface for your materials and minimizes the risk of damage or misalignment.
Remember, precision and stability are key to achieving the best results.
How can I ensure that the laser cutting machine settings are optimized for the best results on wood?
To ensure the best results on wood with your laser cutting machine, it’s crucial to optimize the settings properly. One important aspect is to prioritize proper ventilation. This helps remove any fumes or smoke produced during the cutting process, ensuring a clean and safe working environment.
Additionally, regularly maintaining and cleaning the lenses of the machine is essential for optimal wood cutting results. This prevents any debris or residue from affecting the laser’s accuracy and performance.
Conclusion
Congratulations! You’ve now mastered the art of getting the best results from your laser cutting machine in woodworking. Just like a skilled conductor leading a symphony, you’ve calibrated your machine with precision. You’ve carefully chosen the perfect type of wood, like a painter selecting the finest canvas. Your design files have been prepared with the expertise of a master architect. And your material is secured like a fortress protecting its treasures.
Through testing and adjusting settings, you’ve unlocked the secrets of this powerful tool. Remember, safety is paramount, so practice it diligently. Embrace the magic of laser cutting and let your creativity soar!