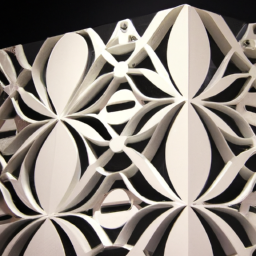
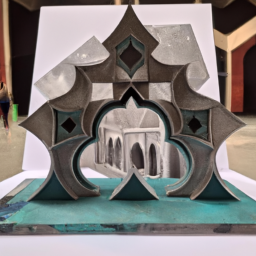
Imagine you’re an artist, sculpting a masterpiece out of a solid block of acrylic. With each precise cut and engraving, you bring your unique design to life.
But to achieve flawless results, you need the right techniques. Just like a surgeon needs the right tools and expertise to perform a delicate operation, you too need the proper knowledge and skills to create stunning acrylic models.
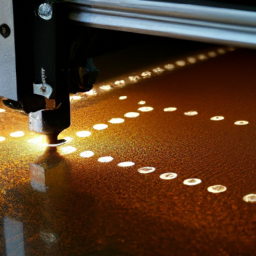
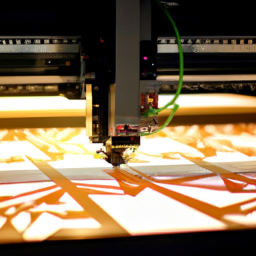
In this article, we will explore five essential tips that will elevate your laser cutting and engraving game to new heights. From choosing the perfect acrylic material to taking care of your finished models, we will guide you through every step of the process.
So, whether you’re a seasoned professional or a curious beginner, get ready to unlock the secrets of laser cutting and engraving to create truly remarkable acrylic model designs.
Key Takeaways
- The choice of acrylic material is important for laser cutting and engraving acrylic models
- Use vector-based design software for precise control over the design
- Conduct test cuts and engravings before finalizing the project to ensure desired results
- Clean and maintain acrylic models regularly to keep them in good condition
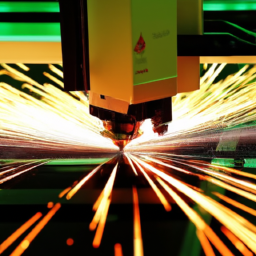
Choose the Right Acrylic Material
When it comes to laser cutting and engraving unique acrylic model designs, you’ll want to make sure you choose the right acrylic material to achieve stunning results.
Start by considering the thickness of the acrylic. Thicker acrylic sheets are more durable and can withstand more intricate designs. However, thinner sheets allow for more flexibility and can be easier to work with.
Next, compare different types of acrylic materials. Clear acrylic provides a sleek, modern look, while colored acrylic adds a pop of vibrancy to your design. Additionally, frosted or mirrored acrylic can create unique effects.
By carefully selecting the acrylic material that best suits your design, you can ensure optimal results.
Now that you’ve chosen the right acrylic material, let’s move on to preparing your design.
Prepare Your Design
To prepare your design for laser cutting and engraving acrylic materials, you’ll need to use vector-based design software. This type of software allows for precise control over the shapes and lines in your design, ensuring a high-quality result.
Additionally, it’s important to consider the size and complexity of your design. This can affect the time and cost of the laser cutting and engraving process. By taking these factors into account, you can create a design that’s optimized for laser cutting and engraving on acrylic materials.
Use vector-based design software
You can easily create intricate designs with vector-based design software because it allows for precise control over the laser cutting and engraving process, ensuring that your acrylic models turn out exactly as you envision them, even if you’re not a professional designer.
Here are some key points to consider when using vector-based design software:
-
Design software compatibility: Ensure that the software you choose is compatible with the laser cutting machine you’ll be using. This will prevent any compatibility issues and ensure smooth operation.
-
Troubleshooting common issues: Familiarize yourself with common issues that may arise during the design process, such as file format errors or incorrect settings. Knowing how to troubleshoot these problems will help you save time and avoid mistakes.
-
Practice and experimentation: Take the time to practice and experiment with different design techniques and settings. This will help you become more familiar with the software and discover new ways to create unique acrylic models.
Considering the size and complexity of your design, you can now move on to the next step of the laser cutting and engraving process.
Consider the size and complexity of your design
The size and complexity of your design will greatly impact the final result of your laser project. When considering the size, think about the dimensions of the acrylic material you will be using and ensure that your design fits within those parameters. Additionally, the complexity of your design will affect the intricacy and level of detail that can be achieved. To achieve the best outcome, it is important to use appropriate cutting and engraving settings on your laser machine. Experiment with different engraving depths and techniques to find the one that works best for your design. Furthermore, choose the right type of acrylic material for your project, considering both its durability and the desired effect. Lastly, explore the use of color and texture in your designs to add visual interest. Transitioning into the next section, setting up your laser cutting and engraving machine is crucial for achieving accurate results.
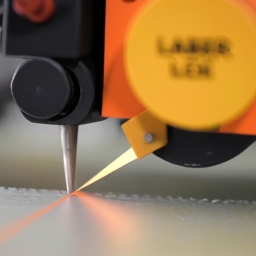
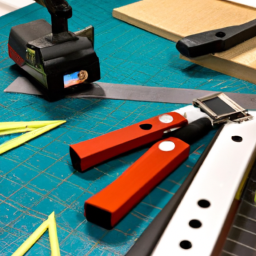
Set Up Your Laser Cutting and Engraving Machine
Once you’ve assembled your laser cutting and engraving machine, make sure it’s properly calibrated and aligned for accurate and precise results. To set up your machine, follow these steps:
-
Check the laser settings: Adjust the power, speed, and frequency settings based on the type and thickness of acrylic you’re working with. This will help you achieve the desired cutting and engraving results.
-
Troubleshoot common issues: Familiarize yourself with common problems that may occur during laser cutting and engraving, such as charring, melting, or incomplete cuts. Understand the causes and solutions for these issues to minimize errors and optimize your machine’s performance.
-
Conduct test cuts and engravings: Before working on your final acrylic model, perform test cuts and engravings on similar materials to ensure accurate settings and proper machine functioning. Make any necessary adjustments to achieve the desired outcome.
Once you’ve set up your machine and adjusted the laser settings, it’s time to move on to the next step of testing and adjusting to further refine your acrylic model designs.
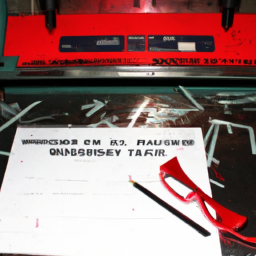
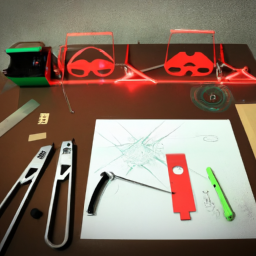
Test and Adjust
Before you begin your full laser cutting and engraving job, it’s crucial to run a test cut to ensure that everything is set up correctly.
This will allow you to identify any potential issues and make necessary adjustments to achieve the desired results.
By taking the time to test and adjust, you can avoid wasting materials and ensure that your final product meets your expectations.
Run a test cut before starting the full job
First things first, make sure you run a test cut before diving into the full job – trust me, you won’t regret it! Here are three important reasons why:
-
Safety First: Running a test cut allows you to ensure that all safety precautions are in place. This includes checking the ventilation system, wearing protective gear, and confirming that the laser cutter is properly calibrated and functioning correctly. It’s crucial to prioritize safety to prevent accidents or injuries during the cutting and engraving process.
-
Avoid Costly Mistakes: By running a test cut, you can identify any potential mistakes or issues in your design or settings. This helps you avoid wasting expensive acrylic materials and saves you from the frustration of ruining your finished product. Taking the time to test and adjust before the full job can save you both time and money.
-
Optimize Results: A test cut allows you to fine-tune your settings and make necessary adjustments to achieve the desired results. By experimenting with different power levels, cutting speeds, and engraving depths, you can optimize the outcome and ensure that your final product matches your vision.
Now that you understand the importance of running a test cut, let’s discuss how to make necessary adjustments to achieve the desired results.
Make necessary adjustments to achieve desired results
To achieve the desired results, you’ll need to fine-tune your settings like a skilled artist adjusting brush strokes on a canvas. Making design adjustments and troubleshooting problems are crucial steps in laser cutting and engraving unique acrylic model designs. One effective way to do this is by running a test cut and examining the results. However, it’s important to remember that every material and design is different, so you may need to make further adjustments to achieve the desired outcome. To assist you in this process, refer to the table below for common design adjustments and potential solutions:
| Design Adjustment | Potential Solution |
|---|---|
| Inconsistent engraving | Adjust laser power or speed settings |
| Charring on edges | Increase air assist or reduce power |
| Poor cutting precision | Check focal length or clean lens |
By implementing these adjustments, you can troubleshoot any problems and achieve the best possible results. Now, let’s move on to the next section and learn how to take care of your acrylic models.
Take Care of Your Acrylic Models
To ensure the longevity of your acrylic models, it’s crucial to clean and maintain them properly. Regularly dusting and wiping down the surfaces with a soft, lint-free cloth will help keep them looking their best.
Additionally, storing your acrylic models in a safe and dust-free environment will prevent any potential damage or scratches that could occur.
Clean and maintain your acrylic models properly
Maintaining your acrylic models will ensure they remain pristine and stunning, leaving you feeling proud of your creative masterpieces. Proper cleaning techniques are essential to keep your models in top condition.
Start by using a soft, lint-free cloth to gently wipe away any dust or debris. Avoid using abrasive materials or harsh chemicals that could damage the surface.
Regular maintenance is also crucial to prevent any long-term damage. Inspect your models regularly for any signs of wear or discoloration, and address them promptly.
Additionally, store them in a safe and dust-free environment to further protect their quality.
By following these guidelines, you can ensure that your acrylic models stay in excellent shape, ready to be displayed or used in your next project.
Store them in a safe and dust-free environment
Ensuring the longevity of your acrylic masterpieces involves safeguarding them in a secure and dust-free environment. Proper storage is paramount to prevent dust accumulation, which can mar the beauty of your intricate designs.
When storing acrylic models, it’s essential to choose a location away from high traffic areas and potential sources of dust, such as open windows or ventilation systems. A dedicated cabinet or display case with tightly sealed doors can provide the necessary protection.
Additionally, consider using acid-free tissue paper or microfiber cloths to wrap and cover your acrylic models, further shielding them from dust particles. Regularly inspect and clean the storage area, ensuring it remains free from dust and debris.
By following these precautions, you can maintain the pristine appearance of your acrylic models for years to come.
Frequently Asked Questions
How do I choose the right acrylic material for laser cutting and engraving unique model designs?
When choosing acrylic material for laser cutting and engraving unique model designs, it’s important to consider the symbolism it can add to your creations. The right acrylic thickness selection is crucial for achieving the desired results. Opt for materials that are specifically designed for laser cutting to ensure clean and precise cuts. Thicker acrylics provide more depth and durability, while thinner ones offer flexibility and intricate detailing. Experiment with different acrylics to find the perfect balance between strength and design possibilities.
What are some tips for preparing my design before laser cutting and engraving?
To prepare your design for laser cutting and engraving, follow these tips:
-
Firstly, use design software to create your model, ensuring it’s in a compatible file format like DXF or AI.
-
Next, optimize your design by simplifying complex shapes, reducing line segments, and avoiding overlapping lines.
-
Lastly, convert text to outlines and double-check dimensions.
Properly preparing your design will ensure accurate and efficient laser cutting and engraving results.
How do I properly set up my laser cutting and engraving machine for acrylic models?
To properly set up your laser cutting and engraving machine for acrylic models, you need to follow specific laser cutting techniques.
First, ensure the machine’s focus is properly adjusted for accurate results.
Next, set the appropriate laser power and speed settings for acrylic materials.
Troubleshooting laser cutting issues may involve checking the ventilation system, cleaning the lens, and ensuring proper alignment of the material.
These steps will ensure precise and successful laser cutting and engraving of acrylic models.
What should I consider when testing and adjusting the laser cutting and engraving settings for my acrylic models?
When testing and adjusting the laser cutting and engraving settings for your acrylic models, follow a systematic testing process. Start by selecting a small area of the design and test different power and speed settings to determine the optimal combination.
Pay close attention to the cut quality, depth, and engraving precision. Adjust parameters such as power, speed, and focus until you achieve the desired results. Remember to document your settings for future reference.
How can I effectively take care of my acrylic models after they have been laser cut and engraved?
To effectively take care of your laser cut and engraved acrylic models, you need to follow proper acrylic model maintenance procedures. This includes cleaning the models regularly to remove any dust or debris. Use a soft, lint-free cloth or a microfiber cloth to gently wipe the surface of the acrylic. Avoid using abrasive cleaners or rough materials that can scratch the surface. By regularly cleaning your laser cut models, you can ensure their longevity and keep them looking pristine.
Conclusion
To conclude, laser cutting and engraving acrylic models can be a rewarding and creative experience. By following the right steps, you can achieve unique and intricate designs.
Remember to choose the right acrylic material, prepare your design properly, and set up your machine accurately. Test and adjust as needed to ensure the best results.
Taking care of your acrylic models will ensure their longevity. Just like a skilled sculptor shaping a masterpiece, with precision and attention to detail, you can bring your acrylic models to life.