Coincidences can sometimes be more than just chance encounters. They can be the universe’s way of guiding you towards a solution. And if you’ve stumbled upon this article, it’s no coincidence that you’re facing laser cutter troubles. But fear not, for we have the expert tips you need to troubleshoot your machine like a pro.
Laser cutters are incredible tools that can bring your creative visions to life, but they require proper maintenance to ensure optimal performance. In this article, we will guide you through six essential tips to troubleshoot your laser cutter effectively.
First, we’ll delve into the importance of checking the optics and ensuring they’re free from dirt or damage.
Next, we’ll explore how the ventilation system plays a crucial role in preventing overheating.
And of course, we’ll emphasize the significance of regular cleaning and calibration to keep your laser cutter in top shape.
We’ll also discuss the importance of replacing worn or damaged parts, as well as consulting the manufacturer’s manual or seeking professional help when needed.
So let’s dive in and equip you with the knowledge and skills to conquer any laser cutter troubles that come your way.
Key Takeaways
- Coincidences can guide you towards a solution
- Regular cleaning and calibration are significant for top shape
- Neglecting to replace worn or damaged parts can lead to decreased cutting accuracy, reduced speed, and safety hazards
- Consult manufacturer’s manual or seek professional help for troubleshooting and safety protocols
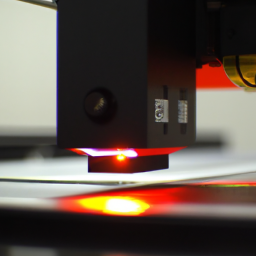
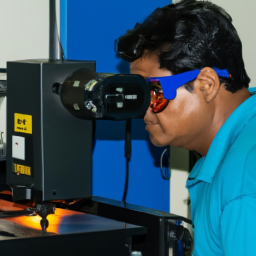
Check the Optics
Make sure to double-check the optics, or you might be left feeling frustrated and disappointed with the results. When troubleshooting your laser cutter, it’s crucial to check the lens and inspect the mirrors.
These components play a vital role in directing the laser beam accurately, and any dirt, debris, or misalignment can significantly affect the cutting quality. Start by examining the lens for any signs of damage, such as scratches or residue buildup. Clean it gently with a lint-free cloth and specialized lens cleaner if necessary.
Next, inspect the mirrors for any dirt or smudges. Use a clean cotton swab or compressed air to remove any contaminants.
Once you’ve ensured the optics are clean and properly aligned, you can move on to examining the ventilation system, which is equally important for optimal laser cutter performance.
Examine the Ventilation System
Check if your ventilation system is functioning properly, as a clogged or inefficient system can be compared to a congested highway during rush hour, causing harmful fumes to linger and obstructing the smooth operation of your laser cutter.
To ensure the proper functioning of your ventilation system, follow these steps:
-
Check the filters: Regularly inspect and clean or replace the filters to prevent the buildup of debris and ensure proper airflow.
-
Inspect the exhaust system: Examine the ductwork and connections for any leaks or blockages that may hinder the exhaust flow.
-
Clean the exhaust fan: Remove any dust or debris that may have accumulated on the fan blades to maintain optimal performance.
-
Test the airflow: Use a smoke test or airflow meter to verify that the ventilation system is effectively removing fumes from the laser cutting area.
-
Maintain proper ventilation: Make sure the exhaust system is running at the recommended airflow rate for your laser cutter.
After examining the ventilation system, it’s crucial to move on to the next step: cleaning the laser cutter regularly.
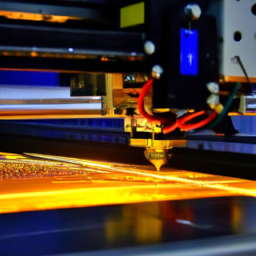
Clean the Laser Cutter Regularly
Regularly cleaning your laser cutter will ensure its optimal performance and prolong its lifespan, allowing you to create amazing projects without any hiccups. Proper maintenance is crucial to prevent breakdowns and keep your machine running smoothly.
Start by removing any debris or residue from the cutting bed, lenses, and mirrors. Use a soft cloth and a mild cleaning solution to gently wipe these components, being careful not to scratch or damage them.
Pay close attention to the ventilation system and ensure it’s free from dust and obstructions. Additionally, clean the air assist nozzle and replace the filter regularly to maintain proper airflow.
By implementing a regular cleaning routine, you can prevent unnecessary issues and keep your laser cutter in top shape.
As you move forward, let’s talk about how to calibrate the machine for precise cutting.
Calibrate the Machine
One crucial step that shouldn’t be overlooked is fine-tuning the machine to ensure precise and flawless cutting results. Laser cutter alignment plays a vital role in achieving accurate cuts. By calibrating the machine regularly, you can ensure that the laser beam is properly aligned with the cutting path, minimizing errors and maximizing efficiency. Another aspect of calibration is optimizing cutting speed. Adjusting the speed settings can help you achieve the desired results, whether you need a quick cut or a more detailed, intricate design. To help you understand the importance of calibrating the machine, here’s a table that outlines the key benefits:
| Benefits of Calibrating the Machine |
|---|
| 1. Improved cutting accuracy |
| 2. Enhanced efficiency |
| 3. Consistent results |
| 4. Longer lifespan of parts |
| 5. Reduced material waste |
By following these steps to calibrate your laser cutter, you can ensure that it operates at its peak performance. Once you have fine-tuned the machine, the next important step is to replace any worn or damaged parts.
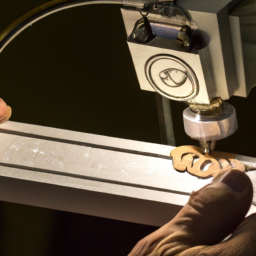
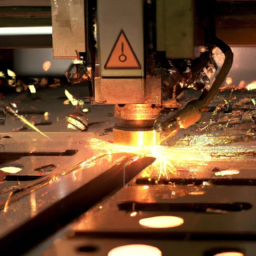
Replace Worn or Damaged Parts
To ensure optimal performance and prevent any potential issues, it’s crucial that you promptly replace any worn or damaged parts in your laser cutting machine. Repair or replace faulty components as soon as you notice any signs of wear or damage. Performing routine maintenance will help you catch these issues early on.
Neglecting to address these problems can lead to decreased cutting accuracy, reduced speed, and even potential safety hazards. Here are a few reasons why replacing worn or damaged parts is so important:
-
Improved efficiency: By replacing faulty components, you can ensure that your laser cutting machine operates at its highest efficiency, saving you time and money.
-
Enhanced precision: Worn or damaged parts can affect the accuracy of your cuts. By replacing them, you can maintain precise cutting results.
-
Extended machine lifespan: Regularly replacing worn or damaged parts can help extend the overall lifespan of your laser cutting machine.
To further troubleshoot any issues or concerns, consult the manufacturer’s manual or seek professional help.
Consult the Manufacturer’s Manual or Seek Professional Help
If you’re facing any issues or concerns with your laser cutting machine, the manufacturer’s manual or professional help can provide valuable guidance and solutions.
Troubleshooting common laser cutter errors requires a systematic approach and understanding of laser cutter safety protocols. The manufacturer’s manual is a comprehensive resource that outlines troubleshooting steps for various error codes and malfunctions. It provides detailed instructions on how to identify and resolve issues related to laser power, optics, alignment, and software.
Additionally, the manual includes safety protocols that must be followed to ensure the well-being of the operator and prevent accidents.
If the manual doesn’t address your specific problem or you’re unsure about the appropriate course of action, seeking professional help from a technician experienced with laser cutting machines can save you time and prevent further damage.
Frequently Asked Questions
How can I prevent my laser cutter from overheating?
To keep your laser cutter from overheating and ensure its longevity, follow these tips.
Firstly, regularly clean and maintain your cutter by removing any debris or dust buildup.
Secondly, check and clean the cooling system, including the fans and water cooling components.
Additionally, monitor the operating temperature and avoid running the cutter for extended periods without breaks.
Lastly, consider installing additional cooling measures such as exhaust fans or air conditioning to regulate the temperature effectively.
Following these steps will help maintain your laser cutter’s lifespan.
What are some common signs of a misaligned laser cutter?
Common signs of a misaligned laser cutter include uneven cutting or engraving results. There may also be a visible offset between the laser beam and the cutting path. Additionally, excessive wear on the machine’s components can indicate misalignment. Laser cutter maintenance plays a crucial role in preventing these issues. To troubleshoot laser cutter problems, it is important to check and adjust the alignment of the laser beam. Also, ensure that the mirrors and lens are clean and properly aligned. Finally, inspect the machine’s mechanical components for any signs of misalignment.
Can I use any type of cleaning solution to clean the laser cutter?
You should avoid using any type of cleaning solution other than those recommended for laser cutters. Alternative cleaning methods can damage the delicate components of the laser cutter and negatively affect its performance. To ensure proper maintenance techniques, it’s important to follow the manufacturer’s guidelines for cleaning.
Regularly cleaning the laser cutter with approved solutions will help prevent buildup and ensure optimal functioning of the machine.
How often should I replace the laser tube in my laser cutter?
To ensure optimal performance, it’s recommended to replace the laser tube in your laser cutter every 1,000 to 1,500 hours of use. Regular maintenance of the laser tube is also crucial for longevity.
Keep the tube clean by regularly removing dust and debris. Additionally, avoid running the laser cutter at high power for extended periods, as this can shorten the tube’s lifespan.
Following these laser tube maintenance tips will help maximize the efficiency and lifespan of your laser cutter.
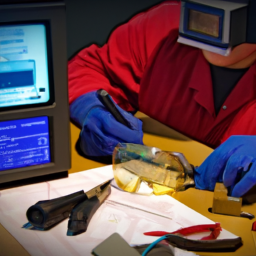
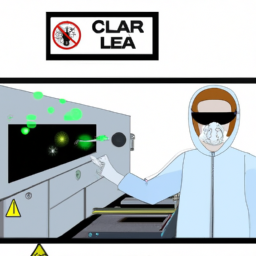
Are there any safety precautions I should take when troubleshooting my laser cutter?
When it comes to troubleshooting your laser cutter, safety should be your top priority. Just as a tightrope walker takes cautious steps to avoid falling, you too must take precautions to prevent accidents.
Always wear protective goggles and gloves to shield yourself from potential harm. Ensure the machine is properly grounded and that the power is turned off before attempting any repairs.
By following these safety measures, you can avoid unnecessary risks and troubleshoot your laser cutter with confidence.
Conclusion
In conclusion, troubleshooting a laser cutter requires attention to detail and thoroughness. By following these expert tips, you can ensure the proper functioning of your machine.
Remember to regularly check the optics and ventilation system, as well as clean and calibrate the cutter. If any parts are worn or damaged, it’s crucial to replace them promptly.
Don’t hesitate to consult the manufacturer’s manual or seek professional assistance if needed. As the saying goes, "A stitch in time saves nine," so take proactive steps to maintain your laser cutter and avoid future issues.