Are you tired of being held back by laser cutter malfunctions? Do you need quick fixes to keep your work flowing smoothly? Look no further.
In this article, we will equip you with six must-know laser cutter troubleshooting tips that will have you back up and running in no time. By following these techniques, you can avoid costly delays and maximize the performance of your laser cutter.
First and foremost, you need to keep your lens and mirrors clean. This ensures optimal beam quality and prevents distortions.
Secondly, check the power supply to ensure it is working at full capacity.

Adjusting the focus is also crucial for precise cutting and engraving.
Additionally, calibrating the laser power will guarantee consistent results.
Don’t forget to troubleshoot the cooling system to prevent overheating and maintain the longevity of your machine.
Lastly, don’t neglect software and firmware updates. Keeping them up to date will provide you with the latest features and enhancements.
With these six troubleshooting tips in your arsenal, you can conquer any laser cutter challenge that comes your way. Let’s get started!
Key Takeaways
- Regularly clean and maintain lenses and mirrors for optimal beam quality
- Adjust focus and laser power settings for precise cutting and engraving
- Troubleshoot cooling system and ensure adequate cooling to prevent overheating
- Update software and firmware regularly for compatibility and performance enhancements.
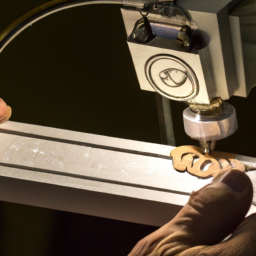
Clean the Lens and Mirrors
Now, let’s get down to business and clean those lenses and mirrors to keep your laser cutter running smoothly! Preventive maintenance is key to ensuring the longevity and efficiency of your machine.
Start by turning off the power and allowing the laser cutter to cool down. Use a soft, lint-free cloth and lens cleaning solution to gently wipe the lens and mirrors. Be careful not to scratch or damage them.
Additionally, make sure your laser cutter has proper ventilation to prevent dust and debris buildup. A clean lens and mirrors will improve the cutting and engraving quality, reducing the chances of errors and misalignment.
With the lenses and mirrors sparkling clean, it’s time to move on to the next important step: checking the power supply.
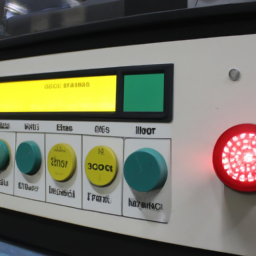
Check the Power Supply
First, make sure to examine the power supply to address any potential issues with your laser cutter. Start by checking the power cable for any signs of damage or loose connections. If you notice any issues, replace the cable immediately to ensure a stable power source.
Next, test the voltage of the power supply using a multimeter. The correct voltage should be within the specified range for your laser cutter model. If the voltage is too low or fluctuating, it could indicate a problem with the power supply unit. In such cases, it’s recommended to contact a professional for further troubleshooting and repairs.
By checking the power supply thoroughly, you can eliminate any power-related issues and proceed to the next step of adjusting the focus for optimal laser cutting performance.
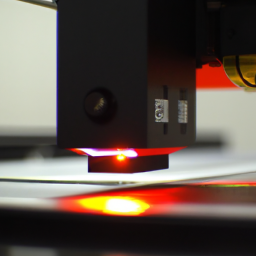
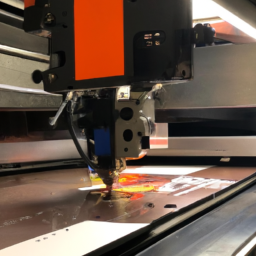
Adjust the Focus
To adjust the focus of your laser cutter, you’ll want to carefully align the focal point to ensure precise and efficient cutting. Imagine you’re working on a project that requires intricate details, such as engraving a delicate pattern on a piece of wood, and by adjusting the focus, you’re able to achieve crisp and clean lines that bring your design to life.
| Troubleshooting Focus Issues | Fixing Blurry Laser Cuts |
|---|---|
| Check the lens cleanliness | Adjust the lens height |
| Verify lens alignment | Use appropriate focus tool |
| Ensure proper lens type | Check for lens damage |
| Adjust focal length | Check for air assist issues |
Troubleshooting focus issues is crucial for obtaining sharp and well-defined laser cuts. A blurry result can ruin the quality of your project. By following the table above, you can identify and fix common focus-related problems. Once you have addressed focus issues, it’s important to calibrate the laser power for optimal cutting performance.
Calibrate the Laser Power
To calibrate the laser power, you need to first check the laser tube output. Use a laser power meter to measure the output power of the laser tube and ensure it is within the recommended range.
If the output is too low or too high, you’ll need to adjust the power settings accordingly. This precise calibration will ensure optimal performance and accurate cutting or engraving results.
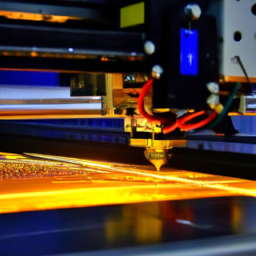
Check the Laser Tube Output
One important aspect to keep in mind is the need to check the laser tube output when troubleshooting a laser cutter, as it plays a crucial role in its overall performance.
To ensure optimal functionality, follow these steps:
-
First, check for any obstructions that may be blocking the laser beam. Remove any debris or materials that could impede the laser’s output.
-
Next, test the laser alignment by using a laser alignment tool. Make sure the beam is hitting the target accurately and adjust the alignment if necessary.
-
Additionally, verify that the laser tube is functioning properly by inspecting its connections and looking for any signs of damage.
-
Finally, measure the laser tube output using a power meter to ensure it is within the recommended range.
By following these steps, you can identify and resolve any issues with the laser tube output.
Once this is done, you can proceed to adjust the power settings for optimal laser cutter performance.
Adjust the Power Settings
Take a moment to adjust the power settings on your laser cutter and experience the exhilarating transformation in its performance. Power settings optimization is crucial for achieving the desired results and troubleshooting any power-related issues.
Start by checking the power output of the laser tube and ensure it’s within the recommended range. If it’s not, adjust the power settings accordingly. Keep in mind that different materials require different power levels, so make sure to consult the material compatibility chart provided by the manufacturer.
Additionally, power adjustments troubleshooting involves monitoring the power supply, checking for loose connections, and ensuring that the correct power mode is selected. By fine-tuning the power settings, you can maximize the efficiency and accuracy of your laser cutter.
Now, let’s move on to troubleshooting the cooling system.
Troubleshoot the Cooling System
When your laser cutter’s cooling system is on the fritz, it’s like trying to navigate the rough waters of a malfunctioning ship, desperately in need of a captain to steer it back on course.
To ensure optimal performance of your laser cutter, regular cooling system maintenance is crucial. Inspect the coolant level and make sure it’s at the recommended level. Clean or replace the coolant filters regularly to prevent clogs and overheating.
Additionally, check for leaks and repair them promptly to avoid damage to the system. Common cooling system issues include inadequate cooling, noisy operation, and coolant contamination. Troubleshoot these problems by checking the pump, fan, and coolant quality.
Once you’ve resolved any cooling system issues, it’s important to update your laser cutter’s software and firmware to ensure compatibility and optimize performance.
Update Software and Firmware
To ensure optimal performance of your laser cutter, it’s crucial to regularly update its software and firmware. Begin by checking for any available updates from the manufacturer’s website or through the software interface.
Once you’ve identified an update, carefully follow the installation instructions provided to ensure a successful and hassle-free update process.
By staying up-to-date with the latest software and firmware, you can enhance the functionality of your laser cutter and address any potential bugs or issues.
Check for Updates
Make sure to regularly check for updates on your laser cutter to ensure that you’re always up-to-date with the latest improvements and fixes. This is crucial because software updates and firmware updates can provide enhancements to the functionality and performance of your laser cutter.
To stay on top of updates, follow these steps:
- Visit the manufacturer’s website or the laser cutter’s control software for any available updates.
- Download the updates and carefully follow the installation instructions to make sure you have a successful update.
- Take note of any specific requirements or prerequisites mentioned in the update instructions.
By regularly checking for updates and promptly installing them, you can make sure that your laser cutter operates efficiently and takes advantage of the latest advancements.
Now, let’s move on to the next step and discuss how to follow the installation instructions for a seamless update process.
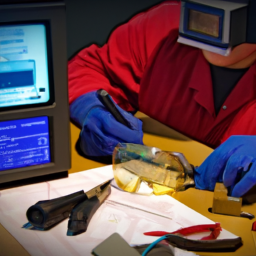
Follow the Installation Instructions
To ensure a smooth operation of your laser cutter, it is crucial to follow the installation instructions carefully. Common installation mistakes can lead to various issues that could have been easily avoided. Proper installation is of utmost importance as it ensures optimal functionality and prevents potential problems in the future.
To assist you in understanding the significance of proper installation, let’s take a look at the following table:
| Installation Mistakes | Consequences |
|---|---|
| Incorrect wiring | Malfunctioning machine or electrical hazards |
| Improper alignment | Inaccurate cuts or damaged materials |
| Failure to calibrate | Inconsistent cutting results or misaligned designs |
By adhering to the installation instructions provided, you can avoid these common mistakes and ensure a trouble-free experience with your laser cutter. Remember, a well-installed machine is the foundation for successful laser cutting projects.
Frequently Asked Questions
How often should the lens and mirrors be cleaned in a laser cutter?
To maintain optimal performance, it’s recommended to clean the lens and mirrors in your laser cutter regularly. Clean them every 20-40 hours of operation or when you notice a decrease in cutting quality. Start by removing any dust or debris with compressed air or a soft brush. Then, use lens cleaning solution and lint-free wipes to gently clean the lens and mirrors. Be careful not to scratch or damage them during the cleaning process.
What are the common signs that indicate a faulty power supply in a laser cutter?
Common signs of power supply issues in a laser cutter include intermittent laser firing, inconsistent power output, and the machine not turning on or shutting down unexpectedly.
To troubleshoot power supply problems, start by checking the power cable and connections for any damage. Ensure that the power supply unit is receiving adequate voltage and that the fuse is intact.
If the issue persists, consider seeking professional assistance to diagnose and repair the power supply in your laser cutter.
How can the focus be adjusted in a laser cutter?
To adjust the focus in a laser cutter, follow these steps.
Start by locating the focus knob, usually located near the lens. Turn the knob clockwise to bring the lens closer to the material for a tighter focus, or counterclockwise to move the lens away for a broader focus.
Ensure the lens is clean and free from debris by regularly performing lens maintenance. This will help optimize the cutting or engraving process and ensure accurate results.
What is the process of calibrating the laser power in a laser cutter?
To calibrate the laser power in a laser cutter, you need to follow a precise process. Start by accessing the laser cutter’s settings menu and locating the laser power calibration option. Adjust the power level to a designated value and run a test cut on a known material.
Measure the depth or quality of the cut and compare it to the desired outcome. Repeat this process, gradually adjusting the laser power until optimal results are achieved.
Proper laser power calibration is crucial for ensuring precise and efficient cutting, as it directly affects the quality and accuracy of the laser cutting process.
What are some troubleshooting steps to fix issues with the cooling system in a laser cutter?
To fix cooling issues in a laser cutter, start by checking the water flow. Imagine a steady stream of water flowing through the system, cooling the laser tube efficiently.
Next, inspect the water pump for any signs of damage or blockage. If necessary, clean or replace the pump.
Additionally, ensure the coolant reservoir is filled to the appropriate level and that the coolant is clean and free from debris.
Finally, check all connections and hoses for leaks or loose fittings.
Conclusion
In conclusion, following these six laser cutter troubleshooting tips will ensure that you can quickly resolve any issues that may arise. By cleaning the lens and mirrors, checking the power supply, adjusting the focus, calibrating the laser power, troubleshooting the cooling system, and updating the software and firmware, you can maintain optimal performance and efficiency.
Remember, staying proactive is key to achieving precise and detailed results. So, equip yourself with these tips and let your laser cutter work flawlessly, like a well-tuned instrument.