Looking to achieve flawless results with your raster engraving projects? Look no further! In this article, we will provide you with 7 tips that will help you achieve perfect results every time.
Imagine this: you have just purchased a new laser engraving machine and you can’t wait to start creating beautiful designs on various materials. However, after your first few attempts, you notice that the results are not quite what you expected. Frustrating, right? Well, fear not!
With the right engraving software, ideal engraving material, and proper adjustments to speed and power settings, you will be well on your way to creating stunning engraved pieces. Additionally, we will guide you through optimizing your images, cleaning and preparing the engraving surface, and testing and adjusting as needed.
So, let’s dive in and discover the secrets to achieving perfect results with raster engraving!
Key Takeaways
- Adjust speed and power settings, experiment with different materials, and optimize the image before engraving for flawless results.
- Choose engraving software with machine learning capabilities and advanced editing tools for precise control and troubleshooting solutions.
- Select the ideal engraving material that is not reflective or too soft to ensure clear and complete engraving.
- Troubleshoot problems by adjusting power, speed, or focus of the laser engraver, trying different materials or settings, and testing and adjusting as needed for perfect final engraving.
Choose the Right Engraving Software
You’ll want to make sure you choose the right engraving software for the job to unlock the full potential of your designs and create truly stunning results.
When it comes to raster engraving, selecting the perfect software is crucial. You need a software that not only integrates machine learning capabilities but also offers solutions for troubleshooting common issues that may arise during the engraving process.
Look for a software that can handle complex designs with ease and provides advanced editing tools for precise control over the engraving process. This will allow you to achieve intricate details and sharp lines in your engravings.
Once you’ve chosen the ideal engraving software, the next step is to select the ideal engraving material.
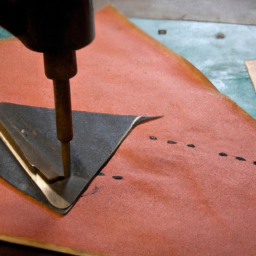
Select the Ideal Engraving Material
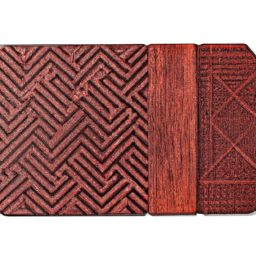
Opt for the ideal material to create a vivid and crisp image when etching with a laser. Choosing the right engraving material is crucial to achieving perfect results.
There are various options available, but selecting the best engraving tools can make a significant difference. Common mistakes in engraving material selection include using materials that are too reflective, like metals, or too soft, like certain types of wood. Reflective materials can cause the laser beam to bounce back, leading to blurry or incomplete engraving. On the other hand, soft materials may not provide enough resistance for the laser to create a clear image.
It is important to experiment with different materials and find the one that offers the best result for your specific design.
Now that you’ve selected the ideal engraving material, it’s time to adjust the speed and power settings for optimal engraving.
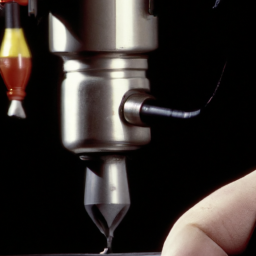
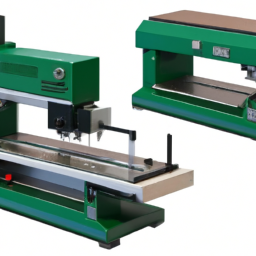
Adjust the Speed and Power Settings
Once you’ve chosen the ideal engraving material, it’s crucial to fine-tune the speed and power settings for the laser to achieve optimal results. Adjusting these settings properly can increase efficiency and save you time and resources.
To do this, start by testing different speed and power combinations on a small area of your material. Observe the results and make adjustments accordingly. If the engraving appears too light or shallow, increase the power. Conversely, if it appears too dark or deep, decrease the power. Similarly, adjust the speed to achieve the desired level of detail and precision.
Remember to troubleshoot any problems that arise, such as inconsistent engraving or burning. Once you have mastered the speed and power settings, you can move on to optimizing the image for engraving, ensuring a flawless end result.
Optimize the Image for Engraving
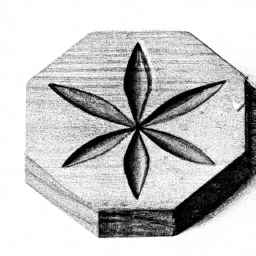
To ensure an impeccable end result, it’s essential to fine-tune the image before engraving, employing techniques that transform it into a masterpiece. Here are some tips to help you optimize the image for engraving:
-
Adjust the engraving depth: Experiment with different depths to achieve the desired effect. Consider the material you are engraving on and adjust the depth accordingly. Test engraving on a scrap piece to find the perfect depth before engraving the final image.
-
Choose the appropriate engraving tool: Select the right tool based on the material and desired level of detail. Different tools have varying power and speed capabilities, so choose wisely. Consider the type of engraving you want to achieve, whether it’s a shallow or deep engraving.
By following these steps, you can ensure that your image is optimized for engraving and ready to be transformed into a stunning masterpiece.
Now, let’s move on to the next section about how to clean and prepare the engraving surface.
Clean and Prepare the Engraving Surface
Before you start engraving, make sure to thoroughly clean and prepare the surface to ensure the best possible outcome for your masterpiece. Surface preparation is crucial in achieving perfect results with raster engraving.
Begin by removing any dust, dirt, or debris from the surface using a soft cloth or brush. Make sure to pay attention to the corners and edges as they can be easily overlooked.
Next, use a cleaning solution specifically designed for the material you’re engraving on. Different materials may require different cleaning techniques, so it’s important to read and follow the manufacturer’s instructions.
Once the surface is clean, dry it completely to prevent any moisture from affecting the engraving process.
Now that your surface is clean and ready, you can proceed to the next step of testing and adjusting as needed for optimal results.
Test and Adjust as Needed
Ensure that you thoroughly test and make any necessary adjustments to achieve the desired outcome for your engraving. Experiment with different engraving techniques to find the one that works best for your specific project. This will allow you to identify any potential issues and troubleshoot them effectively.
Start by engraving a small section of your design and carefully observe the results. Pay attention to the depth, clarity, and overall quality of the engraving. If you encounter any issues, such as inconsistent depth or blurry lines, consider adjusting the power, speed, or focus of your laser engraver.
Additionally, try different materials or settings to see if they produce better results. By taking the time to test and adjust, you can ensure that your final engraving is perfect and meets your expectations.
Frequently Asked Questions
Can I use any image for raster engraving or are there specific requirements?
To achieve perfect results with raster engraving, it’s important to consider the image resolution and suitable file formats. Higher resolution is better as it ensures crisper engraving details. It’s best to use raster image formats like JPEG, PNG, or TIFF. These formats preserve the image quality and allow for easy manipulation during the engraving process. Make sure to choose high-resolution images and save them in compatible file formats for optimal results.
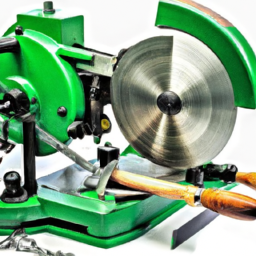
What kind of maintenance is required for the engraving machine?
Maintenance requirements for the engraving machine are crucial to ensure optimal performance. Did you know that neglecting regular maintenance can lead to a 30% decrease in the machine’s lifespan?
To keep it running smoothly, make sure to clean the lenses and mirrors regularly, check for loose screws and belts, and lubricate the moving parts.
In case of any issues, troubleshooting tips like checking the power supply and software settings can help resolve minor problems quickly.
How long does a raster engraving typically take to complete?
The time it takes to complete a raster engraving can vary depending on several factors. These factors include the complexity of the design, the size of the engraving area, the material being engraved, and the speed settings of the engraving machine.
For example, engraving on softer materials like wood or acrylic may be faster compared to harder materials like metal. It’s important to experiment with different settings and materials to find the optimal speed for achieving perfect results.
Can I engrave on curved or uneven surfaces using raster engraving?
Engraving on curved or uneven surfaces using raster engraving is a breeze! You’ll be amazed at how effortlessly the laser glides over the contours, leaving behind crisp and precise designs.
Whether it’s a curved glass or an uneven wooden surface, raster engraving can handle it all. The laser adapts to the surface, ensuring consistent depth and accuracy.
So go ahead, unleash your creativity and engrave on any surface you desire, no matter how curvy or uneven!
Are there any safety precautions I need to take while using the engraving machine for raster engraving?
To ensure your safety while using the engraving machine for raster engraving, it’s crucial to wear proper safety gear, such as protective goggles and gloves.
Additionally, receiving proper training and supervision on how to operate the machine safely is essential. This includes understanding the machine’s controls, power source, and emergency shut-off procedures.
By following these precautions, you can confidently and securely achieve excellent results with raster engraving.
Conclusion
Congratulations! You’ve now reached the end of this enlightening journey towards achieving perfect results with raster engraving. By following these seven tips, you’ve equipped yourself with the knowledge and skills to create stunning engravings that are sure to captivate any observer.
Just like a master painter delicately blends vibrant colors on their canvas, you’ve mastered the art of engraving, effortlessly bringing your ideas to life with precision and finesse.
So go forth, embrace your newfound expertise, and let your creativity soar to new heights!