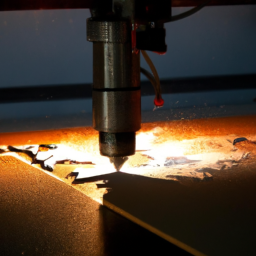
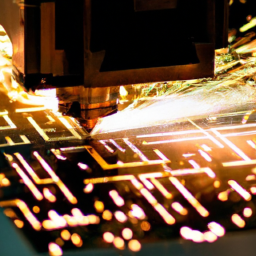
Picture this: you’re in your workshop, ready to unleash the power of your CO2 laser cutter. But wait, something’s not right. The laser isn’t cutting as precisely as it should, and you’re left scratching your head, wondering what went wrong.
Fear not, because in this ultimate guide, we’re going to unravel the mysteries of troubleshooting your CO2 laser cutter.
Whether you’re a seasoned pro or just getting started, understanding the basics is key. From misaligned mirrors to inconsistent cutting issues, we’ll delve into every possible problem and provide you with the knowledge and techniques to fix them.
Power supply failures? We’ve got you covered. Cleaning and maintaining your laser cutter? We’ll show you the ropes.
But we won’t stop there. This guide goes beyond the basics, equipping you with advanced troubleshooting techniques to tackle even the trickiest of problems.
So grab your tools, put on your problem-solving hat, and get ready to unlock the full potential of your CO2 laser cutter.
Let’s troubleshoot like a pro.
Key Takeaways
- Understanding the basics of CO2 laser cutters is crucial for troubleshooting and maintaining optimal performance.
- Safety precautions must be followed when working with a CO2 laser cutter to prevent accidents and injuries.
- Proper alignment of mirrors in the laser cutter is essential for consistent and accurate cutting results.
- Regular maintenance, including cleaning the lens and keeping the ventilation system clean, is important for maximizing the longevity and performance of the laser cutter.
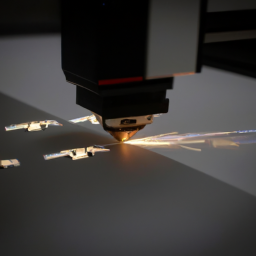
Understanding the Basics of CO2 Laser Cutters
So, you want to understand the basics of CO2 laser cutters, huh? Well, you’re in luck because I’m about to break it down for you in the simplest way possible.
Let’s start with laser cutter safety. When working with a CO2 laser cutter, it’s crucial to prioritize safety. Always wear protective goggles to shield your eyes from harmful laser radiation. Additionally, ensure proper ventilation in your workspace to prevent the buildup of toxic fumes.
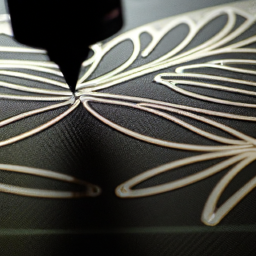
Now, let’s talk about choosing the right materials. CO2 laser cutters are compatible with a wide range of materials, including wood, acrylic, and fabric. However, it’s important to consider the thickness and composition of the material to optimize cutting performance.
Now that you understand the basics, let’s move on to troubleshooting misaligned mirrors.
Troubleshooting Misaligned Mirrors
To fix misaligned mirrors in your CO2 laser cutter, you’ll need to adjust them like a skilled tightrope walker maintaining balance. Laser beam alignment is crucial for optimal performance, and mirror calibration is the key to achieving it. Here are three important steps to follow:
-
Start by inspecting the mirrors for any dirt, debris, or damage. Clean them carefully using a lint-free cloth and a specialized cleaner to ensure their surfaces are pristine.
-
Use a laser beam alignment tool to check the alignment of each mirror. Adjust the mirror mounts or holders as necessary to achieve perfect alignment. Small adjustments can make a big difference, so take your time and be meticulous.
-
Once the mirrors are aligned, test the laser cutter by making a test cut. If the cutting is inconsistent, proceed to the next section for further troubleshooting.
Fixing inconsistent cutting issues requires a thorough examination of other potential causes.
Fixing Inconsistent Cutting Issues
When you’re experiencing inconsistent cutting issues, it’s time to dive into the possible causes and find a solution. Troubleshooting beam divergence and resolving focal length problems are crucial steps in getting your CO2 laser cutter back on track. Beam divergence occurs when the laser beam spreads out as it travels, resulting in inconsistent cutting depths. To troubleshoot this issue, check the alignment of your mirrors and make necessary adjustments. Additionally, ensure that the focal length is properly set for your material thickness. A misaligned focal length can lead to inconsistent cutting results. By addressing these issues, you can improve the accuracy and precision of your laser cutter. In the next section, we will discuss addressing power supply failures.
Addressing Power Supply Failures
If you’re experiencing power supply failures, you’ll want to address them promptly to avoid any frustrating setbacks in your laser cutting projects. Power supply replacement is often necessary in these cases. Here are three key steps to troubleshooting electrical connections in your CO2 laser cutter:
-
Check the electrical connections: Inspect all the wires and terminals for any loose connections or signs of damage. Make sure that all connections are secure and properly tightened.
-
Test the voltage output: Use a multimeter to measure the voltage output of the power supply. Compare the reading with the manufacturer’s specifications to determine if it’s within the acceptable range.
-
Replace faulty components: If you find any faulty components during your inspection or testing, replace them with new ones. This includes any damaged wires, connectors, or the entire power supply unit.
Addressing power supply failures is crucial for maintaining the functionality of your CO2 laser cutter. Once you’ve resolved these issues, you can move on to the next section about cleaning and maintaining your laser cutter.
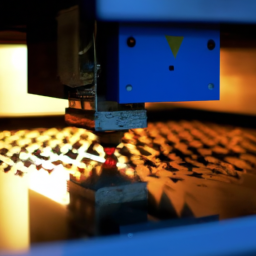
Cleaning and Maintaining Your Laser Cutter
Make sure you regularly clean and maintain your laser cutter to keep it running smoothly and extend its lifespan. Proper cleaning and maintenance are essential for optimal performance and preventing issues that can arise from dust, debris, or buildup. Two critical aspects of cleaning your laser cutter are ventilation and lens care.
For ventilation, ensure that your laser cutter is set up in a well-ventilated area or use a dedicated exhaust system to remove harmful fumes and gases. Regularly check and clean the ventilation system to prevent clogs and ensure efficient airflow.
When it comes to lens cleaning, use a soft cloth or lens cleaning paper to gently remove any dust or residue from the lens surface. Be cautious not to scratch or damage the lens. Additionally, keep the lens area free from debris and regularly inspect for any signs of damage or degradation.
Maintaining a clean and properly functioning laser cutter will minimize potential issues, but if problems do arise, there are advanced troubleshooting techniques you can employ to address them.
Advanced Troubleshooting Techniques
Mastering advanced troubleshooting techniques is essential for maximizing the performance and longevity of your laser cutter, ensuring smooth operation, and minimizing potential issues. When it comes to troubleshooting your CO2 laser cutter, two important areas to focus on are lens replacement and software updates.
Regularly replacing the lens is crucial for maintaining optimal cutting and engraving results. Over time, the lens can become dirty or damaged, affecting the quality of the laser beam and reducing cutting accuracy. By replacing the lens as recommended by the manufacturer, you can ensure consistent and precise cuts.
Additionally, keeping your laser cutter’s software up to date is vital. Software updates often include bug fixes, performance enhancements, and new features that can improve the overall functionality of your machine. By regularly checking for updates and installing them, you can stay ahead of potential issues and take advantage of the latest advancements in laser cutting technology.
Frequently Asked Questions
How can I determine the wattage of my CO2 laser cutter?
To determine the wattage of your CO2 laser cutter, you need to check the calibration accuracy. Start by referring to the user manual or contacting the manufacturer for specific instructions.
Typically, you’ll need a laser power meter to measure the output power. Follow the calibration procedure provided to ensure accurate readings. Remember, "Measure twice, cut once" applies here.
Precise wattage determination is crucial for optimal performance and safety.
What safety precautions should I take when operating a CO2 laser cutter?
When operating a CO2 laser cutter, it’s crucial to prioritize safety. Laser cutter ventilation is essential to remove fumes and maintain clean air in the workspace. Ensure proper ventilation by using exhaust fans or a ventilation system.
Additionally, receiving proper laser cutter training is vital to understand the equipment’s capabilities, safety protocols, and emergency procedures. This knowledge helps prevent accidents and ensures a safe working environment.
Always prioritize safety when using a CO2 laser cutter.
Can I use my CO2 laser cutter on materials other than wood and acrylic?
Yes, you can use your CO2 laser cutter on alternative materials besides wood and acrylic. CO2 laser cutters have a wide range of laser cutting applications. This includes, but is not limited to, materials such as leather, fabric, paper, rubber, and certain types of metal. However, it’s important to note that different materials may require adjustments to the laser power, speed, and focus settings in order to achieve optimal results.
How often should I replace the focusing lens on my CO2 laser cutter?
To keep your CO2 laser cutter running smoothly, it’s crucial to stay on top of focusing lens maintenance. Regularly inspect and clean the lens to ensure optimal performance. However, replacing the lens should be based on its condition rather than a set time frame.
If you notice decreased laser power or poor cutting quality, troubleshooting laser alignment may be necessary. Remember, proper care and attention to your focusing lens can extend the lifespan of your CO2 laser cutter.
Are there any specific maintenance tasks that should be performed on a regular basis to ensure optimal performance of my CO2 laser cutter?
To maintain optimal performance of your CO2 laser cutter, it’s crucial to regularly perform specific maintenance tasks. These tasks include:
- Cleaning the optics
- Checking and aligning the mirrors
- Inspecting and replacing worn parts
- Ensuring proper ventilation
Regularly cleaning the machine and removing debris will prevent buildup and potential damage. By diligently performing these regular maintenance tasks, you can ensure that your CO2 laser cutter continues to operate at its best and produces high-quality results.
Conclusion
So there you have it, the ultimate guide to troubleshooting your CO2 laser cutter! Now, armed with this knowledge, you can tackle any issue that comes your way with confidence and precision.
From fixing misaligned mirrors to addressing power supply failures, we’ve covered it all.
And don’t forget to keep your laser cutter clean and well-maintained for optimal performance.
Remember, troubleshooting doesn’t have to be a daunting task, it can be an exciting adventure! So go forth and conquer those laser cutter problems like a true technical guru!