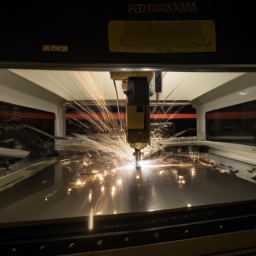


Welcome to ‘The Ultimate Guide to Troubleshooting Your Diode Laser Cutter,’ where we will be your guiding light through the intricate world of diode laser cutters. Like a skilled surgeon, you rely on your diode laser cutter to make precise and clean cuts in various materials.
But what happens when it starts to falter and leave you in the dark? Fear not, for this comprehensive guide will illuminate the path to resolving common issues and achieving optimal performance.
In this guide, we will delve into the basics of diode laser cutters, equipping you with a solid understanding of their inner workings. From there, we will tackle troubleshooting common problems, offering practical solutions to get you back on track.
We will also explore cleaning and maintenance tips, optimizing settings for different materials, and even advanced troubleshooting techniques for complex issues.
So, grab your tools and let’s embark on this enlightening journey to become a master troubleshooter of your diode laser cutter!
Key Takeaways
- Diode laser cutters are powerful tools for making precise cuts in various materials.
- Laser safety should always be a top priority when working with diode laser cutters.
- Regular cleaning and maintenance are important for optimal performance.
- Troubleshooting techniques include checking laser power, cleaning the lens, and ensuring proper ventilation.
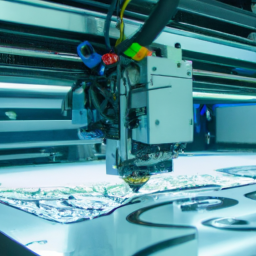
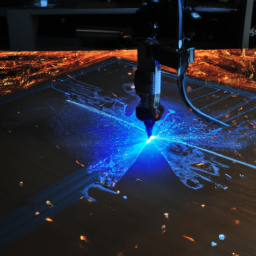
Understanding the Basics of Diode Laser Cutters
If you’re new to diode laser cutters, it’s essential to grasp the basics before diving into troubleshooting.
Laser safety is of utmost importance when working with diode laser cutters. Always wear appropriate protective gear, such as safety goggles, to shield your eyes from the laser beam.
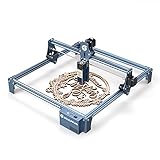
Additionally, it’s crucial to choose the right diode laser cutter for your needs. Consider factors like power output, cutting area, and software compatibility when making your selection.

Now that you understand the basics of diode laser cutters, let’s move on to troubleshooting common issues.
Troubleshooting Common Issues with Diode Laser Cutters
When faced with common issues, diode laser cutter owners often find themselves frustrated and searching for solutions. To help you troubleshoot these problems, here are three techniques you can try:
-
Check the laser power: If your diode laser cutter isn’t cutting or engraving properly, make sure the laser power setting is correct. Adjust the power according to the material you’re working with.
-
Clean the lens: A dirty lens can cause blurry cuts or poor engraving results. Use a lens cleaning solution and a lint-free cloth to regularly clean the lens.
-
Check the ventilation: Poor ventilation can lead to overheating and reduced performance. Make sure the exhaust system is properly connected and the air filters are clean.
By following these troubleshooting techniques, you can resolve common laser problems and ensure optimal performance.
In the next section, we’ll discuss cleaning and maintenance tips for your diode laser cutter.
Cleaning and Maintenance Tips for Optimal Performance
To ensure your diode laser cutter performs at its best, it’s essential to implement regular cleaning and maintenance practices. By taking preventive measures and avoiding common mistakes, you can optimize the performance and longevity of your machine.
Start by keeping the laser lens clean and free from dust or debris. Use a soft, lint-free cloth to gently wipe the lens, ensuring there are no smudges or scratches.
Additionally, regularly clean the cutting bed and remove any leftover residue or debris. Avoid using harsh chemicals that can damage the machine and instead opt for mild cleaning solutions.
Finally, make sure to lubricate the moving parts of the cutter to prevent friction and ensure smooth operation.
By following these cleaning and maintenance tips, you can now move on to optimizing settings for different materials.
Now that your diode laser cutter is clean and well-maintained, let’s explore how to optimize settings for different materials.
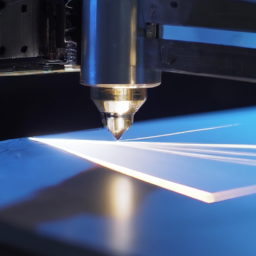
Optimizing Settings for Different Materials
Mastering Material Optimization: Maximize the potential of your diode laser cutter by fine-tuning settings for different materials.
To achieve the best results, it’s crucial to choose the appropriate focal length for each material. This will ensure precise cutting and engraving.
Additionally, adjusting power and speed settings can greatly impact the outcome. Experiment with different power levels to find the optimal balance between cutting efficiency and material preservation. Similarly, varying the speed settings allows for customization based on the material’s thickness and density.
By finding the perfect combination of power, speed, and focal length for each material, you can achieve superior results and minimize wastage.
Now, let’s delve into advanced troubleshooting techniques for complex issues, ensuring you have the knowledge to overcome any obstacle.
Advanced Troubleshooting Techniques for Complex Issues
Delving into advanced troubleshooting techniques for complex issues enhances your understanding of optimizing settings for different materials on a diode laser cutter. When faced with laser alignment problems, it’s important to check the positioning of the laser module and make sure it’s properly aligned with the cutting bed. Misalignment can lead to inaccurate cuts and uneven engraving.
Additionally, power supply issues can cause a variety of problems, such as inconsistent power output or a complete loss of power. To troubleshoot this, ensure that all connections are secure and that the power supply is functioning correctly.
If these techniques don’t resolve the issue, it may be necessary to consult recommended resources for further assistance and support, such as manufacturer guides or online forums.
Recommended Resources for Further Assistance and Support
If you’ve exhausted all the troubleshooting techniques for complex issues on your diode laser cutter, don’t worry! There are still resources available to help you out. Here are three recommended resources that can provide further assistance and support:
-
Online forums: Joining online communities dedicated to laser cutting can be a game-changer. These forums are filled with experienced users and experts who can offer guidance and solutions to your problems. They provide a platform for you to ask questions, share your experiences, and learn from others in the laser cutting community.
-
Manufacturer’s customer support: Don’t hesitate to reach out to the manufacturer of your diode laser cutter. They have a team of knowledgeable professionals who are trained to assist you with any technical issues you may encounter. Whether it’s via phone, email, or live chat, the manufacturer’s customer support can provide valuable insights and solutions specific to your laser cutter model.
By utilizing these resources, you can ensure that you have the necessary support to troubleshoot and resolve any issues you may face with your diode laser cutter.
Frequently Asked Questions
What are some alternative methods to troubleshoot common issues with diode laser cutters?
Having trouble with your diode laser cutter? Fear not! There are alternative methods to troubleshoot those pesky common issues.
First, try the classic ‘turn it off and on again’ technique. If that doesn’t work, check for loose connections or faulty wiring.
Another handy trick is to clean the lens and mirrors to ensure optimal performance.
Remember, troubleshooting techniques can save the day when it comes to resolving common issues with diode laser cutters.
Can I use any cleaning solution to maintain my diode laser cutter, or are there specific products I should use?
You should use specific cleaning solutions to maintain your diode laser cutter. Not all cleaning solutions are suitable for this purpose. It’s important to use products that are specifically designed for cleaning laser equipment. These products are formulated to remove dirt, debris, and residue without damaging the delicate components of the laser cutter. Using the wrong cleaning solution can potentially cause damage to your machine and affect its performance.
How can I determine the optimal settings for cutting different materials on my diode laser cutter?
Finding the right power and speed settings for different materials on a diode laser cutter can be a trial-and-error process, but it’s crucial for achieving optimal results.
For example, let’s say you’re cutting acrylic. Start with a lower power setting and gradually increase it until you achieve a clean cut. Similarly, adjust the cutting speed to find the right balance between precision and efficiency.
If you encounter issues, such as uneven cuts or excessive charring, consult troubleshooting guides or seek assistance from online forums or manufacturer support for advanced troubleshooting techniques and additional resources.
Remember to always use specific cleaning solutions to maintain your diode laser cutter’s longevity.
Are there any advanced troubleshooting techniques I can employ for complex issues with my diode laser cutter?
When troubleshooting complex issues with your diode laser cutter, there are advanced troubleshooting techniques you can employ.
Start by thoroughly inspecting the machine for any visible damage or loose connections.
Then, consult the user manual or online resources for specific troubleshooting steps related to your issue.
Additionally, consider reaching out to the manufacturer or a professional for further assistance.
Remember to follow proper safety protocols and always unplug the machine before attempting any troubleshooting.
Where can I find additional resources for assistance and support with my diode laser cutter?
You can find additional resources for assistance and support with your diode laser cutter through support forums and online tutorials. Support forums are a great place to connect with other laser cutter users who may have experienced similar issues and can offer advice.
Online tutorials provide step-by-step instructions and troubleshooting tips that can help you navigate complex problems. Utilizing these resources can help you troubleshoot and resolve any issues you may encounter with your diode laser cutter.
Conclusion
In conclusion, don’t fret when encountering hiccups with your diode laser cutter. With this ultimate troubleshooting guide, you’ll effortlessly navigate the challenges that may arise.
By mastering the basics, keeping up with regular cleaning and maintenance, and tinkering with settings for different materials, you’ll be well on your way to optimal performance.
And if you encounter more complex issues, fear not! Our advanced troubleshooting techniques will assist you in overcoming any obstacle.
Remember, assistance and support are just a click away with our recommended resources. Happy laser cutting!