Have you ever spent hours working on a design, only to be disappointed with the final result when using a raster engraving machine? Don’t worry, you’re not alone. Many people make common mistakes that can easily be avoided, ensuring you achieve the best possible outcome.
In this article, we will discuss five of these mistakes and how to steer clear of them. By properly preparing your design files, choosing the right material, calibrating power and speed settings, paying attention to focal length and z-axis height, and regularly cleaning and maintaining your machine, you can avoid these pitfalls and achieve stunning results every time.
So, let’s dive in and discover how to optimize your raster engraving machine for the best possible outcome.
Key Takeaways
- Properly preparing design files is crucial to avoid wasting time and materials
- Design file optimization reduces file size without compromising quality
- Ensuring file format compatibility is necessary for seamless integration with the machine
- Paying attention to material suitability is important for achieving desired engraving outcomes
Properly Prepare Your Design Files
Make sure you’ve properly prepared your design files so you don’t end up wasting time and materials on errors that could have been easily avoided.
One key aspect of preparation is design file optimization. This involves reducing the file size without compromising the quality of your engraving. By optimizing your design files, you can ensure faster processing times and smoother engraving results.
Additionally, it’s crucial to consider file format compatibility. Different raster engraving machines may require different file formats, such as JPEG, PNG, or SVG. Make sure to save your design files in the appropriate format to ensure seamless integration with your machine.
By following these steps, you’ll be on your way to successful engraving.
Now, let’s move on to the next section and discuss how to choose the right material for your project.
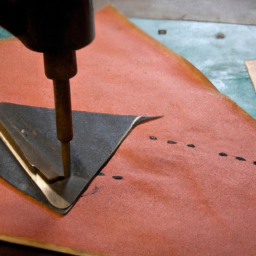
Choose the Right Material
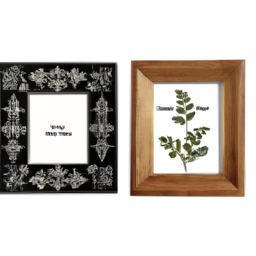
Selecting the appropriate material is crucial when using a raster engraver, as it determines the outcome of the design and the level of detail that can be achieved. Choosing suitable materials can prevent common issues such as burning or incomplete engraving. To help you make the right choice, consider the table below:
| Material | Suitable For |
|---|---|
| Wood | Detailed designs with varying depths |
| Acrylic | Clean and precise engravings |
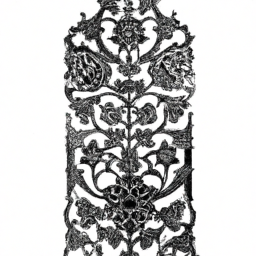
| Leather | Intricate patterns and fine details |
| Glass | Delicate and intricate designs |
By selecting the right material for your project, you can avoid potential problems and achieve the desired results. Once you have chosen the material, it’s important to calibrate the power and speed settings to further enhance the engraving process. This will be discussed in the next section.
Calibrate Power and Speed Settings
When calibrating the power and speed settings on your raster engraving machine, it’s important to test engraving settings on scrap material first. This will allow you to make adjustments and fine-tune the settings before engraving on your final material.
Additionally, you should adjust the power and speed settings based on the different materials you’re working with, as each material may require different settings for optimal engraving results. By optimizing the settings for the desired engraving depth and quality, you can ensure that your engravings are precise and of high quality.
Test Engraving Settings on Scrap Material
Before you begin testing engraving settings on scrap material, it’s crucial to experiment with different techniques to achieve the desired results. Here are three key tips to keep in mind:
-
Test engraving on curved surfaces: When working on rounded or uneven materials, it’s important to adjust the settings accordingly. Experiment with different power and speed combinations to ensure consistent and accurate engraving.
-
Troubleshooting common engraving issues: Testing on scrap material allows you to identify and address common problems such as inconsistent depth, blurry lines, or burning. By adjusting the settings and observing the results, you can troubleshoot these issues before working on final projects.
-
Fine-tuning for optimal results: Scrap material provides an opportunity to fine-tune the power and speed settings for different materials. Take note of the engraving quality, depth, and clarity achieved with various settings, and use this information to adjust power and speed for different materials.
By testing engraving settings on scrap material, you can gain valuable insights and optimize your machine’s performance.
Next, we’ll discuss how to adjust power and speed for different materials.
Adjust Power and Speed for Different Materials
To achieve optimal results on various materials, it’s important to adjust the power and speed settings on your engraving machine.
Power and speed optimization is crucial for troubleshooting engraving issues and ensuring consistent, high-quality outcomes.
When engraving different materials, such as wood, acrylic, or metal, you need to find the right balance between power and speed.
If the power is set too high, it can cause burning or melting, while too low power may result in incomplete engraving.
Similarly, adjusting the speed is essential to control the depth and quality of the engraving.
By experimenting with different power and speed settings on scrap materials, you can fine-tune your engraving machine for optimal performance.
This will enable you to optimize settings for the desired engraving depth and quality in the next section about ‘optimize settings for desired engraving depth and quality’.
Optimize Settings for Desired Engraving Depth and Quality
Achieve the perfect engraving depth and superior quality by optimizing the settings on your engraving machine. To ensure the desired engraving depth and quality, it is important to understand the various engraving techniques and troubleshoot any issues that may arise. Here are some tips to help you optimize your settings:
-
Experiment with different power and speed settings: Adjusting the power and speed can greatly impact the depth and quality of your engraving. Start with lower settings and gradually increase them until you achieve the desired results.
-
Use appropriate engraving techniques: Different materials require different engraving techniques. For example, using a dot matrix technique for photos can result in a more detailed engraving, while using a hatch fill technique for text can create a crisp and clear result.
-
Test and fine-tune your settings: Before engraving on your final material, always test your settings on a sample piece. This will allow you to make any necessary adjustments and ensure the best possible outcome.
By optimizing your settings and employing these engraving techniques, you can achieve the desired engraving depth and quality. Next, let’s discuss the importance of paying attention to focal length and z-axis height.
Pay Attention to Focal Length and Z-axis Height
When using a raster engraving machine, it’s important to pay attention to the focal length and Z-axis height. Set the correct focal length to ensure sharp engravings. Adjust the Z-axis height according to different material thicknesses. Additionally, use proper focus techniques to achieve consistent results.
By following these key points, you’ll be able to optimize the engraving process and achieve high-quality outcomes.
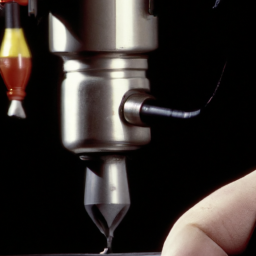
Set Correct Focal Length for Sharp Engravings
Ensuring the correct focal length is set on your raster engraving machine can make all the difference in achieving sharp engravings. Have you ever wondered how this simple adjustment can significantly improve your results?
Choosing the right lens and ensuring proper alignment are crucial steps in setting the correct focal length. The focal length refers to the distance between the lens and the material being engraved. If the focal length is too short, the laser beam will spread out too much, resulting in blurry and less precise engravings. On the other hand, if the focal length is too long, the laser beam will not have enough power to engrave the material effectively.
So, it is essential to select the appropriate lens and carefully align it for sharp and clear engravings.
Now, let’s move on to the next important aspect: adjusting the z-axis height for different material thicknesses.
Adjust Z-axis Height for Different Material Thicknesses
Now that you’ve set the correct focal length for sharp engravings, it’s time to move on to the next important step: adjusting the Z-axis height for different material thicknesses.
This is crucial for achieving precise and consistent results with your raster engraving machine. When engraving on materials of varying thicknesses, it’s essential to adjust the focus accordingly to ensure optimal engraving depth. By adjusting the Z-axis height, you can maintain the correct focal point and avoid shallow or over-engraved areas.
If you encounter any issues with the engraving depth, troubleshooting techniques such as adjusting the material height or checking the machine’s settings can help resolve the problem. By mastering the art of adjusting focus and troubleshooting, you can ensure consistent and high-quality results with your raster engraving machine.
Moving forward, let’s explore how to use proper focus techniques for consistent results.
Use Proper Focus Techniques for Consistent Results
To achieve consistent and impressive results, you’ll want to make sure you’re using the right focus techniques with your engraving machine. Proper focus techniques are essential for achieving the desired engraving precision.
Here are five important focus techniques to keep in mind:
- Adjust the focus point according to the material’s thickness.
- Use a focus tool to ensure accurate focus alignment.
- Regularly clean the focus lens to remove any debris or residue.
- Double-check the focus before every engraving job to avoid errors.
- Experiment with different focus settings to optimize engraving results.
By utilizing these focus techniques, you can ensure that your engraving machine consistently produces high-quality results.
Now, let’s move on to the next section about how to clean and maintain your machine regularly.
Clean and Maintain Your Machine Regularly
Make sure you keep your raster engraving machine in top shape by regularly cleaning and maintaining it, or else you might end up with a machine that’s as useless as a broken record player.
To ensure consistent and high-quality results, it’s important to establish a cleaning frequency and follow a maintenance checklist. Clean the lenses, mirrors, and focus gauge regularly to remove any dust or debris that could affect the engraving process.
Check and clean the exhaust system to prevent any buildup that could lead to poor ventilation. Additionally, lubricate the moving parts and tighten any loose screws or bolts.
By taking these simple steps, you can extend the lifespan of your machine and avoid potential issues.
Now that you know how to keep your machine in top shape, let’s move on to the next section about testing and iterating for best results.
Test and Iterate for Best Results
Don’t forget to experiment and tweak your process to achieve optimal results with your engraving machine. Testing and iterating are essential best practices when using a raster engraving machine. Here are some tips to help you get the best results:
-
Test different materials: Try engraving on various materials such as wood, metal, or acrylic to see how each one reacts. This will give you an idea of what settings work best for each material.
-
Adjust power and speed: Experiment with different power and speed settings to find the perfect balance for your desired engraving effect. Start with lower power and slower speed, then gradually increase until you achieve the desired outcome.
-
Fine-tune your design: Make small adjustments to your design, such as line thickness or spacing, and observe how it affects the final result. This will help you achieve the desired level of detail in your engravings.
By testing and iterating, you can refine your process and achieve the best results with your raster engraving machine.
Frequently Asked Questions
Can I use any design file format with a raster engraving machine?
Yes, you can use various design file formats with a raster engraving machine. However, it’s important to be aware of compatibility issues. Not all file formats are compatible, so it’s best to use formats like SVG, DXF, or AI, which are widely supported.
To optimize your design files for better results, ensure they are in a high-resolution format and use vector graphics whenever possible. This will help achieve precise and detailed engraving on your raster engraving machine.
What are the key factors to consider when choosing the right material for raster engraving?
When choosing the right material for raster engraving, there are several key factors to consider. Different materials have their own pros and cons for engraving, so it’s important to choose based on your specific needs.
For example, wood offers a natural and rustic look, while acrylic provides a sleek and modern appearance. Metal can create a durable and industrial effect. Experimenting with different materials and settings will help you achieve various effects with raster engraving.
How frequently should I calibrate the power and speed settings of my engraving machine?
To optimize power and speed settings on your engraving machine, it’s crucial to calibrate them frequently. Like a skilled artist adjusting their brush strokes, regularly fine-tuning these settings ensures precise and flawless results.
Troubleshooting common issues involves checking for loose connections, cleaning the machine’s lens, and ensuring proper ventilation. Following these tips will ensure smooth engraving and prevent costly mistakes.
Is it necessary to adjust the focal length and Z-axis height for every engraving project?
Adjusting the focal length and z-axis height for every engraving project is crucial for optimal results. Different focal lengths can significantly impact engraving quality, so it’s important to ensure the correct focal length is set for each project.
Additionally, proper ventilation is essential in a raster engraving machine to prevent overheating and maintain a safe working environment. Don’t overlook these factors, as they directly affect the quality and safety of your engraving projects.
What are some recommended cleaning and maintenance practices for a raster engraving machine?
To keep your raster engraving machine in top condition, regular cleaning and maintenance are essential. Use a soft cloth and gentle cleaning techniques to remove dust and debris from the machine. Avoid using harsh chemicals that could damage the surface. Instead, opt for recommended cleaning products specifically designed for engraving machines.
By following these cleaning practices, you can ensure optimal performance and longevity for your machine.
Conclusion
In conclusion, by avoiding these common mistakes, you can ensure optimal results when using a raster engraving machine.
Properly preparing your design files, choosing the right material, calibrating power and speed settings, paying attention to focal length and Z-axis height, and regularly cleaning and maintaining your machine are all essential steps for success.
Remember, testing and iterating will lead to the best possible outcome. So, keep these tips in mind and enjoy the smooth and precise engraving process!