Imagine you’re a master sculptor, chiseling away at a block of marble. Each strike of the hammer and chisel brings you closer to your vision, revealing the intricate details hidden within the stone.
Now, imagine that instead of a hammer and chisel, you have a laser cutter at your disposal. With its precision and speed, it’s like having a magic wand that can turn your wildest designs into reality. But, just like any tool, mastering the art of laser cutting requires proper workflow and integration with the right software.
In this article, we will guide you through nine essential steps to ensure a successful workflow and seamless integration with laser cutter software. From understanding the basics of laser cutting to post-processing and finishing, we will equip you with the knowledge and skills to bring your creations to life with precision and finesse.
So, let’s dive in and unlock the full potential of laser cutting!
Key Takeaways
- Familiarize yourself with laser cutter software and its capabilities.
- Prepare design files by organizing and ensuring compatibility with the software.
- Properly calibrate and maintain the laser cutter for optimal performance.
- Troubleshoot laser issues and software compatibility regularly.
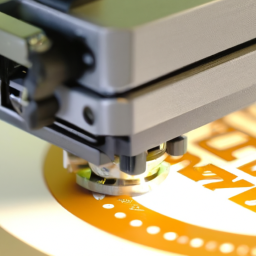
Understand the Basics of Laser Cutting
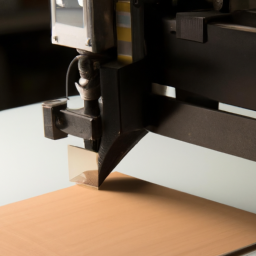
Laser cutting is a super cool technique that lets you create amazing designs by using a laser beam to cut and engrave materials. To fully utilize this process, it’s essential to understand laser cutting techniques and follow safety precautions.
Different materials require specific settings, such as power, speed, and focal length, to achieve desired results. Safety measures include wearing protective eyewear, ensuring proper ventilation, and keeping a safe distance from the laser cutter.
Familiarize yourself with the laser cutter software and its capabilities. It’s crucial to comprehend file formats, design dimensions, and cutting paths. By preparing your design files properly, you can optimize the laser cutting process and ensure accurate results.
Now, let’s dive into how to prepare your design files for laser cutting.
Prepare Your Design Files
First, make sure your design files are ready to go by giving them a final polish before diving into the exciting world of laser cutting. Design preparation is crucial for a successful workflow and integration with laser cutter software.
Start by organizing your files in a logical manner, creating separate folders for different elements or versions of your design. This will help you stay organized and easily locate specific files when needed.
Additionally, ensure that your design files are properly formatted and compatible with the laser cutter software you’ll be using. This may involve converting file types or adjusting settings to optimize your design for cutting.
With your design files prepared and organized, you’re now ready to set up the laser cutter and bring your creations to life.
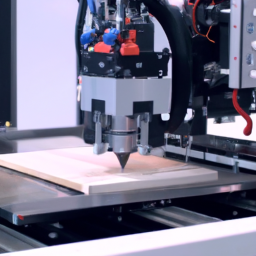
Set Up the Laser Cutter
To ensure optimal results, it’s important to properly calibrate and maintain the laser cutter.
Begin by checking the alignment of the laser beam and adjusting it if necessary.
Next, adjust the settings such as power, speed, and focus to achieve the desired outcome.
Regularly clean the lens and mirrors to maintain optimal cutting and engraving quality.
Ensure the laser cutter is properly calibrated and maintained
Make sure the laser cutter’s calibration and maintenance are on point, as it can be a game-changer for flawless results and a stress-free workflow. To ensure this, follow these steps:
-
Troubleshoot laser issues: Regularly inspect the laser cutter for any signs of wear or damage, and address them promptly. Check the alignment of the laser beam to ensure it’s hitting the target accurately.
-
Troubleshoot software compatibility: Update the laser cutter software regularly to ensure it’s compatible with your design files. If you encounter any issues, consult the user manual or contact the software manufacturer for assistance.
-
Maintain cleanliness: Keep the laser cutter clean and free from debris, as this can affect its performance. Regularly clean the lens and mirrors to maintain optimal cutting and engraving quality.
By ensuring proper calibration and maintenance, you can minimize downtime and maximize efficiency. Now, let’s move on to adjusting settings such as power, speed, and focus for optimal results.
Adjust settings such as power, speed, and focus for optimal results
Unlock the potential of your laser cutting projects by fine-tuning the power, speed, and focus settings for flawless and fabulous results. Adjusting these settings is crucial for achieving the desired outcome and avoiding potential issues. Start by fine-tuning the power, which determines the laser’s intensity. Higher power can cut through thicker materials, but be cautious not to burn or scorch the material. Next, adjust the speed, which controls how fast the laser moves across the material. A slower speed can produce more precise cuts, while a faster speed may be suitable for engraving. Lastly, ensure the focus is properly set to achieve sharp and clear results. Troubleshooting issues like inconsistent cuts or scorching can often be resolved by adjusting these settings. Remember to test and adjust these settings to optimize your laser cutting workflow seamlessly.
Test and Adjust
To ensure accuracy and quality, you should run test cuts on your design.
This will allow you to identify any areas that may need adjustment or refinement.
If necessary, make the required adjustments to the design or settings before proceeding with the final production.
Run test cuts to ensure accuracy and quality
Ensure the precision and excellence of your laser-cut designs by running test cuts and verifying their accuracy and quality. To help you with quality control and troubleshooting techniques, here are four key steps to follow:
-
Begin with a small test design: Start by cutting a small, simple shape to evaluate the accuracy and quality of the laser-cut. This will help identify any potential issues or adjustments needed.
-
Inspect the cut edges: Examine the edges of the test cut for smoothness and clarity. If the edges appear jagged or rough, it may indicate problems with the laser settings or the material being used.
-
Check for proper dimensions: Measure the dimensions of the test cut against the original design. Ensure that the cut is accurately reproducing the intended size and shape.
-
Evaluate overall quality: Look at the overall appearance and finish of the test cut. Pay attention to details such as burn marks, discoloration, or excessive charring. These issues can be indicative of incorrect power or speed settings.
By following these steps, you can identify any potential issues with your laser-cut designs and make any necessary adjustments to the design or settings for optimal results.
Make any necessary adjustments to the design or settings
To ensure the accuracy and quality of your laser cutting project, it is crucial to run test cuts. However, even after performing the test cuts, you may encounter design troubleshooting or find the need to make adjustments to the design or settings. This step is essential for achieving the desired outcome. By analyzing the test cuts, you can identify any flaws or areas that require improvement. This may include modifying the design to enhance its functionality or making adjustments to the laser cutter settings to achieve better precision. These design troubleshooting and advanced laser cutting techniques play a vital role in optimizing your workflow and ensuring a successful integration with the laser cutter software. Once you have made the necessary adjustments, you can confidently move forward and start the cutting process.
Start the Cutting Process
As you dive into the mesmerizing dance of the laser cutter, the cutting process unveils a symphony of precision and creativity.
To start the laser cutting process, ensure that the material is securely placed on the cutting bed and aligned properly. Double-check the power and speed settings to ensure they’re appropriate for the material being cut.
Activate the laser cutter and watch as it swiftly moves across the material, effortlessly transforming your design into reality. However, if you encounter any common cutting issues, such as incomplete cuts or charring, don’t panic.
Troubleshoot by adjusting the power and speed settings, or by cleaning the lens and mirrors to ensure optimal performance.
Once the cutting process is complete, it’s time to move on to post-processing and finishing, where you can add the final touches to your masterpiece.
Post-Processing and Finishing
Now that you’ve seen the laser cutter work its magic, it’s time to put the finishing touches on your masterpiece with some post-processing and finishing techniques. Here are three post-processing techniques to enhance the surface finishes of your laser-cut designs:
-
Sanding: Use sandpaper or sanding blocks to smooth out any rough edges or surfaces. Start with a coarse grit and gradually work your way up to a finer grit for a polished finish.
-
Painting: Apply a coat of paint or varnish to add color and protection to your laser-cut design. Make sure to use a paint that’s suitable for the material you’re working with.
-
Engraving: Use the laser cutter to add engraved details or patterns to your design. This technique can create a beautiful contrast and enhance the overall aesthetic of your piece.
By employing these post-processing techniques, you can achieve professional-looking, high-quality surface finishes on your laser-cut creations.
Frequently Asked Questions
What are the safety precautions to take when operating a laser cutter?
When operating a laser cutter, it’s crucial to prioritize safety precautions. To ensure safe laser cutter operation, follow these guidelines.
First, always wear appropriate personal protective equipment, including safety glasses and gloves.
Second, maintain a clean and organized workspace to prevent accidents.
Third, never leave the laser cutter unattended while in operation.
Fourth, familiarize yourself with emergency shutdown procedures in case of any mishaps.
Lastly, regularly inspect and maintain the laser cutter to guarantee its safe and efficient performance.
Can I use any type of material with a laser cutter?
Sure, you can use a variety of materials with a laser cutter. However, it’s important to understand the capabilities of the laser cutter and select materials that are suitable for cutting or engraving. Different materials react differently to the laser, so it’s crucial to choose materials that won’t release harmful fumes or damage the machine.
Always refer to the laser cutter’s user manual for a list of compatible materials and follow proper safety procedures to prevent accidents.
How do I clean and maintain a laser cutter for optimal performance?
To clean and maintain your laser cutter for optimal performance, follow these steps.
First, regularly clean the lens and mirrors to remove dust and debris. Use a lint-free cloth and isopropyl alcohol for cleaning.
Next, check and clean the ventilation system to ensure proper airflow.
Additionally, regularly inspect and clean the cutting bed and remove any residue or debris.
Finally, troubleshoot common issues like misalignment or power fluctuations to maintain smooth operation.
Are there any limitations or restrictions on the size or shape of designs that can be cut with a laser cutter?
Size limitations and shape restrictions are key factors to consider when using a laser cutter. The truth is, there are indeed limitations on the size and shape of designs that can be cut.
Laser cutters have a maximum cutting area, so designs that exceed this size cannot be accommodated. Additionally, certain shapes may be difficult or impossible to cut due to the physical constraints of the laser cutter’s beam.
It’s important to understand these limitations when planning your designs for laser cutting.
Can a laser cutter be used for engraving or etching designs onto materials?
Yes, a laser cutter can be used for engraving or etching designs onto materials. Laser cutter applications include engraving intricate designs onto various materials such as wood, acrylic, glass, and metal. Laser cutter technology offers precise and detailed results, making it a popular choice compared to traditional engraving methods. With a laser cutter, you can achieve intricate designs with high accuracy and efficiency, making it a versatile tool for various creative applications.
Conclusion
Now that you’ve followed the 9 steps for a successful workflow and integration with laser cutter software, you’re ready to conclude your project.
By understanding the basics of laser cutting and preparing your design files, you’ve set yourself up for success.
Setting up the laser cutter and testing and adjusting along the way ensures precise and accurate cuts.
Once you start the cutting process, post-processing and finishing will give your final product a polished and professional look.
Congratulations on completing your project with finesse and precision!