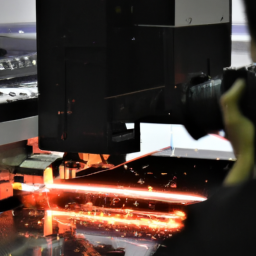
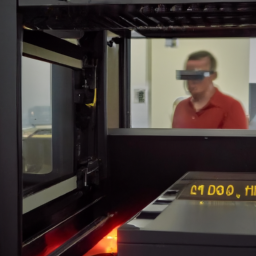
Coincidentally, just as you’re about to start your latest laser cutting project, you encounter a frustrating issue with your machine. Don’t panic! Laser cutter issues are a common occurrence, but fortunately, troubleshooting them doesn’t have to be a daunting task.
In this article, we will delve into the top ten common laser cutter issues and provide you with precise, detailed solutions to get your machine back up and running in no time.
From cutting accuracy problems to engraving depth issues, software glitches to machine overheating, material ignition or burning to alignment problems, we will cover it all.
With a second person point of view, we’ll guide you through each problem, step by step, in an active voice that is easy to follow.
By the end of this article, you’ll have the knowledge and confidence to troubleshoot any laser cutter issue that comes your way.
So let’s dive in and unlock the secrets to a smooth and successful laser cutting experience.
Key Takeaways
- Cutting accuracy problems can be caused by cutting speed and material selection, and can be resolved by optimizing power and speed settings.
- Engraving depth issues can be solved by adjusting the laser beam focus.
- Software glitches can be resolved by updating or reinstalling the software, and compatibility issues between software and operating system should be checked.
- Machine overheating can be prevented by checking the cooling system, removing airflow obstructions, cleaning air vents and exhaust fan, and inspecting and replacing clogged or damaged air filters.
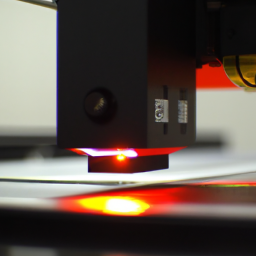
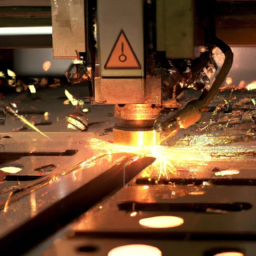
Cutting Accuracy Problems
Cutting accuracy problems can be a real headache, but with a little troubleshooting, you can cut through the fog and find the light at the end of the tunnel.
One common issue is cutting speed optimization. If the cutting speed is too high, the laser can skip over small details, resulting in inaccuracies. On the other hand, if the speed is too low, the laser may spend too much time in one area, causing excessive heat that can distort the material. To solve this problem, you should experiment with different cutting speeds and find the optimal setting for your specific material.
Another factor affecting cutting accuracy is material selection. Different materials require different laser power and speed settings. Make sure you have selected the appropriate settings for the material you are working with.
By carefully optimizing cutting speed and selecting the right material, you can ensure precise and accurate cuts.
Now let’s move on to the next issue – engraving depth problems.
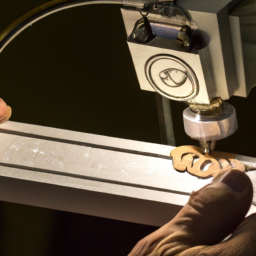
Engraving Depth Issues
To troubleshoot engraving depth issues, there are three key points to consider.
First, adjust the focus of the laser beam to ensure it’s properly hitting the material surface.
Second, check the power and speed settings to make sure they’re appropriate for the material being engraved.
Finally, clean both the engraving area and the surface of the material to remove any debris or residue that may be affecting the depth of the engraving.
Adjust the Focus of the Laser Beam
One of the key steps in optimizing your laser cutter’s performance is ensuring that the focus of the laser beam is properly adjusted. Focus adjustment is essential for achieving accurate engraving depth and crisp, clean cuts.
To adjust the focus, start by aligning the laser beam with the focal point of the lens. This can be done by using a focus tool provided by the manufacturer or by manually adjusting the lens position until the beam is at its sharpest.
Keep in mind that different materials may require different focus settings, so it’s important to test and fine-tune the focus for each specific job.
Once the focus is properly adjusted, you can move on to checking the power and speed settings to ensure optimal laser performance.
Check the Power and Speed Settings
Don’t you just love it when the power and speed settings on your laser cutter magically adjust themselves to perfection? Unfortunately, that rarely happens. Power and speed optimization is a crucial aspect of laser cutting, and understanding how to troubleshoot errors related to these settings can save you time and frustration. To help you with this, here’s a table that outlines some common power and speed issues and their possible solutions:
| Power and Speed Issue | Possible Solution |
|---|---|
| Insufficient Power | Increase the power setting or check for power supply issues. |
| Excessive Power | Decrease the power setting or check for overloading. |
| Inconsistent Speed | Calibrate the speed settings or check for mechanical problems. |
| Slow Cutting Speed | Increase the speed setting or check for material compatibility. |
Now that you have a better understanding of power and speed optimization, let’s move on to the next step: cleaning the engraving area and material surface.
Clean the Engraving Area and Material Surface
Maintaining a clean engraving area and material surface is essential for optimal laser cutting performance. Proper surface preparation ensures that the laser can accurately and efficiently cut through the material. Before starting any cutting job, it’s crucial to clean the engraving area thoroughly.
Remove any debris, such as dust, dirt, or loose material, using a gentle brush or compressed air. For the material surface, wipe it down with a clean, lint-free cloth to remove any oils, fingerprints, or residues that could interfere with the laser cutting process. Depending on the material, you may need to use specific cleaning techniques, such as using isopropyl alcohol for acrylic or acetone for certain plastics.
Ensuring a clean engraving area and material surface will help prevent issues such as incomplete cuts or uneven engraving.
Now, let’s move on to addressing potential software glitches.
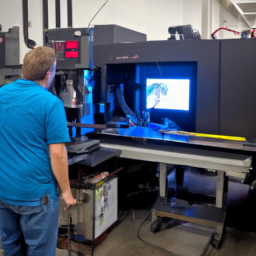
Software Glitches
To troubleshoot software glitches on your laser cutter, there are several key points to consider. First, you should try updating or reinstalling the software to ensure that you have the latest version and that any bugs have been fixed.
Additionally, check for compatibility issues between the software and your operating system or other hardware components.
Finally, if the previous steps don’t resolve the issue, you can try resetting the laser cutter settings to their default values, as this can sometimes fix software-related problems.
Update or Reinstall the Software
If you’re having trouble with your laser cutter, you absolutely must update or reinstall the software to avoid any catastrophic laser cutting failures. Neglecting to update or reinstall the software can lead to glitches, errors, and overall poor performance of your laser cutter. Here are three reasons why updating or reinstalling the software is crucial:
-
Improved Functionality: Updating the software ensures that you have access to the latest features and improvements, allowing for smoother and more efficient laser cutting processes.
-
Bug Fixes: Software updates often include bug fixes that address known issues and vulnerabilities, reducing the likelihood of unexpected errors or malfunctions during your laser cutting projects.
-
Compatibility with Newer Systems: Reinstalling the software ensures compatibility with newer operating systems and hardware, preventing any conflicts that may arise due to outdated software.
By updating or reinstalling the software, you can ensure optimal performance and avoid potential problems.
Now, let’s move on to the next section and check for compatibility issues.
Check for Compatibility Issues
Now, let’s dive into the world of compatibility and see if your laser cutter is playing nice with your other devices.
Laser compatibility is crucial to ensure smooth operation and prevent potential issues. First, check if your laser cutter meets the machine requirements of the software you’re using. Verify the supported operating systems, processor speed, and RAM capacity.
Also, ensure that the software version is compatible with your laser cutter’s firmware. If there are compatibility issues, you may need to update your laser cutter’s firmware or find alternative software that’s compatible.
Once you’ve addressed any compatibility issues, you can proceed to the next section about resetting the laser cutter settings.
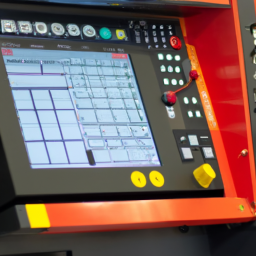
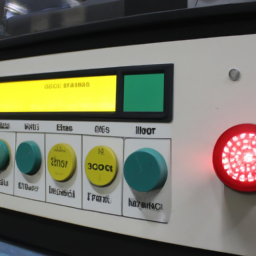
Reset the Laser Cutter Settings
Imagine yourself standing in front of a mysterious door, waiting to enter a room where all the settings of your laser cutter are about to be reset. It’s time to reset the laser cutter settings and fix any issues that may have occurred.
Resetting parameters is a common troubleshooting technique that can solve various problems, such as incorrect power levels or speed settings. By resetting the machine, you can ensure that all the settings are back to their default values, eliminating any potential conflicts or errors.
This process is usually done through the control panel or software interface of the laser cutter. Once the reset is complete, you can move on to the next step, addressing the issue of machine overheating, which can cause significant problems if not resolved promptly.
Machine Overheating
To prevent machine overheating, you should first check the cooling system by ensuring that all fans and vents are working properly and free from dust or debris.
Additionally, be sure to remove any obstructions to airflow, such as materials or objects placed too close to the machine.
Finally, it’s important to reduce the workload or take breaks between jobs to give the machine time to cool down and prevent overheating.
By following these steps, you can effectively troubleshoot and prevent issues related to machine overheating.
Check the Cooling System
First, make sure to check if the cooling system is functioning properly to avoid potential problems with your laser cutter. Proper cooling system maintenance is crucial for the efficient operation of your machine.
Start by inspecting the coolant level and ensuring there are no leaks or blockages in the system. Check if the coolant pump is running smoothly and that the cooling fan is functioning correctly. Additionally, clean the cooling fins and radiator to remove any dust or debris that may obstruct airflow.
It’s essential to troubleshoot the cooling system regularly to prevent overheating, which can lead to various issues such as decreased cutting quality and even damage to the laser cutter. By maintaining a well-functioning cooling system, you can ensure optimal performance and longevity of your machine.
Now, let’s move on to the next section and learn how to remove any obstructions to airflow.
Remove Any Obstructions to Airflow
Ensure that there aren’t any obstacles blocking the airflow, as proper ventilation is vital for maintaining your machine’s efficiency.
To troubleshoot airflow obstruction issues, follow these techniques:
-
Check for any debris or dust buildup in the air vents and exhaust fan. Clean them regularly to prevent blockages.
-
Inspect the air filters and replace them if they’re clogged or damaged. Clean filters allow for better airflow and prevent overheating.
-
Verify that the exhaust duct is properly connected and not bent or kinked. Obstructions in the duct can restrict the airflow and lead to performance issues.
By addressing any airflow obstructions promptly, you can ensure that your laser cutter operates optimally.
Now, let’s move on to the next section, which discusses the importance of reducing the workload or taking breaks between jobs.
Reduce the Workload or Take Breaks Between Jobs
To ensure optimal performance of your laser cutter, it is crucial to address common issues that may arise. In the previous section, we discussed the importance of removing any obstructions to airflow. Now, let’s delve into another crucial aspect: reducing the workload or taking breaks between jobs. By doing so, you can effectively reduce laser downtime and optimize laser cutting efficiency.
To help you visualize the impact of reducing the workload or taking breaks, let’s consider the following table:
| Workload | Laser Downtime | Laser Cutting Efficiency |
|---|---|---|
| High | High | Low |
| Moderate | Moderate | Moderate |
| Low | Low | High |
As you can see, by managing your workload and allowing breaks between jobs, you can significantly improve the efficiency of your laser cutter. With this in mind, let’s now explore the next section: material ignition or burning, and how to troubleshoot it effectively.
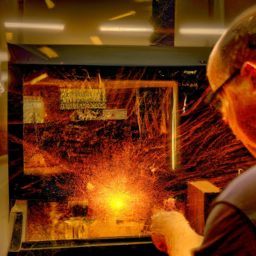
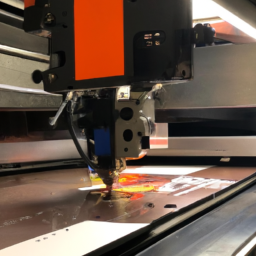
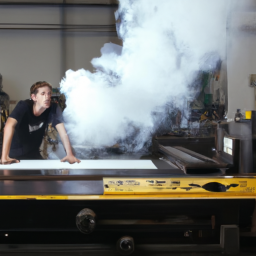
Material Ignition or Burning
One of the most concerning issues with laser cutters is when materials catch fire or burn, potentially causing serious damage. Preventing material ignition is crucial for the safety of both the machine and the operator.
To troubleshoot burning issues, start by ensuring that the laser cutter is properly calibrated and that the correct power settings are being used for the specific material. Additionally, make sure that the material being used is suitable for laser cutting and that it isn’t too thick or doesn’t contain any flammable components.
Proper ventilation and exhaust systems should also be in place to remove any smoke or fumes that may ignite. If material ignition or burning continues to be a problem, it’s recommended to consult the laser cutter’s manual or contact the manufacturer for further assistance.
Moving onto the next section, alignment problems can also cause significant issues with laser cutters.
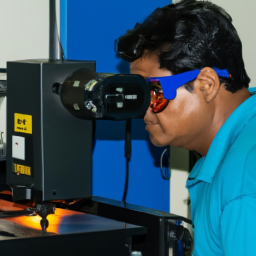
Alignment Problems
Alignment problems can lead to frustrating and inaccurate results when using a laser cutter. Laser alignment plays a crucial role in ensuring that the laser beam is focused accurately on the desired cutting path. When alignment issues arise, it’s essential to follow specific troubleshooting steps to rectify the problem.
First, check the mirrors and lenses for dirt, debris, or damage that may affect the laser’s path. Clean or replace them as necessary.
Next, inspect the laser head and rails to ensure they’re properly aligned and secure. Make any necessary adjustments or tighten loose components.
Additionally, calibrate the laser cutter according to the manufacturer’s instructions to ensure optimal alignment.
Regularly maintaining and checking the alignment of your laser cutter will help prevent alignment problems and ensure accurate and precise cutting results.
Frequently Asked Questions
How can I prevent the laser cutter from overheating during prolonged use?
To prevent the laser cutter from overheating during prolonged use and maintain its performance, there are a few key steps you can take.
First, ensure proper ventilation by keeping the machine in a well-ventilated area.
Regularly clean the air filters and exhaust system to prevent debris buildup.
Additionally, monitor the temperature of the laser tube and coolant levels to prevent overheating.
Implementing these measures will help you avoid potential issues and ensure smooth operation of the laser cutter.
Is there a way to troubleshoot alignment problems without professional assistance?
To troubleshoot alignment problems at home without professional assistance, you can try some DIY alignment techniques. Start by checking the mirrors and lenses for any dirt or debris that may be obstructing the laser beam. Clean them carefully using a lens cleaning solution and a lint-free cloth.
Next, ensure that the laser head is properly aligned with the cutting bed. Make small adjustments using the alignment screws until the laser beam is centered and focused correctly.
What are some common software glitches that laser cutter users encounter?
Common causes of laser cutter software glitches include outdated software, incompatible file formats, and system errors.
To troubleshoot these issues, start by updating the software to the latest version. Ensure that you’re using file formats supported by the laser cutter software.
Additionally, check for any system errors and restart both your computer and the laser cutter. If the problem persists, consult the user manual or contact customer support for further assistance.
Can engraving depth issues be resolved by making adjustments to the machine’s settings?
Engraving depth issues can often be resolved by making adjustments to the machine’s settings. Firstly, you can try adjusting the engraving speed. Slower speeds can result in deeper engravings, while faster speeds can produce shallower ones.
Additionally, focal length adjustments can also impact engraving depth. By adjusting the focal length, you can achieve greater precision and control over the depth of the engraving.
It’s important to carefully experiment with these settings to achieve the desired engraving depth.
What precautions should I take to avoid material ignition or burning while using a laser cutter?
To prevent material ignition and avoid burning while using a laser cutter, take precautions that will keep your work safe and pristine.
Shield the surrounding area with non-flammable materials to create a barrier against potential hazards.
Adjust the laser’s power settings to match the material’s properties, which is crucial.
Keep a close eye on the cutting process and ensure proper ventilation to minimize the risk of combustion.
Prioritize safety measures to guarantee a smooth laser cutting experience.
Conclusion
In conclusion, troubleshooting common laser cutter issues requires a keen eye for precision and a methodical approach. By addressing cutting accuracy problems and engraving depth issues, as well as software glitches and machine overheating, you can ensure smooth and efficient operation of your laser cutter.
Another important issue to consider is material ignition, which can be a safety hazard. Additionally, alignment problems can affect the overall performance of the machine.
Just like a skilled surgeon, you must delicately navigate through these obstacles to restore your machine’s functionality. So, grab your tools and embark on this laser cutter repair journey, where every tweak and adjustment symbolizes your determination to conquer any challenge that comes your way.