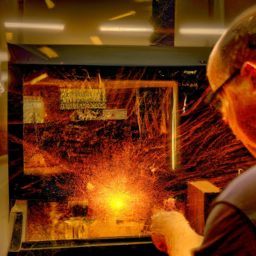
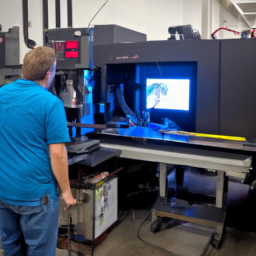
Did you know that laser cutters are used in a wide range of industries, from manufacturing to architecture, and even in the creation of intricate artwork? These powerful machines are capable of cutting and engraving various materials with precision and speed. However, like any other equipment, laser cutters can encounter issues that may hinder their performance and disrupt workflow.
That’s why it’s crucial to have a solid understanding of laser cutter troubleshooting. In this article, we will explore seven best practices that will help you identify and resolve common problems with laser cutters in the workplace. By following these practices, you can minimize downtime, improve efficiency, and ensure the longevity of your laser cutter.
So, let’s dive in and discover the key steps to keep your laser cutter running smoothly and effectively.
Key Takeaways
- Regular maintenance and cleaning are essential for optimal performance and longevity of laser cutters.
- Calibration and alignment procedures should be regularly performed to ensure accurate laser cutting.
- Updating software and firmware is crucial for enhancing productivity and addressing hardware-related issues.
- Following safety guidelines, using proper protective gear, and providing adequate employee training are necessary for safe operation and troubleshooting of laser cutters.
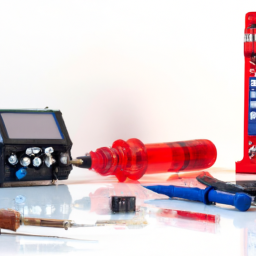
Regular Maintenance and Cleaning
Regular maintenance and cleaning are essential tasks for ensuring the optimal performance and longevity of a laser cutter in the workplace. To maintain the machine’s efficiency, it’s crucial to follow a regular maintenance schedule.
This includes cleaning the laser cutter’s lens, mirrors, and bed to remove any debris or residue that may affect the cutting quality. Regularly inspect and replace worn-out parts, such as belts or filters, to prevent malfunctions. Additionally, lubricate the moving parts to reduce friction and ensure smooth operation.
Cleaning the air assist system is equally important to maintain proper airflow and prevent overheating. By adhering to these regular maintenance practices, you can maximize the laser cutter’s lifespan and minimize the risk of unexpected breakdowns.
Now, let’s move on to the next section and check the power supply.
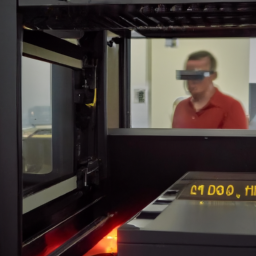
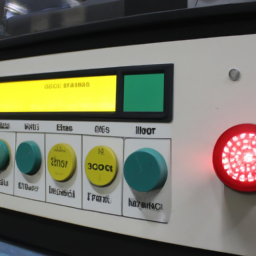
Power Supply Check
To ensure your laser cutter is running smoothly, you must regularly inspect and test the power supply. Any malfunction can cause frustration and delay your work. Power supply testing is a crucial part of laser cutter troubleshooting techniques.
Begin by visually inspecting the power supply for any signs of damage or loose connections. Next, use a multimeter to measure the voltage output from the power supply. Compare the measured values to the manufacturer’s specifications to determine if the power supply is functioning correctly. If the voltage readings are outside the recommended range, it may indicate a faulty power supply that needs to be repaired or replaced.
Additionally, check the fuse and circuit breaker to ensure they’re not tripped or blown. By conducting regular power supply checks, you can prevent potential issues and maintain optimal laser cutter performance.
Moving on to calibration and alignment, it’s important to ensure precise settings for accurate laser cutting.
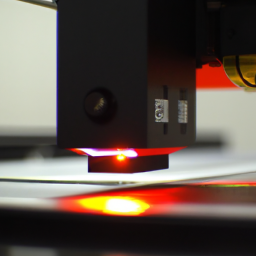
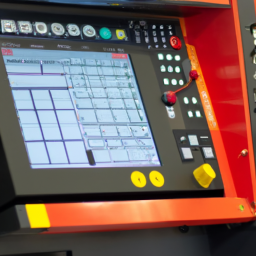
Calibration and Alignment
Make sure you fine-tune the settings and line up the components with precision for a seamless and flawless laser cutting experience. Calibration techniques and alignment procedures are crucial in ensuring the accuracy and quality of your laser cuts. To achieve optimal results, begin by calibrating the laser power and speed settings based on the material being cut. This involves adjusting the power and speed until the desired results are achieved. Next, perform alignment procedures to ensure that the laser beam is properly aligned with the cutting head and that the focal point is precisely positioned. This will prevent uneven cuts and ensure clean edges. Regularly check and adjust the mirrors and lenses to maintain accurate beam alignment. Additionally, consider using a 2 column and 4 row table like the one below to track and document your calibration and alignment procedures, helping you keep a record of your settings and adjustments.
| Calibration Techniques | Alignment Procedures |
|---|---|
| Power and speed adjustments | Laser beam alignment |
| Mirrors and lenses check | Focal point positioning |
| Material-specific calibration | Precise component alignment |
| Regular maintenance and adjustment | Clean edges and uniform cuts |
By implementing these calibration and alignment techniques, you can optimize your laser cutter’s performance. In the next section, we will discuss the importance of software and firmware updates in ensuring the continued efficiency of your laser cutter.
Software and Firmware Updates
To ensure optimal performance and functionality of your laser cutter, it’s crucial to regularly install the latest software updates. These updates often include bug fixes, new features, and improvements that can enhance your productivity.
Additionally, updating the firmware of your laser cutter is equally important as it can address any hardware-related issues and optimize the machine’s performance.
Lastly, it’s essential to check for compatibility issues between the software, firmware, and any other connected devices to avoid any potential conflicts that may hinder the smooth operation of the laser cutter.
Install the latest software updates
By updating the laser cutter’s software regularly, you can ensure optimal performance and minimize the risk of any technical issues. Laser cutter maintenance is crucial for smooth operations in the workplace.
To update the software, follow these troubleshooting techniques. First, check the manufacturer’s website for the latest software version. Download the update and save it to a USB drive. Insert the USB drive into the laser cutter and navigate to the software update menu. Follow the on-screen instructions to complete the installation process.
Updating the software will provide bug fixes, new features, and improved compatibility with other software.
Once the software update is complete, you can proceed to the next step of updating the firmware of the laser cutter, ensuring your equipment is up to date and running efficiently.
Update the firmware of the laser cutter
To ensure your laser cutter is running at its best and taking advantage of all the latest features, take a moment to update the firmware. Updating the firmware is a critical step in laser cutter troubleshooting techniques. By updating the firmware, you can resolve any bugs or performance issues that may be affecting the cutter’s functionality.
Here are some reasons why updating the firmware is important:
- Improved performance: Firmware updates often include optimizations that can enhance the overall performance of the laser cutter, enabling it to work faster and more efficiently.
- Bug fixes: Firmware updates address any known bugs or glitches, ensuring a smoother and more reliable operation.
- New features: Updating the firmware can unlock additional functionalities and features that weren’t available in previous versions.
- Compatibility improvements: Firmware updates may also improve compatibility with other software or hardware components, reducing the chances of compatibility issues.
By keeping the firmware up to date, you can prevent potential issues and ensure your laser cutter operates at its full potential.
Moving on to the next section, let’s check for compatibility issues.
Check for compatibility issues
Take a moment to ensure that your laser cutter is compatible with all necessary software and hardware components. Compatibility testing is crucial to avoid any issues during the laser cutting process. Start by checking the software compatibility of your laser cutter. Ensure that the software you are using is compatible with the firmware version installed on the machine. Outdated software can lead to errors and malfunctions. Similarly, check for hardware compatibility. Verify that all the hardware components, such as the computer, operating system, and connectors, are compatible with the laser cutter’s requirements. To help you understand the compatibility requirements, refer to the table below:
| Component | Required Specification | Compatible Specification |
|---|---|---|
| Operating System | Windows 10 | Windows 7 |
| Computer | 8GB RAM | 4GB RAM |
| Connector | USB 3.0 | USB 2.0 |
Ensuring compatibility between your laser cutter and software/hardware components will minimize potential issues and optimize the cutting process. In the next section, we will explore troubleshooting common issues without skipping a beat.
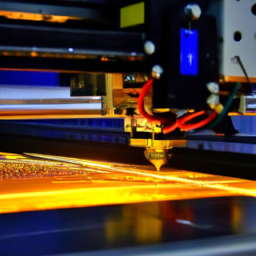
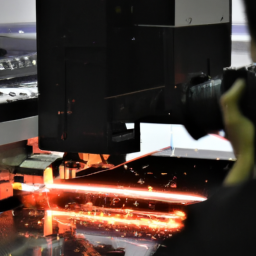
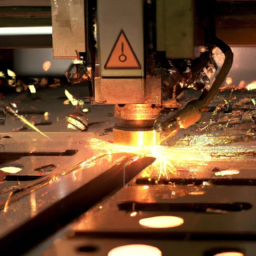
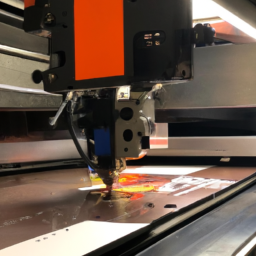
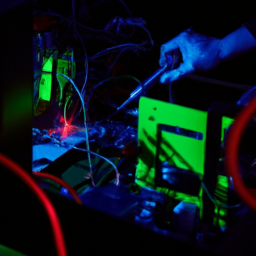
Troubleshooting Common Issues
To troubleshoot cutting or engraving problems, you need to identify the root cause of the issue. This could be related to the laser beam intensity, cutting bed, or material alignment. By resolving issues with the laser beam intensity, you can ensure that the cutting or engraving is done accurately.
In addition, fixing problems with the cutting bed or material alignment is crucial for precise and consistent results.
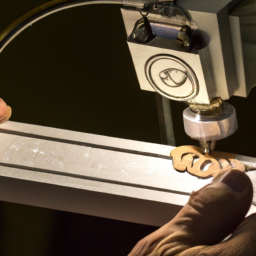
Identify and troubleshoot cutting or engraving problems
Experiencing frustrating cutting or engraving issues with your laser cutter? Look no further, as we delve into identifying and troubleshooting these problems to help you regain your artistic brilliance.
Follow these steps to troubleshoot cutting or engraving problems with your laser cutter:
-
Check Laser Settings: Ensure that the laser power, speed, and frequency settings are appropriate for the material you’re working with. Adjust them as needed to achieve optimal results.
-
Identify Material Compatibility: Different materials require different laser settings. Make sure the material you’re using is compatible with your laser cutter. Consult the manufacturer’s guidelines or conduct tests on a small sample before proceeding.
-
Inspect Optics: Check for any dust, debris, or damage on the lens, mirrors, and other optical components. Clean or replace them if necessary to maintain the quality of the laser beam.
-
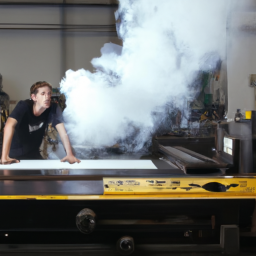
Monitor Exhaust System: A clogged or faulty exhaust system can cause cutting or engraving issues. Ensure that the exhaust system is properly functioning to remove fumes and debris from the cutting area.
By following these troubleshooting steps, you can resolve issues with the laser beam intensity and achieve accurate cutting or engraving results.
Resolve issues with the laser beam intensity
Now, let’s delve into resolving issues with the laser beam intensity. Maintaining optimal laser beam intensity is crucial for achieving accurate and clean cuts or engravings.
One essential aspect to consider is laser tube maintenance. Regularly inspecting and cleaning the laser tube ensures its longevity and consistent performance. Additionally, proper lens cleaning is equally important. Dust, debris, or residue on the lens can obstruct the laser beam and result in inconsistent cutting or engraving quality. Carefully clean the lens using a lint-free cloth and a non-abrasive lens cleaner. Remember to handle the lens delicately to avoid scratches or damage.
By diligently maintaining the laser tube and keeping the lens clean, you can ensure optimal laser beam intensity and achieve excellent cutting or engraving results.
Now, let’s move on to fixing problems with the cutting bed or material alignment.
Fix problems with the cutting bed or material alignment
One common issue with the cutting bed or material alignment is when the material starts to wander off course, like a lost driver on a winding road. This can happen due to various reasons, such as a misaligned cutting bed or improperly calibrated material guides.
To fix this problem, start by checking the alignment of the cutting bed and adjusting it if necessary. Next, ensure that the material guides are properly aligned and tightened. If the issue persists, it could be related to the cooling system or the laser tube.
Check the cooling system for any clogs or malfunctions and resolve them accordingly. Additionally, inspect the laser tube for any signs of damage or degradation and replace it if necessary. By addressing these problems, you can ensure precise and accurate cutting.
Moving on to safety precautions, it’s important to follow certain guidelines to protect yourself and others from potential hazards.
Safety Precautions
To ensure the safety of all employees, it’s crucial to follow safety guidelines and protocols when operating a laser cutter. This includes using proper protective gear such as safety glasses, gloves, and aprons.
Additionally, it’s important to train employees on safe operation and troubleshooting techniques to minimize the risk of accidents or injuries.
Follow safety guidelines and protocols
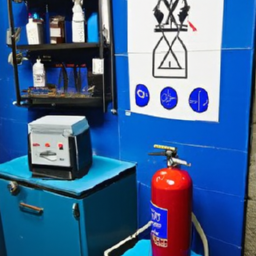
Make sure you’re familiar with and following all the safety guidelines and protocols when troubleshooting the laser cutter in your workplace. It’s crucial to prioritize safety to prevent accidents and ensure a secure working environment. Here are three essential safety measures to keep in mind:
-
Safety equipment: Always wear the appropriate safety gear, such as safety glasses, gloves, and a lab coat, when working with the laser cutter. These items will protect you from potential hazards, such as laser radiation and flying debris.
-
Emergency procedures: Familiarize yourself with the emergency protocols specific to your workplace. This includes knowing the location of emergency exits, fire extinguishers, and first aid kits. Be prepared to respond quickly and effectively in case of an emergency.
-
Regular maintenance: Regularly inspect the laser cutter for any signs of damage or malfunction. Report any issues to your supervisor immediately to prevent the risk of accidents.
To ensure your safety, it’s crucial to use proper protective gear when troubleshooting the laser cutter.
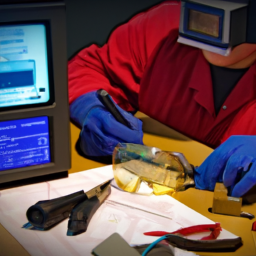
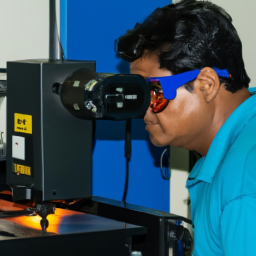
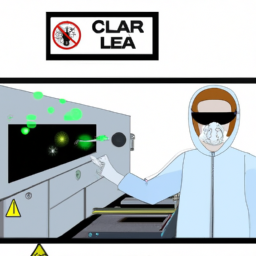
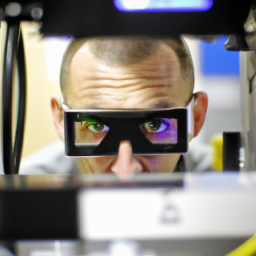
Use proper protective gear
Ensuring your own safety is a must, so don’t forget to gear up with the right protective equipment when tinkering with the laser cutter. To safeguard your eyes from potential harm, always wear protective eyewear specifically designed for laser work. These goggles are made with specialized lenses that can filter out harmful laser beams, preventing any damage to your vision.
Additionally, proper ventilation is crucial to ensure a safe working environment. The laser cutter produces fumes and smoke that can be hazardous if inhaled. Install an effective ventilation system that can efficiently remove these pollutants from the air, preventing any respiratory issues.
By wearing protective eyewear and ensuring proper ventilation, you can minimize the risk of accidents and injury when operating the laser cutter.
Transitioning into the next section, it’s equally important to train employees on safe operation and troubleshooting techniques to maintain a secure workplace.
Train employees on safe operation and troubleshooting techniques
Now that you understand the importance of wearing proper protective gear, it’s equally crucial to train employees on safe operation and troubleshooting techniques when it comes to laser cutters in the workplace. Employee training plays a vital role in maintaining a safe working environment and minimizing potential risks.
By providing comprehensive training, you ensure that your employees are equipped with the knowledge and skills needed to operate laser cutters safely and effectively. This includes teaching them how to identify and troubleshoot common issues that may arise during the cutting process.
Training sessions should cover topics such as machine setup, maintenance procedures, emergency protocols, and proper handling of materials. By investing in thorough employee training, you not only promote a culture of safety but also reduce the likelihood of accidents and equipment damage.
Frequently Asked Questions
How often should the laser cutter’s lenses be replaced?
On average, the lenses of a laser cutter should be replaced every 6 to 12 months. Maintaining the laser cutter’s lenses is crucial for optimal performance and safety. Signs of lens wear include reduced cutting quality, decreased power, and increased beam divergence.
Regularly inspect the lenses for scratches, debris, or discoloration. Clean them with a lint-free cloth and lens cleaner as needed. Remember, timely lens replacement ensures precise and efficient laser cutting operations.
What is the recommended humidity level for the laser cutter’s operation?
The optimal humidity level for laser cutter operation is between 40% and 60%. High humidity can have detrimental effects on the performance of the laser cutter. It can cause the laser beam to scatter, resulting in reduced cutting precision and accuracy. Additionally, high humidity can lead to condensation on the lens, affecting its transparency and causing distortion.
Maintaining the recommended humidity level is crucial for ensuring optimal laser cutter performance and prolonging its lifespan.
Can I use materials other than wood and acrylic in the laser cutter?
Think outside the box and explore uncharted territory! While it might be tempting to experiment with alternative materials for laser cutting, it’s crucial to understand the limitations. The laser cutter is primarily designed for wood and acrylic, ensuring optimal performance, safety, and quality. Using other materials may compromise the precision and efficiency of the machine, leading to subpar results or even damage. Stick to the recommended options to ensure a smooth laser cutting experience.
How do I determine the appropriate laser power and speed settings for different materials?
To determine the appropriate laser power and speed settings for different materials, start by experimenting with small test cuts. Begin with low power and slow speed, gradually increasing until desired results are achieved.
Pay attention to the material’s reaction to the laser, such as melting or charring. Optimize laser performance by finding a balance between power and speed that provides clean, precise cuts without damaging the material.
Regularly calibrate and monitor the laser cutter to ensure consistent and accurate settings.
Are there any safety certifications or regulations that the laser cutter needs to comply with in the workplace?
To ensure a safe working environment, laser cutters must comply with stringent safety certifications and workplace regulations. These measures are as crucial as a superhero’s powers for defending against potential hazards.
Safety certifications, such as UL or CE, guarantee that the laser cutter meets specific safety standards.
Workplace regulations, such as OSHA guidelines, outline proper usage, maintenance, and training protocols.
Compliance with these certifications and regulations is paramount to protect employees and prevent accidents in the workplace.
Conclusion
In conclusion, following these seven best practices for laser cutter troubleshooting in the workplace is crucial for maintaining optimal performance and safety.
Regular maintenance and cleaning are essential to keep the machine in top condition.
Checking the power supply ensures consistent power delivery.
Calibration and alignment guarantee accurate cuts.
Keeping software and firmware up to date maximizes efficiency.
Troubleshooting common issues promptly prevents downtime.
Lastly, never underestimate the importance of safety precautions.
By adhering to these practices, you’ll be able to maximize productivity and ensure a seamless laser cutting experience.
Remember, safety should be your top priority, as even the smallest negligence can have catastrophic consequences.