Are you looking to maximize the longevity of your laser cutter while producing stunning engraving projects? Look no further! In this article, we will share five invaluable tips that will not only extend the lifespan of your laser cutter but also ensure the success of your engraving endeavors.
Maintaining your laser cutter is of utmost importance, and we will guide you on how to clean and maintain it regularly for optimal performance.
Additionally, we will delve into the correct settings for engraving, helping you achieve precise and flawless results.
Choosing the right materials is crucial, and we will provide expert advice on selecting the ideal ones for your engraving projects.
Furthermore, we will offer valuable insights on properly securing and positioning the material, monitoring the engraving process, and allowing sufficient cooling time.
By implementing these tips, you can be confident in the longevity and efficiency of your laser cutter, while achieving exceptional engraving results.
Key Takeaways
- Regular cleaning and maintenance are important for optimal performance.
- Test engraving settings on scrap material before starting a project.
- Choose the right materials to impact machine longevity.
- Monitor temperature levels with a temperature monitoring device.
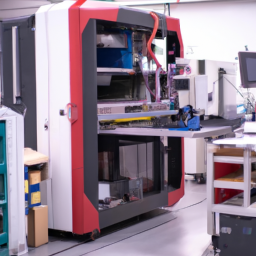
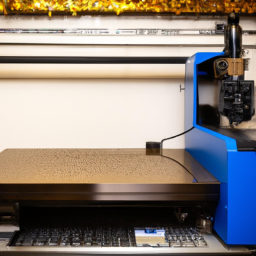
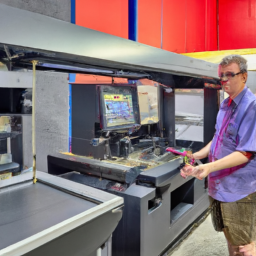
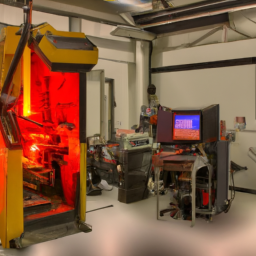
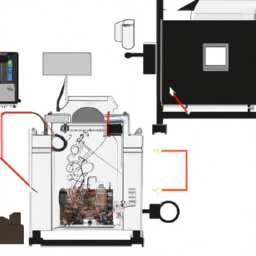
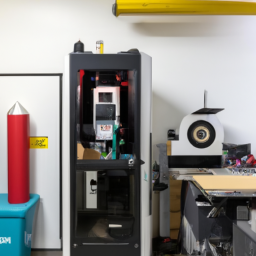
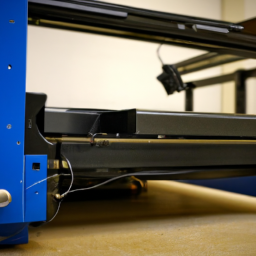
Clean and Maintain Your Laser Cutter Regularly
Don’t neglect the regular cleaning and maintenance of your laser cutter to ensure its longevity and avoid any potential breakdowns that could halt your engraving projects.
To keep your laser cutter in optimal condition, it’s crucial to implement proper cleaning methods. Start by removing any debris or residue from the cutting bed and lens using a soft cloth or brush.
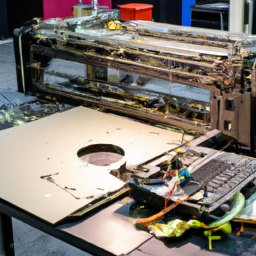
Additionally, make sure to clean the air assist nozzle and replace the water in the cooling system regularly. Ignoring these cleaning procedures can lead to decreased performance and potential damage to your laser cutter.
Furthermore, it’s important to be aware of common engraving mistakes, such as using incorrect power or speed settings, which can result in poor engraving quality or even damage to the machine.
By properly maintaining your laser cutter and avoiding common mistakes, you can ensure smooth engraving projects and extend the lifespan of your machine.
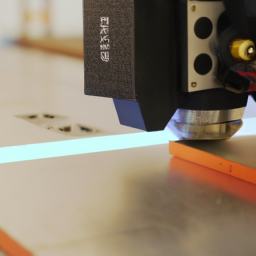
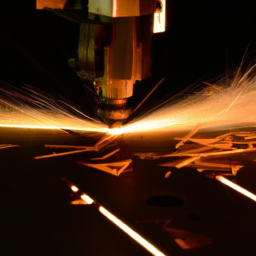
Use the Correct Settings for Engraving
To ensure optimal results when engraving, it’s crucial to use the correct settings on your laser cutter. Adjusting the power and speed settings is essential for achieving the desired depth and clarity in your engravings.
Before engraving on your final material, it’s always advisable to test engrave on scrap material to fine-tune the settings and ensure the best outcome.
Additionally, regularly calibrating your laser cutter will help maintain accuracy and consistency in your engravings.
Adjust Power and Speed Settings
When engraving projects, it’s important to adjust the power and speed settings to ensure the longevity of your laser cutter. Power and speed optimization is key to achieving the best engraving results and preventing any potential damage to the machine. Here are some essential tips to help you troubleshoot engraving issues and extend the lifespan of your laser cutter:
-
Find the right balance: Experiment with different power and speed combinations to determine the optimal settings for your specific material.
-
Start low and slow: Begin with lower power and slower speed settings, gradually increasing them until you achieve the desired engraving depth.
-
Consider material thickness: Adjust the power and speed based on the thickness of the material you’re engraving to avoid excessive burning or incomplete engraving.
-
Regular maintenance: Keep your laser cutter clean and perform routine maintenance to ensure smooth operation and prevent any power or speed issues.
-
Monitor for signs of wear: Regularly inspect the laser cutter for signs of wear and tear, such as degraded engraving quality or unusual noises.
By adjusting the power and speed settings properly, you can avoid potential problems and achieve optimal results.
Next, let’s discuss the importance of test engraving on scrap material.
Test Engraving on Scrap Material
Try giving your laser cutter a test run on some scrap material to ensure that you achieve the perfect engraving depth and quality. Testing engraving techniques on scrap material allows you to troubleshoot any potential issues before working on your final project. By doing so, you can adjust the power and speed settings, as well as the focus, to achieve the desired results. It is recommended to create a test grid on the scrap material, varying the power and speed settings for each square, and noting the outcome in a table for reference. This method helps you identify the optimal settings for different materials and engraving depths. Once you have successfully completed the test engravings, you can proceed to calibrate the laser cutter for your actual project.
Calibrate the Laser Cutter
Get ready to fine-tune your laser cutter by calibrating it for optimal performance. To achieve the highest level of accuracy, it’s crucial to calibrate the laser cutter.
Here are two key steps to help you calibrate your machine and optimize cutting speed:
-
Check the focal length: Make sure the laser is focused at the correct distance from the material. This will ensure precise engraving and cutting. Adjust the focal length by moving the lens up or down until you achieve the sharpest focus.
-
Set the power and speed: Calibrate the laser power and cutting speed based on the material you’re working with. Different materials require varying power levels and cutting speeds for optimal results. Experiment with different settings to find the right combination for each material.
By calibrating your laser cutter with accuracy and optimizing cutting speed, you’ll achieve the best possible results.
In the next section, we’ll discuss how to choose the right materials for engraving.
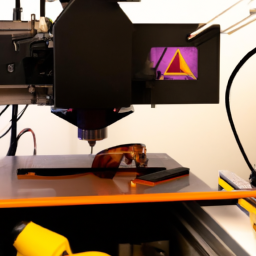
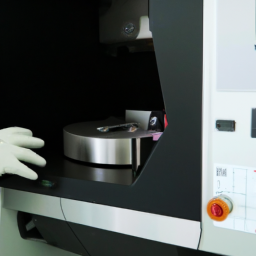
Choose the Right Materials for Engraving
To ensure your laser cutter lasts longer, it’s important to select the appropriate materials for engraving. This may alleviate concerns about damaging the machine or producing subpar results. Choosing suitable materials is crucial to achieve the desired outcome.
Opt for materials that are specifically designed for laser engraving, such as wood, acrylic, glass, or certain types of metal. These materials have been tested and proven to work well with laser cutters, ensuring clean and precise engraving.
Additionally, consider the engraving techniques and designs you plan to use, as some materials may be more suitable for intricate designs while others are better for larger, bolder engravings. By selecting the right materials, you can enhance the lifespan of your laser cutter while achieving optimal engraving results.
Now, let’s move on to the next section and discuss how to properly secure and position the material.
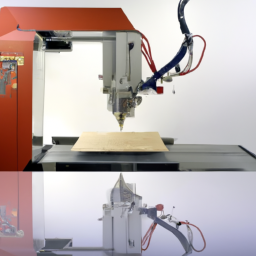
Properly Secure and Position the Material
To properly secure and position the material for engraving, use clamps or tape to firmly hold it in place. This will prevent any movement or shifting during the engraving process, ensuring accurate and precise results.
Additionally, make sure the material is level and straight to avoid any distortion or uneven engraving.
Finally, leave enough space around the material for the laser cutter to move freely without any obstructions, allowing it to navigate smoothly and complete the engraving with efficiency.
Use Clamps or Tape to Secure the Material
Using clamps or tape to secure the material is a total game-changer when it comes to extending the lifespan of your laser cutter. Not only does it ensure that the material stays in place during the engraving process, but it also prevents any movement or vibrations that could potentially damage the cutter or affect the accuracy of the design. When it comes to clamps, there are various alternatives available, such as spring clamps, toggle clamps, or even magnetic clamps. Alternatively, you can also use different adhesive options like double-sided tape or glue to secure the material. These options provide a strong hold without leaving any residue or marks on the surface. By securely fastening the material, you can confidently move on to the next step of ensuring that the material is level and straight without any interruptions.
Ensure the Material is Level and Straight
Securing the material properly not only helps prevent damage to the laser cutter but also ensures that the material remains level and straight throughout the engraving process, improving the accuracy of the design.
Interestingly, studies have shown that maintaining a level and straight material can increase the efficiency of laser cutting by up to 20%. To achieve this, utilize effective leveling techniques and alignment methods.
One popular method is using a level to check if the material is flat and adjust it accordingly. Additionally, ensure the material is aligned parallel to the laser cutter’s movement to avoid any deviations in the engraving.
By implementing these measures, you can enhance the precision and efficiency of your laser cutting projects.
Speaking of efficiency, another crucial aspect to consider is leaving enough space for the laser cutter to move, which we will discuss in the next section.
Leave Enough Space for the Laser Cutter to Move
Make sure there’s enough space for the laser cutter to move around, so it can work its magic without any restrictions. Space management is crucial to ensure optimal laser cutter mobility during the engraving process.
Before starting any project, carefully assess the available space in your workspace and plan accordingly. Ensure that there is ample room for the laser cutter to move in all directions without any obstructions. This will prevent any accidental collisions or damage to both the equipment and the material being engraved.
Additionally, leaving enough space for the laser cutter to move freely will also allow for easy access when loading and unloading materials. By effectively managing the space and ensuring proper laser cutter mobility, you can enhance the efficiency and lifespan of your engraving projects.
Transitioning into the subsequent section, it’s important to monitor the engraving process to ensure precise and accurate results.
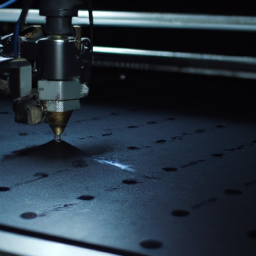
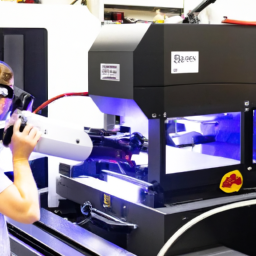
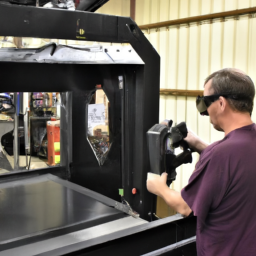
Monitor the Engraving Process
To ensure the longevity of your laser cutter, it is essential that you actively monitor the engraving process, paying close attention to any potential issues that may arise. By monitoring the progress of the engraving, you can catch and troubleshoot any problems before they escalate and cause damage to the machine. A helpful tool for monitoring is a 3×4 table that displays key parameters such as power level, engraving speed, materials used, and time elapsed. This table allows you to track the progress of the engraving and make adjustments if necessary. Additionally, it helps you identify any patterns or trends that may impact the performance of your laser cutter. By actively monitoring the engraving process, you can ensure the optimal performance and extend the lifespan of your machine. In the subsequent section about allowing sufficient cooling time, it is important to follow proper procedures to prevent overheating and damage to the laser cutter.
Allow Sufficient Cooling Time
To ensure the longevity of your laser cutter, it’s crucial to let the machine cool down between engravings. Overworking the laser cutter without allowing sufficient cooling time can lead to overheating and potential damage.
It’s essential to follow the manufacturer’s guidelines for cooling periods to prevent any adverse effects on the laser cutter’s performance.
Let the Laser Cutter Cool Down Between Engravings
Ensure that you allow the laser cutter sufficient time to cool down between engravings, as this practice will significantly prolong its lifespan.
Monitoring the engraving progress and preventing overheating are crucial steps in maintaining the health of your laser cutter. Laser cutting is a precise and intricate process that generates a considerable amount of heat. By allowing the laser cutter to cool down adequately, you prevent the internal components from becoming overheated, which can lead to damage or even system failure.
A good rule of thumb is to wait at least 10-15 minutes between consecutive engravings to ensure that the temperature has stabilized. This cooling period allows the laser cutter to dissipate heat and return to optimal operating conditions. By following this cooling protocol, you can avoid overworking the laser cutter and maintain its longevity.
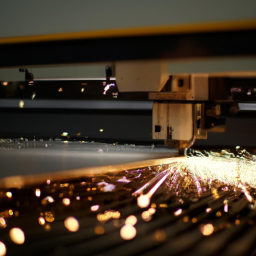
Avoid Overworking the Laser Cutter
Take breaks and give your laser cutter some rest to prevent it from being overworked and potentially breaking down. Overusing the laser cutter can lead to overheating issues and decrease its lifespan. To avoid these problems, follow these tips:
-
Set a maximum usage time: Limit the amount of time you use the laser cutter in one session to prevent it from overheating.
-
Schedule cooling periods: Take regular breaks to let the laser cutter cool down and prevent any internal components from getting too hot.
-
Monitor temperature levels: Use a temperature monitoring device to keep track of the laser cutter’s internal temperature and ensure it stays within safe limits.
By following these tips, you can avoid overworking the laser cutter and prevent overheating issues.
In the next section, we’ll discuss the importance of following the manufacturer’s guidelines for cooling periods.
Follow Manufacturer’s Guidelines for Cooling Periods
To ensure the longevity of your laser cutter, it’s crucial to follow the manufacturer’s guidelines for cooling periods. Overheating can lead to costly repairs and diminished performance. By adhering to these guidelines, you can maximize efficiency and prevent overheating.
The laser cutter is designed to handle specific workloads, and pushing it beyond its limits can have detrimental effects. After prolonged use, the laser cutter needs time to cool down and dissipate heat. This cooling period allows the components to rest and prevents any potential damage caused by excessive heat.
Ignoring these cooling recommendations may result in decreased cutting quality and even permanent damage to the machine. So, take the necessary precautions, allow the laser cutter to cool down, and extend its lifespan while maintaining optimal performance.
Frequently Asked Questions
What are the potential risks or dangers associated with engraving projects on a laser cutter?
When engraving projects on a laser cutter, there are potential risks and dangers that you need to be aware of. Safety precautions should be taken to minimize these risks.
Potential risks include fire hazards due to flammable materials, release of toxic fumes from certain materials, and the possibility of eye damage from laser radiation.
To safeguard against these risks, it’s important to use appropriate safety equipment, ensure proper ventilation, and follow the manufacturer’s guidelines for safe operation.
Can I use a laser cutter to engrave on any type of material, or are there specific materials I should avoid?
Engraving materials vary in compatibility with laser cutters. While some materials, like wood and acrylic, are commonly used and safe for engraving, others may pose risks. Avoid engraving on materials that contain PVC or other toxic substances, as they can release harmful fumes.
Additionally, certain metals and glass may require special techniques or equipment. Always prioritize safety precautions, such as proper ventilation and wearing protective gear, to ensure a successful and hazard-free engraving process.
How often should I clean and maintain my laser cutter to ensure optimal performance and longevity?
To ensure optimal performance and longevity of your laser cutter, it’s important to follow proper cleaning and maintenance practices. Cleaning frequency depends on your usage, but a general guideline is to clean the lens and mirrors weekly, and the exhaust system and filters monthly.
Regularly inspect and clean the machine’s interior and exterior, removing any debris or residue. Additionally, perform routine maintenance tasks such as calibrating the laser power and checking for loose or worn parts.
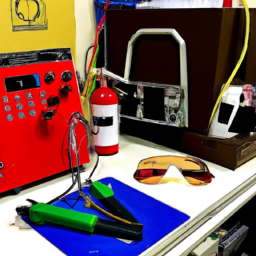
Are there any specific safety precautions I need to take while operating a laser cutter for engraving projects?
To ensure your safety and the longevity of your laser cutter during engraving projects, it’s crucial to take specific safety precautions.
First and foremost, provide proper ventilation to prevent the buildup of harmful fumes.
Additionally, wear appropriate protective gear such as safety glasses and gloves.
Familiarize yourself with emergency shutdown procedures and always operate the laser cutter in a well-lit area.
By adhering to these safety measures, you can enjoy worry-free engraving while safeguarding yourself and your equipment.
How long does it typically take for a laser cutter to cool down after an engraving session, and why is it important to allow sufficient cooling time?
After an engraving session, a laser cutter typically takes around 15-30 minutes to cool down. Allowing sufficient cooling time is crucial for the longevity of the laser cutter.
During the engraving process, the laser generates intense heat, which can cause damage if not properly cooled down. Adequate cooling time helps prevent overheating and ensures that the machine operates at optimal conditions. This is of utmost importance for the maintenance and overall performance of the laser cutter.
Conclusion
In conclusion, by following these 5 tips, you can ensure the longevity of your laser cutter while achieving excellent engraving results.
Regularly cleaning and maintaining your machine will prevent any buildup or damage.
Using the correct settings and materials will optimize the engraving process and enhance the final outcome.
Properly securing and positioning the material will minimize errors and ensure accurate engraving.
Monitoring the process and allowing sufficient cooling time will prevent overheating and potential damage.
By implementing these practices, you can confidently embark on your engraving projects with precision and expertise.