


Are you ready to turn your workshop into a laser-cutting paradise?
Imagine the thrill of transforming raw materials into beautiful home decor pieces that will impress even the most discerning eye. With these 7 best practices, you’ll be well-equipped to create intricate designs and flawless cuts that will elevate your craftsmanship to new heights.
By juxtaposing the power of modern technology with your artistic vision, laser cutting offers an unparalleled opportunity to bring your imagination to life. But to achieve the best results, you need to follow a set of tried-and-true techniques.
First, select the right materials to ensure that your creations are both visually stunning and durable.
Next, prepare your design files meticulously, ensuring they are optimized for laser cutting.
Calibration is a crucial step that guarantees precise and accurate cuts, so take the time to fine-tune your laser cutter.
Securing your material properly prevents any unwanted movement during the cutting process, while testing and adjusting allow you to perfect your technique.
Finally, pay attention to the finishing touches and assembly to create a polished end product.
With these best practices, your workshop will become a haven for laser-cutting enthusiasts, and your home decor pieces will leave everyone in awe.
Get ready to unleash your creativity and take laser cutting to the next level.
Key Takeaways
- Select the right materials for visually stunning and durable creations
- Prepare design files meticulously
- Calibration guarantees precise and accurate cuts
- Secure material properly to prevent unwanted movement
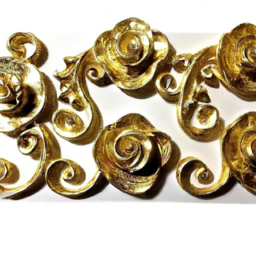
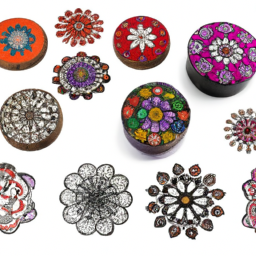
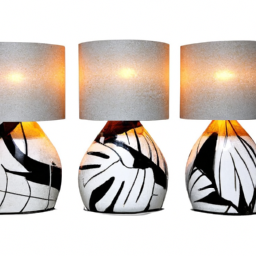
Choose the Right Materials
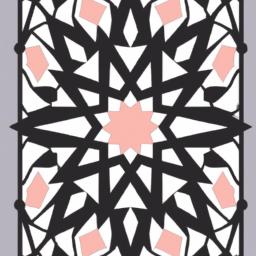
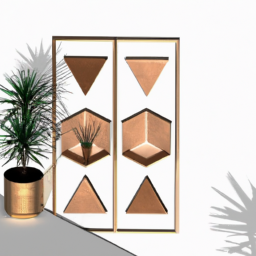
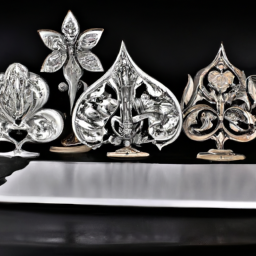
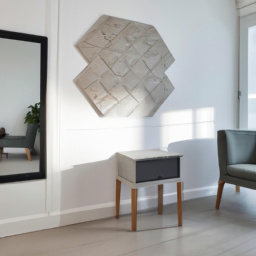
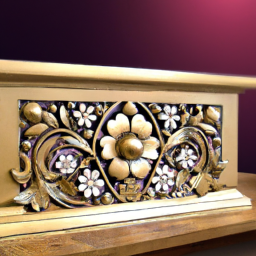
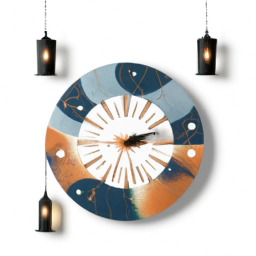
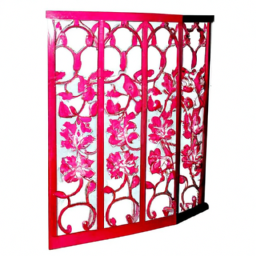
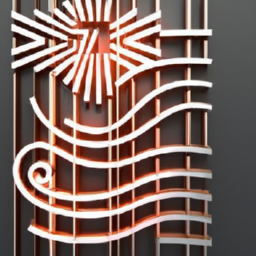
You’ll want to choose the right materials for laser cutting your home decor in the workshop. When it comes to eco-friendly options, consider materials like bamboo, cork, or reclaimed wood. These choices not only showcase your commitment to sustainability but also provide a unique aesthetic appeal.
Exploring unique material combinations can add depth and visual interest to your designs. For instance, combining wood with acrylic or metal can create stunning contrasts. Additionally, consider incorporating materials with different textures or finishes to enhance the overall look of your decor.
Once you have selected the perfect materials, it’s time to prepare your design files. Transforming your vision into reality is an exciting process, and meticulous preparation of your design files is crucial for a successful outcome.
Prepare Your Design Files
To prepare your design files for laser cutting home decor, you need to follow a few key points.
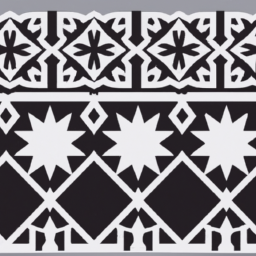
First, use vector graphics software to create your designs as it allows for precise and scalable graphics.
Next, it’s important to set the correct cutting parameters such as power, speed, and focus to ensure clean and accurate cuts.
Lastly, arrange your design in a way that maximizes efficiency, minimizing material waste and reducing cutting time.
Use Vector Graphics Software
When it comes to laser cutting home decor in the workshop, one essential tool to consider is using vector graphics software.
Vector graphics software allows you to create and edit designs that are precise and scalable, ensuring that your final product is of the highest quality. With this software, you can easily optimize your designs by adjusting the shapes, sizes, and positions of your elements. This is especially important when working with intricate patterns or delicate details.
By using vector graphics software, you can ensure that every cut is clean and accurate, resulting in a polished finished product. Once you’ve prepared your design files using this software, you can move on to the next step of the process: setting the correct cutting parameters.
Set the Correct Cutting Parameters
Once you’ve nailed the perfect cutting parameters, you’ll feel like a laser-cutting genius, effortlessly transforming raw materials into stunning works of art. Achieving the ideal cutting technique is crucial for creating precise and clean cuts in your home decor projects.
To ensure success, here are some troubleshooting tips to consider:
- Always start by testing the parameters on a scrap piece of material to avoid any mistakes on your final piece.
- Adjust the speed and power settings of the laser cutter according to the type and thickness of the material you’re working with.
- Use the appropriate focal length lens to optimize the beam’s focus and achieve the desired cutting depth.
By following these cutting parameters and troubleshooting tips, you’ll be well on your way to creating beautiful laser-cut home decor.
Now, let’s move on to the next step and discuss how to arrange your design for efficiency.
Arrange Your Design for Efficiency
Make sure you optimize the layout of your design to maximize efficiency and minimize waste. By arranging your design strategically, you can maximize productivity and optimize material usage.
Start by grouping similar shapes together and nesting them as closely as possible. This will reduce the amount of material needed and minimize the time it takes for the laser cutter to move between cuts.
Additionally, consider rotating your designs to fit more pieces on a single sheet of material. This will further maximize productivity and minimize waste. Remember to leave enough space between the pieces to ensure clean cuts and avoid any potential damage.
With an efficient design layout, you can now proceed to calibrate your laser cutter for the best results.
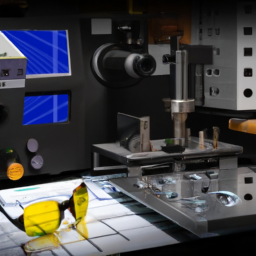
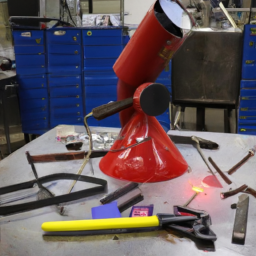
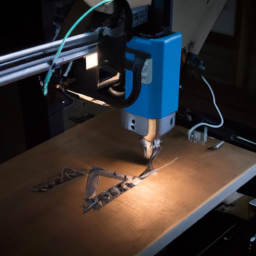
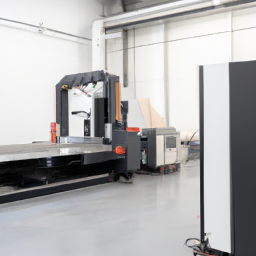
Calibrate Your Laser Cutter
To calibrate your laser cutter, you need to adjust the focus and power settings to ensure accurate and efficient cutting.
Test the cutting speed to find the optimal settings for your materials.
It’s also crucial to ensure proper ventilation and safety measures are in place to protect yourself and your workspace.
Adjust the Focus and Power Settings
Ensure that you’re adjusting the focus and power settings correctly to achieve precise laser cuts on your home decor projects. Here are three key points to consider:
-
Adjusting the focal length: This step is crucial as it determines the distance between the laser lens and the material. By finding the optimal focal length, you can ensure that the laser beam is focused at its finest point, resulting in sharp and clean cuts.
-
Optimizing power output: It’s essential to find the right balance between too much and too little power. Adjust the power settings according to the material’s thickness and density to prevent under or overcutting, ensuring that your home decor pieces are cut with precision.
-
Fine-tuning the settings: Take the time to experiment with different focus and power settings to achieve the desired outcome. Keep track of successful combinations for future reference.
By mastering the adjustment of focus and power settings, you’ll be ready to move on to the next step of testing the cutting speed and ensuring your laser cutter is optimized for spectacular results.
Test the Cutting Speed
Once you’ve got the focus and power settings dialed in, it’s time to put the pedal to the metal and test the cutting speed to see how fast and efficient your laser cutter can really be. Cutting precision is crucial in home decor projects, so it’s important to find the optimal speed that allows for clean and accurate cuts.
Start by selecting a test design or pattern that represents the complexity of your typical projects. Begin with a slower speed and gradually increase it until you find the sweet spot where the cuts are precise without any charring or burning. If you notice any issues during the test, such as incomplete cuts or excessive material damage, try troubleshooting techniques like adjusting the focus, power, or speed settings.
By fine-tuning the cutting speed, you can ensure the best results for your home decor creations. With the cutting speed optimized, it’s time to move on to ensuring proper ventilation and safety measures.
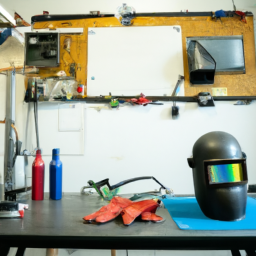
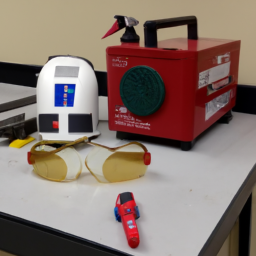
Ensure Proper Ventilation and Safety Measures
Now that you’ve tested the cutting speed, it’s time to ensure proper ventilation and implement safety measures in your workshop.
Ventilation is extremely important when laser cutting home decor. It helps remove harmful fumes and gases produced during the cutting process. Make sure your workshop is well-ventilated by opening windows or using exhaust fans to maintain a steady airflow.
Additionally, it’s crucial to wear appropriate safety gear like safety goggles and gloves to protect yourself from potential hazards. Keep a fire extinguisher nearby and have a first aid kit readily available in case of accidents.
By prioritizing ventilation and taking necessary safety precautions, you can create a safe working environment for laser cutting.
Now, let’s move on to the next section and discuss how to secure your material.
Secure Your Material
To ensure precise and accurate laser cutting, it’s essential to secure your material properly. Use clamps or tape to firmly hold the material in place, preventing any warping or movement during cutting.
This will help maintain the integrity of the design and ensure clean cuts without any distortions.
Use Clamps or Tape to Secure the Material
Use clamps or tape to fasten the material securely before laser cutting it in the workshop. This step is crucial to ensure that the material stays in place and doesn’t move during the cutting process.
When it comes to securing your material, you have two main options: clamps or tape. Clamps provide a strong and reliable hold, especially for thicker or heavier materials. They come in various sizes and styles to accommodate different materials and shapes.
On the other hand, tape is a versatile alternative that works well for lighter materials or when clamps aren’t available. You can use double-sided tape or masking tape to secure the material firmly onto the cutting bed.
Regardless of which method you choose, the goal is to prevent any warping or movement during cutting, which could compromise the accuracy and quality of your final product.
Transitioning into the next section, it’s also important to avoid warping or movement during the cutting process to ensure precise and clean cuts.
Avoid Warping or Movement During Cutting
Ensure that your material remains stable and stationary throughout the cutting process to achieve precise and flawless results. Preventing material damage and troubleshooting common issues related to warping and movement is crucial for successful laser cutting.
To prevent warping, make sure to use a stable and flat cutting surface. If your material is prone to warping, consider using weights or clamps to secure it in place. Additionally, tape can be used to hold down smaller pieces.
If you notice any movement during cutting, stop the process immediately and adjust the material to prevent further damage. By taking these precautions, you can minimize the risk of warping or movement and ensure accurate cuts.
In the next section, we will discuss how to test and adjust your laser cutting settings for optimal results.
Test and Adjust
Fine-tune the laser settings for your home decor projects, adjusting the power and speed until the beam glides effortlessly through the material like a knife through butter.
To ensure optimal results, it’s essential to experiment with different adjustment techniques and troubleshooting tips.
Start by conducting test cuts on scrap materials similar to your project. This will allow you to gauge the laser’s performance and make necessary adjustments. Pay attention to the depth and quality of the cut, ensuring it’s clean and precise.
If you notice any issues such as burning, charring, or incomplete cuts, make incremental changes to the power and speed settings until you achieve the desired outcome.
Once you’ve mastered the ideal laser settings, you can confidently move on to the next section about finishing and assembly, completing your stunning home decor pieces.
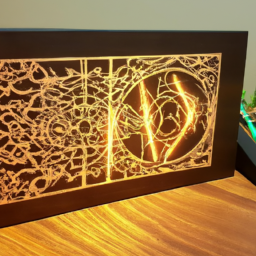
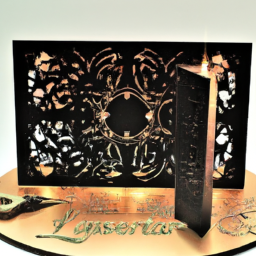
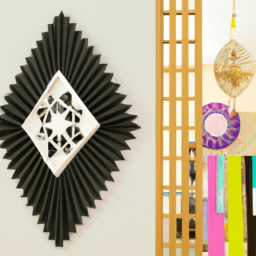
Finishing and Assembly
Now that you’ve mastered the art of adjusting your laser settings, it’s time to put the finishing touches on your home decor projects and bring them to life. Here are some finishing techniques and troubleshooting tips to ensure your laser-cut creations look their best:
-
Sanding: Smooth out any rough edges or imperfections with sandpaper or a sanding block.
-
Painting: Add color and personality to your designs by applying paint or stain.
-
Sealing: Protect the surface of your home decor pieces with a clear sealant or varnish.
-
Assembly: Carefully follow the assembly instructions to securely join the different parts of your project together.
-
Quality check: Before finalizing your project, inspect it for any flaws or issues that may need to be addressed.
By applying these finishing techniques and troubleshooting tips, you can create stunning and professional-looking home decor items that will impress everyone who sees them.
Frequently Asked Questions
How much maintenance does a laser cutter require?
To ensure your laser cutter operates smoothly, regular maintenance is crucial. Follow these laser cutter maintenance tips to keep your machine in top shape.
Start by cleaning the lens and mirrors regularly to prevent debris buildup.
Check and clean the exhaust system to avoid clogging.
Regularly inspect and replace worn-out parts.
Keep the machine lubricated and aligned properly.
Lastly, consult a laser cutter troubleshooting guide for any issues you may encounter.
Can I use a laser cutter on any type of material?
Yes, you can use a laser cutter on a wide range of materials for home decor. The advantages of using a laser cutter include its precision and ability to create intricate designs. However, there are limitations when it comes to certain materials. For instance, some plastics can release toxic fumes when cut with a laser, while metals may require higher power levels. It’s important to research and understand the compatibility of materials before using a laser cutter.
How long does it take to calibrate a laser cutter?
Calibrating a laser cutter is a crucial step to ensure optimal performance. The duration of the calibrating process depends on various factors, such as the complexity of the machine and the level of precision required.
Generally, it takes anywhere from a few minutes to a couple of hours. During calibration, the laser cutter is carefully adjusted to align with the cutting bed and achieve accurate cuts. This process significantly impacts the overall performance and quality of the laser cutter.
What safety precautions should I take when using a laser cutter?
To ensure your safety when using a laser cutter, it’s crucial to take proper safety precautions. Start by wearing appropriate personal protective equipment, such as safety glasses and gloves. Keep the work area clean and organized to prevent accidents.
Regularly inspect and maintain the laser cutter to ensure it’s in good working condition. Follow manufacturer guidelines for laser cutter maintenance, including cleaning and replacing parts. Always prioritize safety to prevent any potential hazards or injuries.
Can I use a laser cutter for outdoor home decor projects?
Yes, you can definitely use a laser cutter for outdoor home decor projects. The beauty of outdoor laser cutting is that it allows you to create intricate designs on various materials like wood, acrylic, and metal. Whether you want to make custom signs, garden ornaments, or even outdoor furniture, the precision and versatility of laser cutting applications will ensure stunning results. Just remember to follow the necessary safety precautions and choose the appropriate materials for your project.
Conclusion
In conclusion, by following these best practices for laser cutting home decor, you can ensure precise and high-quality results in your workshop.
For example, Sarah, a DIY enthusiast, used these guidelines to create a stunning wooden wall art piece for her living room. With careful material selection, proper design file preparation, and calibration of her laser cutter, Sarah achieved intricate and flawless cuts.
By securing the material, testing and adjusting as needed, and applying finishing touches, she transformed her vision into a beautiful and professional-looking home decor item.