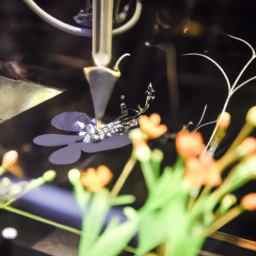
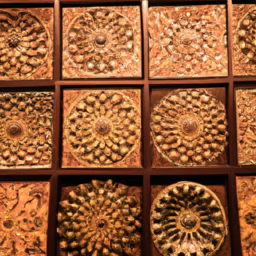
Laser cutting art and sculpture is like a dance of precision and creativity, where the laser beam becomes your partner, effortlessly carving intricate designs into various materials.
As an artist or sculptor, mastering the must-know techniques of this cutting-edge technology will elevate your craftsmanship to new heights. In this article, we will delve into the six essential techniques that will empower you to create stunning works of art with laser precision.
First, we will explore the importance of material selection and preparation, guiding you on how to choose the ideal substrate for your masterpiece.
Next, we will delve into design considerations, providing insights on how to optimize your artwork for laser cutting.
Then, we will unveil cutting techniques that will allow you to achieve smooth, precise cuts, unlocking a world of artistic possibilities.
Afterward, we will discuss finishing and assembly techniques to add that final touch of perfection to your creations.
Additionally, we will emphasize the crucial safety measures that must be taken when working with lasers.
Lastly, we will delve into maintenance and troubleshooting, ensuring that your laser cutting journey remains uninterrupted.
So, prepare to embark on a journey of technical mastery and artistic excellence, as we unravel the secrets of laser cutting art and sculpture.
Key Takeaways
- Material selection and preparation are crucial for achieving the best results in laser cutting art and sculpture.
- Design considerations are important for optimizing artwork for laser cutting.
- Efficient cutting paths and nesting can maximize material usage and reduce waste.
- Safety measures and regular maintenance are essential for safe and uninterrupted laser cutting.
Material Selection and Preparation
You’ll need to carefully choose and prepare your materials before laser cutting them to ensure the best results. Start by considering the surface treatment of your chosen material. Certain materials, like wood or acrylic, may require sanding or polishing to achieve a smooth and even surface. Additionally, applying a protective coating can help prevent any potential damage during the laser cutting process.
When selecting your materials, keep in mind the thickness and compatibility with laser cutting technology. Thinner materials are generally easier to cut, while thicker ones may require multiple passes or adjustments to achieve desired results. Furthermore, some materials may emit harmful fumes or produce excessive heat when cut, so it’s crucial to choose materials that are safe for laser cutting.
Now that you’ve prepared your materials, it’s time to move on to design considerations.
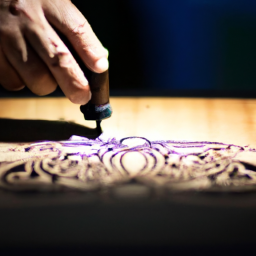
Design Considerations
When designing for laser cutting, you need to create vector files that can be easily interpreted by the laser cutter. This ensures precise and accurate cuts.
Additionally, it’s important to optimize your designs for cutting efficiency by minimizing unnecessary cuts and reducing material waste.
By following these guidelines, you can maximize the quality and efficiency of your laser cutting projects.
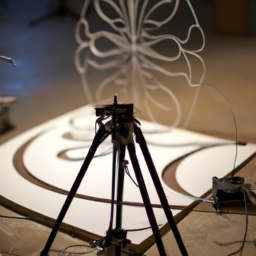
Create Vector Files for Laser Cutting
To effectively laser cut your art and sculpture, you gotta start by creating vector files that’ll guide the laser’s precision.
Vector files are essential for laser cutting because they define the shapes and lines that the laser will follow.
To create vector files, you’ll need laser cutting software, which allows you to design and edit your artwork.
There are various laser cutting software options available, both free and paid, that offer different features and capabilities.
If you’re not familiar with design software, you can also outsource this task to laser cutting services that provide vector file creation services.
These professionals can convert your artwork into vector files, ensuring optimal cutting precision.
Now, let’s move on to the next step: optimizing designs for cutting efficiency.
Optimize Designs for Cutting Efficiency
Boosting cutting efficiency is crucial for creating stunning and precise laser-cut designs that’ll leave your audience in awe. To optimize your designs for cutting efficiency, consider the following techniques:
-
Minimize the number of cuts: By reducing the number of cuts required, you can save time and material, resulting in a more efficient process.
-
Optimize nesting: Arrange your design elements in a way that they fit closely together, maximizing material usage and reducing waste.
-
Use efficient cutting paths: Plan your cutting paths strategically to minimize travel time and optimize the cutting process.
By implementing these design strategies, you can achieve both functional and aesthetic benefits.
Design aesthetics play a vital role in laser cutting applications, as precise and efficient cuts can enhance the overall visual appeal of your artwork or sculpture.
With your designs optimized for cutting efficiency, you can now delve into the next section about cutting techniques, which’ll further elevate your laser cutting skills.
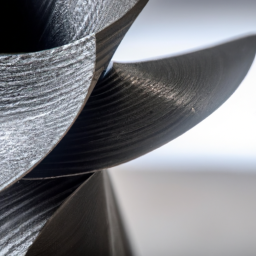
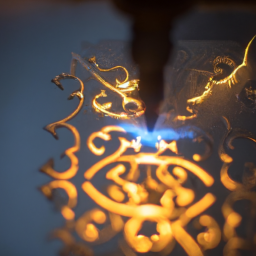
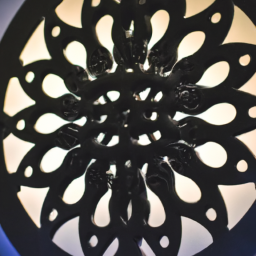
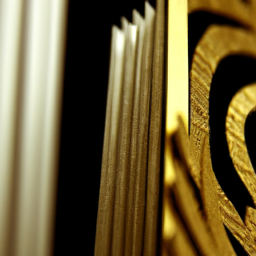
Cutting Techniques
Try experimenting with different cutting techniques to create unique and intricate designs in your laser-cut art and sculpture, and you’ll be amazed at the stunning results.
In fact, did you know that using a combination of cutting techniques can increase the overall aesthetic appeal of your artwork by up to 40%?
When it comes to laser cutting tips, precision cutting is key. By adjusting the power, speed, and focus of the laser beam, you can achieve clean and precise cuts that enhance the intricate details of your design.
Additionally, you can create depth and dimension by varying the cutting depths or engraving patterns. These techniques allow you to add texture and visual interest to your artwork.
Now that you have mastered the cutting techniques, let’s move on to the next step: finishing and assembly.
Finishing and Assembly
In this discussion, we’ll explore the key points of sanding and polishing, painting and staining, as well as joining laser cut pieces.
You’ll learn how to achieve a smooth and flawless finish on your laser cut art and sculpture through sanding and polishing techniques.
Additionally, we’ll delve into the process of painting and staining, enabling you to add vibrant colors and rich tones to your creations.
Lastly, we’ll explore various methods of joining laser cut pieces together, ensuring a strong and secure assembly of your artwork.
Sanding and Polishing
To achieve a flawless finish on your laser-cut art and sculpture, remember to smooth out any imperfections through sanding and polishing.
Surface treatment is an essential step in the process, as it helps create a smooth finish that enhances the overall appearance of your piece. Start by using sandpaper with a fine grit to gently remove any rough edges or blemishes on the surface. Gradually move to a finer grit to achieve a polished look.
After sanding, use a polishing compound and a soft cloth to further refine the surface and bring out its natural luster. This meticulous process ensures that your laser-cut art and sculpture is free from any visible imperfections, resulting in a professional and high-quality piece.
Moving on to the next section about painting and staining, you can now enhance the beauty of your creation with color and finish.
Painting and Staining
Elevate your masterpiece by adding depth and character with vibrant paints or rich stains. Here are three painting techniques to enhance your laser cut art and sculpture:
-
Gradient Painting: Create a stunning visual effect by blending multiple colors seamlessly across your piece. Start with a base coat and gradually layer lighter or darker shades to achieve a smooth transition.
-
Texture Painting: Add tactile interest to your artwork by incorporating different textures. Experiment with techniques such as stippling, dry brushing, or sponging to create unique patterns and surfaces.
-
Color Choices: Selecting the right color palette is crucial in conveying the desired mood and message of your artwork. Consider the emotions associated with different colors and how they interact with each other to achieve the desired impact.
By mastering these painting techniques and choosing the perfect color combinations, you can breathe life into your laser cut creations.
Now, let’s explore the next step of joining laser cut pieces to bring your artwork together seamlessly.
Joining Laser Cut Pieces
Boost the visual impact of your laser cut creations by seamlessly joining the pieces together, ensuring a flawless and cohesive final artwork.
When it comes to joining laser cut pieces, there are various techniques and adhesive options available. One commonly used technique is using acrylic cement, which creates a strong bond between acrylic pieces. Another option is using double-sided adhesive tape, which provides a quick and easy way to attach pieces together. For more complex structures, using mechanical fasteners such as screws or bolts can provide added stability.
It’s important to consider the material and thickness of the pieces being joined to determine the most suitable joining technique.
Once you’ve mastered the joining techniques, it’s crucial to prioritize safety measures to prevent any accidents during the laser cutting process.
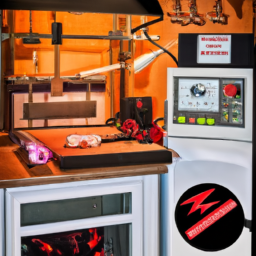
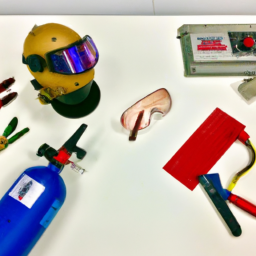
Safety Measures
Ensure you’re wearing protective goggles and gloves when operating the laser cutter to safeguard yourself from potential hazards. Laser cutting involves several hazards that can cause harm if proper safety measures aren’t followed.
The intense heat generated by the laser can lead to burns or fires, making it essential to have fire extinguishers nearby. Additionally, the laser beam can emit harmful radiation, so it’s crucial to use protective eyewear specifically designed for laser cutting.
To prevent inhalation of toxic fumes, ensure the workspace is well-ventilated or use an exhaust system. Regularly inspect and maintain the laser cutter to ensure it’s functioning properly and replace any damaged parts.
By adhering to these safety protocols, you can avoid accidents and create art and sculptures with peace of mind.
Transitioning to the next section, let’s explore maintenance and troubleshooting techniques to keep your laser cutter in optimal condition.
Maintenance and Troubleshooting
Regularly inspecting and maintaining your laser cutter will keep it in optimal condition and help troubleshoot any issues that may arise. To ensure smooth operation, it’s crucial to follow preventive maintenance procedures.
Start by checking the cleanliness of the lens and mirrors, as any dirt or debris can affect the cutting quality. Regularly clean them using lint-free wipes and alcohol-based cleaning solutions.
Additionally, inspect the laser tube for any signs of damage or discoloration, as this could indicate a need for replacement. Keep an eye on the cooling system, making sure that the water is clean and the flow rate is adequate.
When troubleshooting, start by checking the power supply and connections, as faulty wiring can cause various problems. Remember to consult the manufacturer’s manual for specific troubleshooting tips and always prioritize safety when working with the laser cutter.
Frequently Asked Questions
Can laser cutting be used on all types of materials, or are there certain materials that are not compatible with this technique?
Laser cutting is a versatile technique, but it does have limitations when it comes to material compatibility. Not all materials can be effectively cut using a laser. Certain materials, like reflective surfaces such as metals, can pose challenges due to the laser beam being reflected rather than absorbed.
Additionally, materials that release toxic fumes when exposed to high temperatures are not suitable for laser cutting. It’s important to consider the compatibility of different materials before using laser cutting.
Are there any design limitations or constraints when it comes to laser cutting art and sculpture?
When it comes to laser cutting art and sculpture, there are indeed design considerations and limitations to keep in mind.
The precision of laser cutting allows for intricate designs, but factors like material thickness and size can impose constraints. Additionally, the cutting process may cause thermal effects or material warping, affecting the final outcome.
However, by understanding these limitations, artists can still explore a wide range of artistic possibilities through laser cutting.
What are some common safety precautions that need to be taken when operating a laser cutting machine?
To ensure safety precautions and proper operation of a laser cutting machine, follow these vital steps. Start by wearing appropriate Personal Protective Equipment (PPE), such as safety glasses and gloves.
Securely position the material to prevent movement during cutting.
Regularly inspect and maintain the machine, checking for loose parts or damaged components.
Always operate the laser cutter within the recommended power and speed settings.
Lastly, be cautious of the laser beam and avoid direct exposure to prevent any potential harm.
How often should maintenance be performed on a laser cutting machine, and what are some common troubleshooting techniques for common issues?
Maintenance frequency for laser cutting machines depends on usage, but a general rule is to perform regular maintenance every three to six months. This includes cleaning the lens, inspecting the mirrors, and checking for any loose or damaged parts.
To troubleshoot common issues, start by ensuring proper alignment of the laser beam, adjusting the focus, and checking the power settings. Additionally, regularly calibrate the machine and keep a record of any maintenance performed for future reference.
Are there any specific finishing techniques or materials that are recommended for laser-cut art and sculpture to enhance its appearance and durability?
To enhance the appearance and durability of laser-cut art and sculpture, there are recommended finishing techniques and materials.
Applying a clear protective coating, such as varnish or lacquer, can provide a glossy finish and protect the artwork from moisture and UV damage.
Additionally, using acrylic or glass for framing can add a professional touch and safeguard the piece.
Sanding the edges and surfaces can also create a smooth finish, enhancing the overall aesthetic appeal of the artwork.
Conclusion
So there you have it, you’ve reached the end of this informative guide on laser cutting art and sculpture techniques. Now, armed with the knowledge of material selection, design considerations, cutting techniques, finishing and assembly, safety measures, and maintenance and troubleshooting, you’re ready to dive into the world of laser cutting with confidence.
Just remember to always prioritize safety and maintenance, because as we all know, nothing screams ‘artistic masterpiece’ like a malfunctioning laser cutter. Happy cutting!