Are you tired of giving the same old, plain gifts? Looking to add a touch of luxury and creativity to your personalized items? Well, you’re in luck! In this article, we’re going to reveal 7 incredible ways to add texture to your laser cut gifts and personalized items.
Imagine the delight on your loved one’s face when they receive a gift that not only showcases your thoughtfulness but also boasts a stunning raised design. With the technique of embossing, you can achieve just that!
And if you’re aiming for a smooth and polished finish, sanding is your secret weapon.
But why stop there? Let’s bring some vibrant colors into the mix! Painting your laser cut creations will not only make them stand out but also give them a unique and personalized touch.
And for those who crave a touch of luxury, adding metallic foil will take your gifts to a whole new level.
Ready for even more texture? Layering materials allows you to create a multi-dimensional look that will leave everyone in awe.
And if you’re short on time but still want instant texture, textured materials are here to save the day.
So, get ready to transform your laser cut gifts and personalized items into works of art. Let’s dive into these 7 incredible techniques and add that wow factor to your creations!
Key Takeaways
- Embossing, sanding, painting, and metallic foil are effective techniques for adding texture to laser-cut gifts and personalized items.
- Different colors of metallic foil can evoke different emotions, such as gold for luxury, silver for elegance, rose gold for romance, copper for warmth, and blue for serenity.
- Layering materials adds depth and visual interest to laser-cut designs.
- Textured materials like wood veneer and leather can be used as overlays or backings to instantly add texture to laser-cut designs.
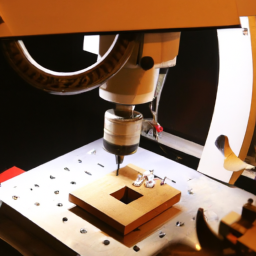
Embossing for Raised Designs
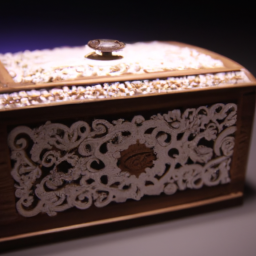
You can easily add a touch of elegance and depth to your laser cut gifts and personalized items by embossing them with raised designs. Embossing is a technique that involves creating a raised pattern or design on a surface. It can be done using heat embossing and embossing powders. Heat embossing involves stamping a design onto your item using a special ink, then sprinkling embossing powder over the wet ink. The powder is then heated with a heat gun, causing it to melt and create a raised effect. This technique allows you to add intricate and detailed designs to your laser cut items, giving them a unique and personalized touch. Once you have finished embossing, you can move on to the next step, which is sanding for smooth and polished surfaces.
Sanding for Smooth and Polished Surfaces
Smooth and shiny surfaces can be achieved by skillfully sanding your laser cut creations. To achieve a polished finish, it’s important to use the right sanding tools and techniques.
Start by selecting a fine-grit sandpaper, such as 220 or higher, to gently sand the surface of your item. Use smooth, even strokes in the direction of the wood grain or design lines. This will help remove any rough edges or burn marks left by the laser cutting process.
Once the surface is smooth, you can further enhance the polished look by using polishing techniques such as buffing with a soft cloth or applying a clear varnish. This will give your items a professional, high-quality finish.
Now, let’s move on to the next step: painting for vibrant and colorful finishes.
Painting for Vibrant and Colorful Finishes
To achieve stunning and vibrant finishes, try adding a pop of color to your laser-cut creations through the art of painting. Painting allows you to unleash your creativity and bring life to your personalized items.
Whether you want a bold and eye-catching design or a soft and subtle look, painting can help you achieve the desired effect. One technique you can use is stenciling, which allows you to create intricate patterns with ease. Simply secure the stencil onto your surface and apply paint through the openings for a precise and professional finish.
Another option is decoupage, which involves layering paper or fabric onto your laser-cut piece and sealing it with a protective coating. This technique creates a vintage-inspired look that adds depth and texture to your creation.
By exploring different painting techniques, you can transform your laser-cut gifts into unique and personalized works of art.
Now, let’s explore how adding metallic foil can give your creations a luxurious touch.
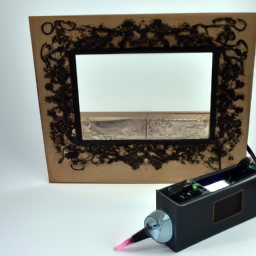
Adding Metallic Foil for a Luxurious Touch
Enhance the elegance of your laser-cut creations by incorporating metallic foil, giving them a touch of luxury. Foil stamping is a technique that involves heat transfer to apply a thin layer of metallic foil onto the surface of your gift or personalized item. This method creates a stunning effect that catches the light and adds dimension to your design.
To help you visualize the impact of metallic foil, here is a table showcasing different foil colors and their corresponding emotions they evoke:
| Foil Color | Emotion |
|---|---|
| Gold | Luxury |
| Silver | Elegance |
| Rose Gold | Romance |
| Copper | Warmth |
| Blue | Serenity |
By incorporating metallic foil into your laser-cut creations, you can elevate them to a whole new level. The next section will explore the art of layering materials for a multi-dimensional look, allowing you to add even more depth and visual interest to your designs.
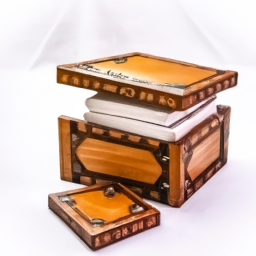
Layering Materials for a Multi-dimensional Look
Create a stunning visual effect by layering different materials in your laser-cut creations, adding depth and dimension to your designs. Here are three ways to achieve this multi-dimensional look:
-
Incorporating fabric for a soft and tactile feel: By adding fabric to your laser-cut designs, you can create a unique contrast between the rigidity of the material and the softness of the fabric. This adds texture and a sense of touch to your personalized items.
-
Applying resin for a glossy and glass-like effect: Resin can be poured onto your laser-cut designs to create a smooth and shiny surface. This not only adds a luxurious touch but also enhances the overall appearance of your creations.
-
Using textured materials for instant texture: By incorporating materials with different textures, such as wood veneer or leather, you can instantly add depth and interest to your laser-cut gifts. This creates a tactile experience for the recipient and makes your creations stand out.
By layering materials and incorporating fabric and resin, you can take your laser-cut designs to the next level.
Next, let’s explore how to use textured materials for instant texture.
Using Textured Materials for Instant Texture
Get ready to elevate your laser-cut designs with a touch of instant texture by incorporating different textured materials like wood veneer or leather.
One way to add a soft and tactile feel to your personalized items is by using fabric. Fabrics such as velvet or suede can create a luxurious and plush texture that’ll instantly elevate your designs. You can incorporate fabric by adding it as an overlay on top of your laser-cut piece or by using it as a backing material.
Another option is to incorporate wood for a natural and rustic texture. Wood veneer can be laser-cut into intricate patterns and then layered onto your design, adding depth and a touch of nature to your personalized items.
Whether you choose fabric or wood, these textured materials will add a unique and eye-catching element to your laser-cut gifts.
Frequently Asked Questions
Can I use embossing techniques on materials other than paper or cardstock?
Yes, you can definitely use embossing techniques on materials other than paper or cardstock. Imagine the exquisite texture you could create by embossing on wood or acrylic! The process involves using heat and pressure to raise the design, resulting in a visually stunning and tactile effect. Whether you’re adding a personalized touch to a wooden plaque or embellishing an acrylic keychain, embossing on these materials will surely make your laser-cut gifts and personalized items stand out.
Is sanding necessary for all laser cut projects?
Achieving a smooth finish on your laser cut items without sanding is possible by using alternative finishing techniques. One method is to apply a clear coat or varnish to the surface of the material, giving it a glossy and polished look.
Another option is to use a heat gun to melt the edges slightly, creating a smooth and rounded appearance.
Additionally, you can experiment with different etching depths to add depth and texture to your designs.
What type of paint works best for laser cut items?
For the best paint to use on laser cut items, opt for acrylic paint. It’s versatile and can adhere well to various materials, making it ideal for adding color and texture to your creations.
If you’re looking for alternative techniques, consider using spray paint or metallic finishes. These can create a unique and eye-catching effect.
Experiment with different paint types and techniques to find the perfect combination that enhances your laser cut gifts and personalized items.
How do I apply metallic foil to laser cut designs?
To apply metallic foil to laser cut designs, start by prepping the surface. If it’s wood, make sure it’s smooth and clean. Apply a layer of adhesive specifically designed for metallic foiling. Once it’s dry, carefully place the metallic foil over the adhesive, shiny side up.
Use a soft bristle brush or a bone folder to gently press the foil onto the surface.
For acrylic, you can achieve a similar effect by using embossing techniques, like heat embossing or dry embossing.
Are there any limitations to layering materials for a multi-dimensional look?
When it comes to layering materials for a multi-dimensional look, there are a few limitations to consider. The thickness of the materials can affect the precision of the laser cut, so it’s important to choose materials that aren’t too thick. Additionally, certain materials may not adhere well together, leading to a less durable final product.
However, there are alternative techniques for adding texture, such as using different engraving depths or incorporating materials with different finishes. These techniques can create unique and visually interesting results.
Conclusion
Congratulations! You’ve just unlocked the secret to creating the most jaw-dropping, awe-inspiring laser cut gifts and personalized items. By adding texture in these 7 mind-blowing ways, you’ll take your creations to a whole new level of wow!
Get ready to mesmerize your loved ones with raised designs that will make their fingers dance. Smooth and polished surfaces that feel like silk. Vibrant and colorful finishes that will ignite their senses. And let’s not forget the luxurious touch of metallic foil.
With these techniques, your creations will be the epitome of multi-dimensional artistry. Prepare to amaze and astound!