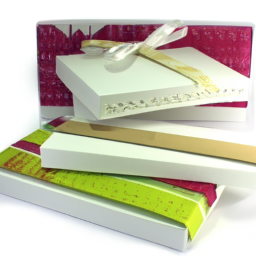
Looking to add a touch of personalization to your gifts and items? Laser cutting is the answer! With its precise and efficient cutting capabilities, laser technology has become a popular choice for creating customized and unique designs. However, it’s important to follow best practices to ensure the best results in your workshop.
In this article, we will explore seven essential tips to help you master the art of laser cutting gifts and personalized items.
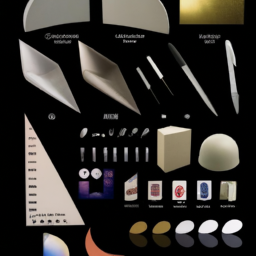
Firstly, selecting the right materials is crucial. Whether it’s wood, acrylic, or leather, choosing the appropriate material will determine the quality and durability of your finished product.
Secondly, proper preparation of your design files is key. Ensuring the correct dimensions and file formats will save you time and prevent any potential errors during the cutting process.
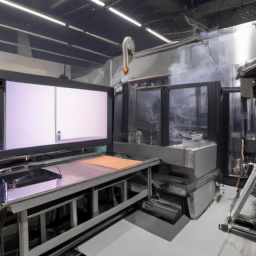
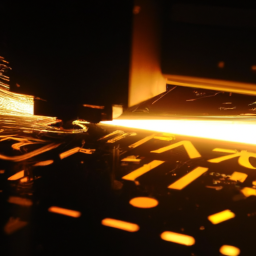
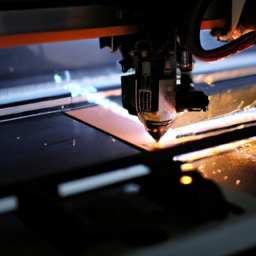
Next, setting up your laser cutting machine is essential for achieving accurate and precise cuts. From adjusting the power and speed settings to calibrating the focus, every detail matters.
Additionally, securely securing the material in place is crucial for safety and preventing any movement during the cutting process.
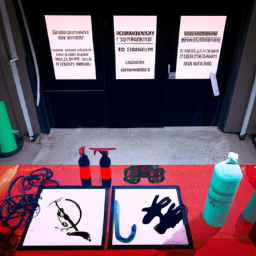
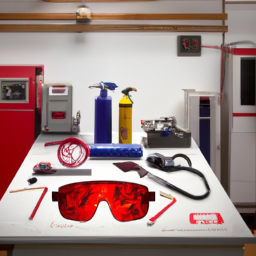
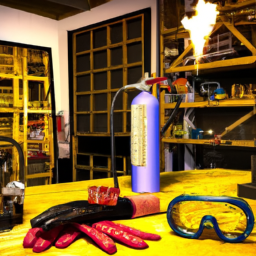
Safety and ventilation should never be overlooked when working with laser cutters. Good ventilation and safety measures, such as wearing protective goggles and ensuring a well-ventilated workspace, are essential to protect yourself and others from harmful fumes and particles.
Lastly, finishing and cleaning your laser-cut gifts adds that final touch of perfection. Removing any residue or debris and applying appropriate finishes will ensure a polished and professional result.
By following these best practices, you can create stunning and personalized laser-cut gifts and items that will impress and delight your recipients. Let’s dive into the details and master the art of laser cutting in your workshop!
Key Takeaways
- Selecting the right materials and appropriate thickness is crucial for quality and durability.
- Proper preparation of design files and compatibility with the laser cutting software saves time and prevents errors.
- Accurate setup of the laser cutting machine, including calibration of power and speed, as well as adjusting focus and z-height, ensures precise cuts.
- Implementing safety measures like ventilation, wearing protective eyewear and masks, and keeping flammable materials away from the cutting area is essential for safe operation.
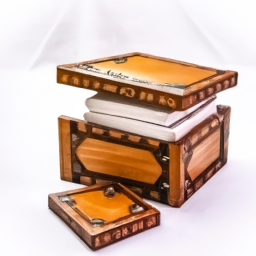
Select the Right Materials for Laser Cutting
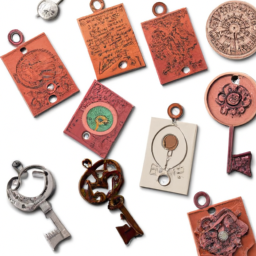
You’ll want to choose materials that are specifically designed for laser cutting, like wood, acrylic, or leather, as they’ll produce clean and precise cuts that’ll bring your personalized gifts to life.
When selecting materials, consider the appropriate thickness for your project. Thinner materials are generally easier to cut, but may lack durability, while thicker materials can withstand more wear and tear but require higher laser power.
Experimenting with different materials can help you achieve unique and interesting effects. For example, wood can create a rustic and natural look, while acrylic offers a sleek and modern appearance.
Once you’ve chosen your materials, it’s time to prepare your design files, ensuring they’re compatible with the laser cutting software and include all necessary measurements and details for accurate cutting.
Prepare Your Design Files
Before diving into your design files, it’s important to ensure they’re properly formatted and ready for laser cutting. Start by using design software that’s compatible with your laser cutting machine. This’ll allow you to create and edit your designs with ease.
When saving your design files, make sure they’re in a format that your laser cutting machine can read, such as DXF or AI. Additionally, double-check that your design is set to the correct dimensions and scale. This’ll ensure that your final product is accurate and precise.
Once your design files are properly formatted, you can move on to the next step of setting up your laser cutting machine. Here, you’ll prepare the machine for the cutting process.
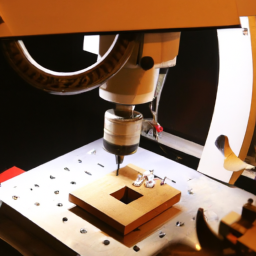
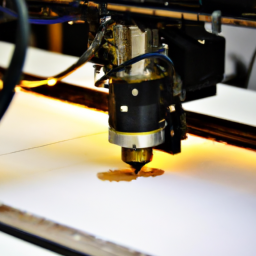
Set Up Your Laser Cutting Machine
To set up your laser cutting machine, you need to calibrate the laser power and speed to ensure optimal cutting performance. Adjust the focus and z-height of the laser to achieve the desired depth and precision in your cuts.
It’s also important to test the cutting parameters on scrap material to fine-tune the settings before starting your actual project.
Calibrate the Laser Power and Speed
Get ready to optimize your laser cutting results by calibrating the power and speed for precise and personalized gifts in your workshop.
Achieving laser beam precision is crucial for obtaining clean and accurate cuts. Start by adjusting the laser power to the appropriate level, ensuring it’s neither too high nor too low. This will prevent charring or incomplete cuts.
Next, optimize cutting speed to achieve the desired results. Increasing the speed may reduce cutting time, but it can also compromise the quality of the cut. Find the right balance between speed and precision to obtain the best outcome for your gifts and personalized items.
Once you have calibrated the power and speed, it’s time to adjust the focus and z-height for even greater accuracy.
Adjust the Focus and Z-Height
Adjusting the focus and z-height of your laser cutter is crucial for achieving precise and accurate cuts. Studies have shown that proper focus can improve cutting accuracy by up to 40%. To ensure consistent results and improve precision, follow these four key steps:
-
Set the correct focal length: Adjust the focus lens to the optimal distance for your material thickness. This will ensure that the laser beam is concentrated at the right point, resulting in cleaner cuts.
-
Check the material surface: Ensure that the material is flat and positioned correctly on the cutting bed. Any unevenness or misalignment can affect the focus and compromise the accuracy of the cuts.
-
Fine-tune the Z-height: Adjust the Z-axis to maintain a consistent gap between the material and the focal lens. This will help maintain a constant focus throughout the cutting process, ensuring uniform cuts.
-
Regularly clean the focal lens: Dust and debris on the lens can distort the laser beam and affect the focus. Clean the lens regularly to ensure optimal performance and accurate cuts.
By following these steps, you can improve precision and ensure consistent results.
Now, let’s move on to the next section and learn how to test the cutting parameters on scrap material.
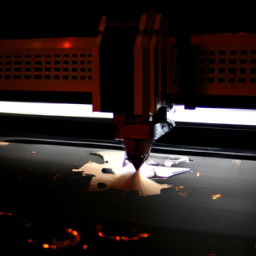
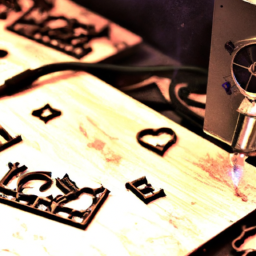
Test the Cutting Parameters on Scrap Material
Let’s jump right into testing the cutting parameters on scrap material to ensure optimal results! When laser cutting gifts and personalized items, it’s crucial to test the cutting techniques and troubleshoot any potential issues.
Start by selecting a small piece of scrap material that’s similar to the one you plan to use for your final product. Adjust the laser power, speed, and frequency settings according to the material’s thickness and density. Carefully observe the cutting process, checking for any signs of incomplete cuts, burns, or excessive charring. Make necessary adjustments until you achieve clean and precise cuts.
Additionally, pay attention to the kerf width and the overall quality of the edges. Once you’ve perfected the cutting parameters, it’s time to move on to the next step: securing the material properly.
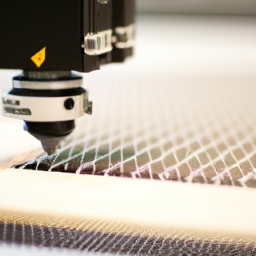
Secure the Material Properly
To ensure the stability of your material during the laser cutting process, it’s crucial to use a clamping system. This will prevent any shifting or warping that may occur, resulting in accurate and precise cuts.
By securely fastening the material in place, you can avoid any potential errors or damage to your finished product.
Use a Clamping System for Stability
Using a clamping system is like giving your laser-cut gifts a firm handshake, ensuring stability and precision throughout the cutting process. This technique improves cutting precision and prevents material damage by securely holding the material in place. A clamping system consists of a table with a grid pattern and adjustable clamps that firmly grip the material. The grid pattern allows for accurate alignment and positioning, while the clamps provide stability and prevent the material from shifting or warping during cutting. When using a clamping system, make sure to position the material correctly and tighten the clamps securely to avoid any movement. This will ensure that your laser-cut gifts turn out flawless and without any imperfections. In the next section, we will discuss how to avoid warping or shifting during the cutting process.
Avoid Warping or Shifting During the Cutting Process
Ensure that your material remains flat and stable throughout the cutting process to prevent any warping or shifting. This is crucial to achieving accurate and precise cuts for your laser-cut gifts and personalized items.
To avoid warping or shifting, consider the following best practices:
- Use a laser cutter with a lower power setting to reduce the risk of overheating, which can cause the material to warp.
- Regularly clean the cutting bed and ensure that it’s free from debris or dust that could interfere with the stability of the material.
- Position your material securely using a clamping system to prevent any movement or shifting during the cutting process.
By implementing these measures, you can maintain the integrity of your materials and prevent unwanted warping or shifting.
In the next section, we’ll discuss how to practice good ventilation and safety measures to ensure a safe and healthy working environment.
Practice Good Ventilation and Safety Measures
Breathe in the fresh air as you work on your laser cutting projects, making sure the workshop is well-ventilated to keep you safe and comfortable. Proper ventilation is crucial when working with laser cutters, as they emit harmful fumes and smoke.
Install an exhaust fan or ventilation system to remove these pollutants from the air. Additionally, wear a respiratory mask and protective eyewear to prevent inhalation of hazardous particles.
Always follow safety precautions by keeping flammable materials away from the laser cutting area and having a fire extinguisher nearby.
Now that you’ve established good ventilation and safety measures, you can move on to the next step of finishing and cleaning the laser-cut gifts, ensuring they’re polished and ready to be enjoyed.
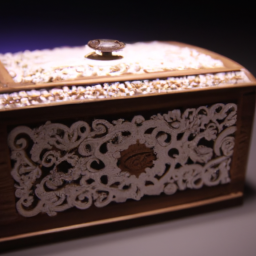
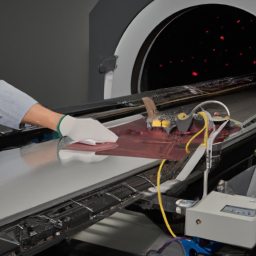
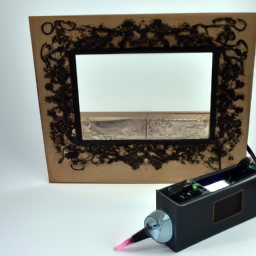
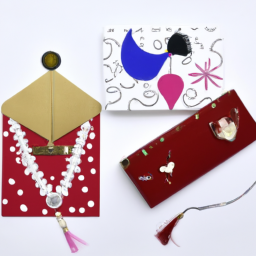
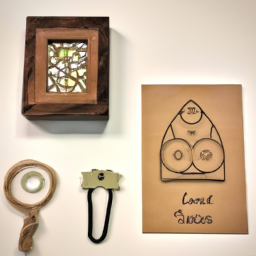
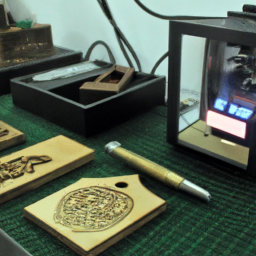
Finishing and Cleaning the Laser-Cut Gifts
After you’ve established a well-ventilated and safe environment, it’s time to focus on putting the finishing touches on your laser-cut creations and ensuring they’re impeccably cleaned.
To add decorative elements to your gifts, there are several methods you can use. One popular option is using acrylic paints to add vibrant colors and intricate designs. Another technique is using adhesive vinyl to create unique patterns and shapes. Additionally, you can experiment with different types of finishes, such as gloss or matte varnish, to enhance the overall look of your creations.
In terms of cleaning, it’s essential to remove any burn marks left behind during the laser-cutting process. You can achieve this by using sandpaper or a specialized burn remover solution.
Remember, attention to detail in finishing and cleaning will greatly enhance the quality and appeal of your laser-cut gifts.
Frequently Asked Questions
Can I use any type of material for laser cutting?
Yes, you can use a variety of materials for laser cutting. However, it’s important to choose the right material for your project. Different materials have different characteristics, such as thickness, flammability, and flexibility. Consider the desired outcome and functionality of your gift or personalized item.
For example, wood is commonly used for its natural aesthetic, while acrylic is chosen for its durability and versatility. By selecting the appropriate material, you can ensure a successful laser cutting process and a high-quality end product.
How do I know if my design file is compatible with the laser cutting machine?
To ensure compatibility between your design file and the laser cutting machine, there are a few key steps to follow.
First, check that your file is saved in a compatible format, such as DXF or SVG.
Next, verify that the dimensions of your design match the material you plan to use.
Additionally, simplify your design by removing any unnecessary elements and ensuring all lines are connected.
If you encounter any issues, consult the machine’s manual or seek troubleshooting assistance from the manufacturer.
What safety measures should I take when operating a laser cutting machine?
When operating a laser cutting machine, your safety should be a top priority. Did you know that around 50% of laser-related accidents occur due to lack of proper training and safety precautions? To ensure your well-being, follow these essential guidelines.
First, perform regular laser cutting machine maintenance to keep it in optimal condition.
Secondly, ensure proper ventilation in the workshop to prevent the accumulation of harmful fumes.
By following these measures, you can minimize the risk of accidents and create a safe working environment.
What are some common mistakes to avoid when securing the material for laser cutting?
When securing materials for laser cutting, it’s important to avoid common mistakes that can affect the quality of your cuts.
One common mistake is not properly aligning the material with the laser bed, resulting in inaccurate cuts. To ensure proper alignment, use alignment guides or rulers and double-check the position before starting the laser.
Another mistake is not securely fastening the material, which can cause it to move during cutting. Use clamps or tape to secure the material firmly in place for precise and clean cuts.
Are there any specific cleaning methods or products recommended for laser-cut gifts?
To keep your laser-cut gifts looking their best, it’s important to follow proper cleaning methods. Start by using a microfiber cloth to gently remove any dust or debris from the surface.
For tougher stains, a mild soap and water solution can be applied. Avoid using harsh chemicals or abrasive cleaners as they can damage the material. Recommended cleaning products for laser-cut gifts include isopropyl alcohol or a specialized plastic cleaner.
Remember to always test a small, inconspicuous area first before applying any cleaning solution.
Conclusion
Congratulations! You’ve now mastered the art of laser cutting gifts and personalized items in your workshop. By following these best practices, you can ensure precise and safe cutting every time.
Remember to:
- Select the right materials
- Prepare your design files
- Set up your machine correctly
- Secure the material tightly
- Maintain good ventilation
Finally, don’t forget to add the finishing touches for a polished look.
With these tips in mind, your laser-cut creations will shine like a diamond in the rough.