Are you feeling like you’re stuck between a rock and a hard place when it comes to raster engraving? Don’t throw in the towel just yet! In this article, we’ve got your back and we’re going to show you how to troubleshoot those pesky raster engraving problems like a pro.
Whether you’re dealing with blurry images, inconsistent engraving, or just not getting the results you want, we’ve got the solutions you need. By checking your settings, keeping your machine clean and well-maintained, adjusting your speed and power settings, using the right materials and techniques, and troubleshooting image resolution and quality, you’ll be well on your way to achieving flawless raster engravings.
So grab your tools and let’s dive into the world of troubleshooting raster engraving problems!
Key Takeaways
- Regularly clean and maintain the engraving machine to prevent issues and ensure optimal performance.
- Experiment with different speed and power settings to achieve the desired engraving results.
- Check and adjust the laser beam alignment with the material to avoid blurry or misaligned engravings.
- Seek professional assistance or consult with experts for specialized expertise and guidance in troubleshooting engraving problems.
Check Your Settings and Parameters
Before diving into complex troubleshooting techniques, it’s important to take a step back and make sure you’ve double-checked all your settings and parameters for raster engraving. Start by verifying the software compatibility with your engraving machine. Make sure the software you’re using is compatible with the specific model and version of your machine. Also, check for any firmware updates that may be available for your machine. Manufacturers often release updates to address bugs or improve performance, so keeping your firmware up to date is crucial.
Once you’ve confirmed your settings and updated your firmware if necessary, you can move on to the next section about cleaning and maintaining your engraving machine. It’s essential to keep your machine in optimal condition for consistent and high-quality engraving results.
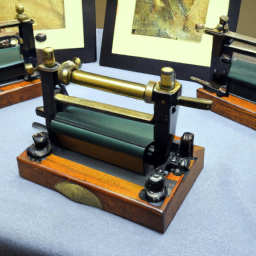
Clean and Maintain Your Engraving Machine
To ensure the smooth operation of your engraving machine, make sure you regularly clean and maintain it, just like oiling the gears of a well-tuned clock. Proper machine maintenance is crucial in preventing and troubleshooting engraving problems.
Here are some tips to help you keep your machine in top shape:
-
Keep it dust-free: Dust and debris can clog the machine and affect the engraving quality. Regularly clean the engraving area and remove any accumulated dust.
-
Lubricate moving parts: Apply lubricant to the moving parts of your machine to reduce friction and ensure smooth movements. This will help prevent wear and tear on the components.
-
Check and tighten connections: Loose connections can lead to erratic engraving or machine malfunctions. Regularly inspect and tighten all connections to ensure a secure and stable operation.
-
Clean the lens and mirrors: The lens and mirrors in your engraving machine can get dirty over time, affecting the quality of the engravings. Clean them regularly using a soft cloth and a lens cleaner to maintain optimal performance.
By following these machine maintenance tips, you can avoid potential issues and ensure that your engraving machine operates at its best.
Now, let’s move on to adjusting your speed and power settings for optimal results.
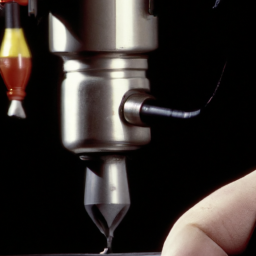
Adjust Your Speed and Power Settings
Get ready to achieve optimal results by adjusting your speed and power settings on your engraving machine! To optimize your settings, start by experimenting with different combinations of speed and power levels.
If your raster engraving is coming out too light or too dark, try increasing or decreasing the power accordingly. Additionally, adjusting the speed can help troubleshoot alignment issues. If your engraving is not aligning properly, try slowing down the speed to give the laser more time to accurately trace the design. On the other hand, if the engraving looks smudged or blurry, increasing the speed may help improve the clarity.
By fine-tuning your speed and power settings, you can ensure that your raster engraving turns out crisp and precise.
Now, let’s move on to the next section about using the correct material and engraving technique.
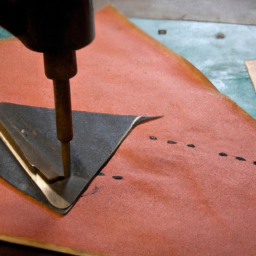
Use the Correct Material and Engraving Technique
Make sure you’re using the correct material and engraving technique to achieve the best results with your machine. Laser alignment is crucial in ensuring precise engraving. Make sure the laser beam is aligned properly with the material to avoid any distortion or misplacement of the design.
Additionally, it’s important to consider material compatibility. Different materials require specific engraving techniques and settings to achieve optimal results. For example, certain materials may require lower power settings to prevent burning or melting, while others may need higher power settings for deeper engraving.
By using the right material and engraving technique, you can avoid potential issues and ensure high-quality results.
Now, let’s move on to troubleshooting image resolution and quality.
Troubleshoot Image Resolution and Quality
Improve the clarity and sharpness of your engravings by adjusting the image resolution and quality settings.
When troubleshooting raster engraving problems, one important factor to consider is the image resizing. If your image has a low resolution, it may appear pixelated or blurry when engraved. To enhance the resolution, try resizing the image to a higher dpi (dots per inch) value.
Additionally, check the quality settings of your engraving software. Some software programs allow you to adjust the engraving speed and power, which can also affect the image quality. Experiment with different settings to find the optimal combination for achieving high-resolution engravings.
Remember, troubleshooting techniques for image resolution and quality are crucial for obtaining clear and precise results. If you’re still experiencing issues, seek professional assistance to ensure you’re utilizing the correct techniques for your specific engraving machine.
Seek Professional Assistance if Needed
If you’re still having difficulties, don’t hesitate to reach out to a professional for assistance with your engraving machine. Seeking a consultation with a professional can provide you with specialized expertise to troubleshoot any lingering problems with your raster engraving.
Engraving machines can be complex, and sometimes issues may arise that require the knowledge and experience of a professional. They can help identify and resolve any underlying issues that may be affecting the quality or performance of your engraving. Whether it’s a technical glitch, a software problem, or a mechanical issue, a professional can offer guidance and solutions to get your engraving machine back on track.
Don’t hesitate to seek professional assistance if you’re facing challenges that you can’t resolve on your own.
Frequently Asked Questions
Can I use any type of material for raster engraving?
Yes, you can use various materials for raster engraving, including wood. Laser engraving is a versatile method that can be used on a wide range of materials. When it comes to wood engraving, it’s important to choose the right type of wood that’s suitable for laser engraving.
Hardwoods like maple or cherry are commonly used, as they produce clean and precise engravings. However, softer woods like pine can also be used with proper adjustments to the laser settings.
How do I know if my engraving machine needs cleaning and maintenance?
Regular maintenance is crucial for ensuring the optimal performance of your engraving machine. Signs of engraving machine wear may include decreased engraving quality, inconsistent or incomplete engraving, and unusual noises during operation.
For example, if you notice that your machine is producing blurry or faint engravings, it could indicate a need for cleaning or maintenance.
By regularly cleaning and maintaining your machine, you can prevent these issues and prolong its lifespan.
What should I do if my engraving image appears blurry or pixelated?
To fix a blurry or pixelated engraving image, start by adjusting the resolution settings on your engraving machine. Increase the resolution to improve the clarity of the image.
Additionally, optimize the image before engraving it by using software or tools that can enhance the image quality. This will help ensure a crisp and clear engraving.
Remember to always test and preview the image before engraving it on your desired material.
Can I adjust the speed and power settings on my engraving machine?
Yes, you can definitely adjust the speed and power settings on your engraving machine. By adjusting these settings, you can find the optimal combination that’ll give you the best results for your engraving. Start by experimenting with different speed and power settings to see what works best for your specific material and design. Make small adjustments and test your engraving until you achieve the desired outcome.
This will help you avoid blurry or pixelated images and ensure high-quality engraving.
When should I seek professional assistance for troubleshooting raster engraving problems?
If you lack experience in troubleshooting raster engraving problems and encounter technical difficulties, it’s advisable to seek professional assistance.
Professional technicians have the expertise and knowledge to identify the root cause of the issue and provide precise solutions. They can save you time and frustration by quickly resolving complex problems that may be beyond your skill set.
Don’t hesitate to reach out to professionals when you encounter difficulties beyond your capabilities.
Conclusion
In conclusion, troubleshooting raster engraving problems requires attentiveness and precision. By carefully checking your settings and parameters, maintaining your engraving machine, and adjusting your speed and power settings, you can overcome any obstacles that may arise.
Remember to use the correct material and engraving technique, and don’t hesitate to seek professional assistance if needed.
Just like a skilled conductor leading a symphony, you have the power to bring out the best in your engravings, creating masterpieces that leave a lasting impression.