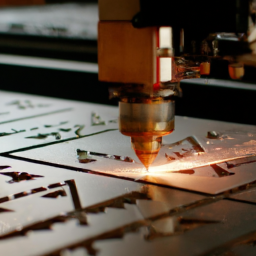
Are you ready to take your laser engraving skills to the next level? Get ready to be amazed as we delve into the world of advanced techniques in laser cutter software for engraving.
By combining the artistry of layering and depth with the precision of customizable speed and power settings, you’ll be able to create stunning and intricate designs like never before.
But that’s not all – we’ll also guide you through the use of advanced design software, enabling you to bring your most imaginative ideas to life.
And for those looking to add a personal touch, we’ll show you how to incorporate photo engraving into your projects.

Plus, we’ll explore advanced cutting techniques that will set your creations apart from the rest.
But don’t worry, we’ve got you covered on troubleshooting and maintenance tips as well.
So, whether you’re a seasoned engraver or just starting out, get ready to unlock the full potential of your laser cutter software and take your engraving skills to new heights.
Key Takeaways
- Customizable speed and power settings allow for layering and depth in engravings.
- Advanced design software enables imaginative ideas and the incorporation of photo engraving.
- Fine-tuning speed and power settings is crucial for optimal engraving depth and clarity.
- Experimenting with different materials and techniques can lead to impressive results in laser engraving.
Mastering Layering and Depth
Now you can take your laser cutter software skills to the next level by mastering layering and depth, allowing you to create stunning engravings that possess a sense of depth and dimensionality.
One of the key techniques to achieve this is mastering shading and gradients. By strategically applying lighter and darker shades, you can create the illusion of depth and make your engravings truly come to life. Additionally, experimenting with different opacity levels and blending modes can further enhance the three-dimensional effect.
Another technique to consider is creating 3D effects. By using advanced software features like embossing or beveling, you can add texture and contours to your designs, making them visually captivating.
Now, let’s move on to the next section about customizing speed and power settings.
Customizing Speed and Power Settings
When it comes to customizing speed and power settings on your laser cutter, there are three key points to keep in mind.
First, you’ll need to adjust the speed and power settings based on the type of material you’re working with to achieve the best results.
Second, fine-tuning these settings is crucial for optimal engraving and cutting outcomes.
Lastly, don’t be afraid to experiment with different combinations of speed and power to discover new possibilities and effects.
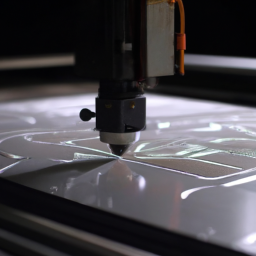
Adjusting speed and power for different materials
By fine-tuning the speed and power settings, laser cutter software empowers you to unleash the full potential of various materials, creating intricate engravings that dance with precision and artistry. Adjusting focus for different materials is crucial to achieve the desired depth and clarity in your engravings.
Laser cutter software allows you to easily customize the focus settings, ensuring optimal results for each material. Additionally, optimizing cutting paths for intricate designs is essential to create delicate and detailed engravings. Laser cutter software offers advanced features that allow you to fine-tune the cutting paths, resulting in clean and precise engravings even for complex designs.
With these capabilities, you can achieve stunning engravings that showcase the beauty of different materials. Transitioning into the subsequent section about fine-tuning settings for optimal results, you can further enhance your engravings by exploring additional techniques.
Fine-tuning settings for optimal results
To achieve stunning results, it’s essential to fine-tune the settings for optimal engraving depth and clarity. Mastering laser calibration is crucial in this process.
Start by adjusting the focus height to ensure the laser beam hits the material at the correct depth. Experiment with different focus heights until you achieve the desired engraving depth.
Additionally, optimizing engraving depth requires adjusting the power setting. Too much power can result in burning, while too little power may not create the desired depth. Find the optimal power setting by testing different power levels on sample materials.
Once you have mastered laser calibration and optimized engraving depth, it’s time to move on to experimenting with speed and power combinations for even more impressive results.
Experimenting with speed and power combinations
Get ready to create stunning results by experimenting with different speed and power combinations for a truly mesmerizing engraving experience.
Here are three key factors to consider when customizing power settings and optimizing engraving speed:
-
Power Level: Adjusting the power level of the laser cutter can have a significant impact on the depth and intensity of the engraving. Higher power levels result in deeper and darker engravings, while lower power levels create lighter and more subtle effects.
-
Speed Setting: The speed at which the laser cutter moves across the material also affects the engraving outcome. Slower speeds allow for more precision and detail, while faster speeds can produce quicker but potentially less detailed results.
-
Material Type: Different materials may require specific speed and power combinations to achieve optimal engraving results. Experiment with various settings to find the perfect balance for each material, whether it’s wood, acrylic, or metal.
By customizing power settings and optimizing engraving speed, you can unlock the full potential of your laser cutter. Now, let’s delve into the next section and explore how to utilize advanced design software to further enhance your creations.
Utilizing Advanced Design Software
When it comes to utilizing advanced design software for laser cutting, you can achieve precise designs by using vector-based software. Take advantage of advanced design features to enhance your creations and make them stand out.
Additionally, you can save time and effort by creating custom templates and patterns that can be easily replicated for future projects.
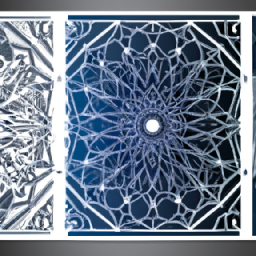
Using vector-based software for precise designs
Create intricate and detailed designs with laser cutter software by utilizing vector-based software. This allows you to effortlessly unleash your artistic vision and achieve precise engraving results.
Vector-based design software is specifically designed to work with precise lines and shapes, providing the perfect tool for creating intricate designs that can be accurately engraved by a laser cutter.
By using vector-based software, you can easily manipulate and adjust elements of your design, ensuring that every line and curve is exactly where you want it to be. This level of precision is crucial for achieving high-quality engraving results, as it allows the laser cutter to accurately follow the design and create crisp, clean lines.
Taking advantage of advanced design features, such as layering and gradient effects, can further enhance your designs and add depth to your engravings.
Taking advantage of advanced design features
Explore the endless possibilities of your design by delving into the realm of layering and gradient effects, allowing your artistic vision to come to life with depth and dimension.
Mastering advanced engraving techniques can take your designs to the next level, giving them a professional and polished look. Enhance your engraving with color effects, adding vibrancy and visual interest to your creations.
To achieve these effects, consider the following:
-
Layering: Experiment with stacking multiple layers of different colors or materials to create unique and complex designs. This technique adds depth and texture to your engraving.
-
Gradient effects: Use gradients to smoothly transition between different colors or shades. This technique can create a smooth gradient effect or even mimic the appearance of shadows and highlights.
By utilizing these advanced design features, you can create stunning and intricate engravings that truly stand out.
Now, let’s move on to the next section about creating custom templates and patterns.
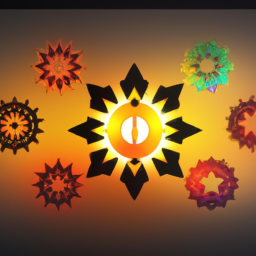
Creating custom templates and patterns
To truly make your designs unique, try your hand at crafting personalized templates and patterns. By customizing laser parameters and optimizing engraving techniques, you can create stunning and intricate designs that stand out from the crowd. One way to do this is by creating custom templates, which serve as a starting point for your designs. These templates can be tailored to fit specific objects or materials, ensuring a perfect fit every time. Additionally, you can experiment with different patterns to add texture and depth to your engravings. Whether it’s a geometric pattern or a more intricate design, the possibilities are endless. By incorporating photo engraving, you can take your designs to the next level and create lifelike images on various materials.
Incorporating Photo Engraving
When incorporating photo engraving, you can truly capture the essence of a moment and immortalize it in a tangible form. This technique allows you to transform your favorite photographs into intricate engravings using laser cutter software. To achieve the best results, it’s crucial to have a good understanding of photo editing and image manipulation.
Here are five key aspects to consider when incorporating photo engraving:
-
Resolution: Make sure the image has a high resolution to maintain clarity and detail in the engraving.
-
Contrast: Adjust the contrast levels to enhance the details and make the engraving stand out.
-
Grayscale Conversion: Convert the image to grayscale to achieve a more realistic and visually appealing engraving.
-
Depth Mapping: Experiment with depth mapping techniques to add dimension and depth to the engraving.
-
Engraving Speed: Adjust the engraving speed according to the material being used to achieve the desired effect.
By mastering these photo engraving techniques, you can create stunning and personalized engravings that beautifully showcase your cherished memories.
Now, let’s explore advanced cutting techniques to further enhance your laser cutter skills.
Exploring Advanced Cutting Techniques
In this section, you’ll explore advanced cutting techniques that’ll allow you to create intricate and delicate cuts using the laser cutter software.
You’ll learn how to utilize advanced cutting algorithms to achieve precise and detailed cuts.
Additionally, you’ll discover how to incorporate 3D cutting techniques, enabling you to add depth and dimension to your designs.
Creating intricate and delicate cuts
Mastering the art of creating intricate and delicate cuts with the laser cutter software will enable you to craft stunning designs, even though it may require patience and practice. To achieve high levels of detail and precision in your engravings, consider the following techniques:
-
Utilize vector-based files: Vector files allow for smooth and sharp lines, ensuring intricate cuts are executed with precision.
-
Adjust power and speed settings: Fine-tuning the power and speed of the laser cutter will help you create delicate cuts without burning or damaging the material.
-
Use multiple passes: By running the laser cutter over the same area multiple times, you can achieve deeper and more defined cuts, enhancing the intricacy of your designs.
-
Experiment with different materials: Different materials have varying levels of hardness and require adjustments in settings to achieve desired results.
By mastering these techniques, you can create intricate and delicate cuts that showcase your attention to detail.
Now, let’s explore how you can utilize advanced cutting algorithms to enhance your laser cutting skills.
Utilizing advanced cutting algorithms
Enhance your laser cutting skills and achieve even more intricate and precise cuts by utilizing cutting-edge algorithms that take your designs to the next level. With advanced cutting techniques and optimized laser settings, you can create stunning and detailed designs that were once thought impossible. These algorithms analyze the geometry of your design and determine the most efficient and precise way to cut, resulting in cleaner edges and smoother curves. By incorporating these advanced techniques into your laser cutter software, you’ll be able to push the boundaries of what’s possible and create truly unique pieces. In the table below, you can see examples of how advanced cutting algorithms can improve your cuts:
| Algorithm | Benefits |
|---|---|
| Adaptive cutting | Reduces material waste and increases cutting speed |
| Kerf compensation | Ensures accurate dimensions and tight-fitting joints |
| Path optimization | Minimizes tool travel distance for faster cuts |
| Multi-pass cutting | Achieves deeper cuts and smoother finishes |
| Dithering | Creates grayscale images with varying laser intensities |
By utilizing these advanced cutting algorithms, you can take your engraving skills to new heights. In the next section, we will explore the benefits of incorporating 3D cutting techniques into your workflow.
Incorporating 3D cutting techniques
By incorporating 3D cutting techniques into your workflow, you’ll be able to take your laser cutting skills to a whole new dimension, unlocking endless possibilities for creating intricate and visually stunning designs.
3D engraving techniques allow you to add depth and texture to your cuts, resulting in more realistic and captivating designs. To optimize laser settings for 3D cuts, start by adjusting the power and speed settings to achieve the desired depth and level of detail. Experiment with different focal lengths and lens types to further enhance the 3D effect.
Additionally, consider using grayscale images or applying dithering techniques to create shading and gradients in your cuts. By mastering these 3D engraving techniques and optimizing your laser settings, you’ll be able to create impressive three-dimensional designs that truly stand out.
Now, let’s move on to some troubleshooting and maintenance tips to ensure smooth operation of your laser cutter.
Troubleshooting and Maintenance Tips
To ensure smooth operation and avoid potential issues, it’s important to regularly maintain and troubleshoot your laser cutter software.
Maintenance strategies play a crucial role in keeping your machine running efficiently. Regularly clean the lens and mirrors to prevent any debris from affecting the cutting quality. Additionally, lubricate the moving parts to reduce friction and ensure smooth movement. Calibration is also essential to maintain accuracy, so regularly check and adjust the laser’s focus and alignment.
When it comes to troubleshooting, common issues like misalignment, power fluctuations, or software glitches can arise. Check the connections and power supply, update the software, and restart the system if needed. Keeping a record of common issues and their solutions can help troubleshoot future problems efficiently.
With proper maintenance and troubleshooting, you can maximize the performance and longevity of your laser cutter software.
Frequently Asked Questions
How do I determine the appropriate layering and depth settings for different engraving projects?
To determine the appropriate layering and depth settings for different engraving projects, start by understanding the material you’re working with. Experiment with different layering techniques to achieve optimal depth. Symbolically, think of each layer as a stroke of an artist’s brush, building up the final image. Adjust the depth settings based on the desired result, considering factors like material thickness and desired contrast. Remember to test and iterate to find the perfect settings for each project.
Can I save and reuse customized speed and power settings for future engraving jobs?
Yes, you can save and reuse customized speed and power settings for future engraving jobs. This allows you to optimize engraving speed and power based on your specific requirements. By saving these settings, you can easily apply them to similar projects in the future, saving you time and effort.
This feature is particularly useful when you’ve found the perfect combination of speed and power for a certain material or design.
What are some advanced design software options that are compatible with laser cutter software?
For advanced design software options that are compatible with laser cutter software, you have several choices. Programs like Adobe Illustrator, CorelDRAW, and AutoCAD are commonly used in conjunction with laser engraving machines. These software options offer a wide range of advanced techniques for laser engraving, including vector editing, precise control over speed and power settings, and the ability to import and manipulate various file formats.
These tools can take your laser engraving projects to the next level.
Is it possible to engrave detailed photos onto different materials using laser cutter software?
Yes, it’s possible to achieve highly detailed photo engraving on different materials using laser cutter software. By exploring photo engraving techniques with laser cutter software, you can create intricate designs and capture fine details.
The software allows you to adjust the power and speed of the laser to achieve different levels of engraving depth. Additionally, you can optimize the settings for specific materials like wood, acrylic, or metal to ensure the best results.
Are there any specific advanced cutting techniques that can be explored to create unique designs with a laser cutter?
Get ready to take your laser cutter designs to the next level! With advanced cutting techniques, you can create unique and eye-catching designs. By experimenting with different cutting patterns and angles, you can add depth and texture to your creations.
Don’t be afraid to think outside the box and try unconventional design ideas. Whether it’s intricate filigree or bold geometric shapes, the possibilities are endless when it comes to using cutting techniques to make your designs stand out.
Conclusion
Congratulations! You’ve now learned the best advanced techniques in laser cutter software for engraving.nnBy mastering layering and depth, customizing speed and power settings, utilizing advanced design software, incorporating photo engraving, and exploring advanced cutting techniques, you’ve become a true expert.nnRemember to troubleshoot and maintain your laser cutter regularly to ensure optimal performance.nnJust like a painter with a brush, your laser cutter is now your artistic tool, allowing you to create intricate and beautiful designs with precision and ease.