Are you ready to cut through the confusion and slice your way to vector cutting mastery?
Look no further, because this ultimate guide is your secret weapon. Consider it your trusty tour guide, leading you through the fascinating world of vector cutting. Just like a skilled surgeon with a scalpel, you’ll learn to wield the laser cutter with precision and finesse.
From understanding the intricacies of vector graphics to troubleshooting any hiccups along the way, this guide has got you covered. Whether you’re a curious beginner or a seasoned pro looking to level up your skills, you’ll find everything you need to know within these pages.
So, grab your design software, buckle up, and get ready to embark on an exhilarating journey into the art of vector cutting.

Let’s go!
Key Takeaways
- Vector graphics provide scalability and easy editing options, making them ideal for design projects.
- Choosing the right software for vector cutting is crucial, considering factors such as ease of use, customization options, and compatibility.
- Proper preparation of design files is essential, including choosing the appropriate file format for laser cutter compatibility and converting text to outlines or paths.
- Operating a laser cutter requires regular maintenance, including cleaning lenses and mirrors, lubricating moving parts, and following safety precautions.
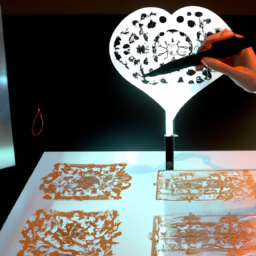
Understanding Vector Graphics
Understanding vector graphics is essential for beginners to effectively utilize vector cutting. By using vector graphics in graphic design, you can experience several benefits.
Firstly, these graphics can be scaled to any size without losing quality, which is crucial for creating high-resolution designs. Additionally, vector graphics allow for easy editing and modification, enabling you to make changes to your designs effortlessly.
When exploring different file formats for vector graphics, it is important to consider compatibility with various software and devices. Common file formats include AI (Adobe Illustrator), EPS (Encapsulated PostScript), and SVG (Scalable Vector Graphics). Each format has its advantages and disadvantages, so it is essential to choose the one that suits your needs.

Understanding vector graphics is just the beginning of your journey into vector cutting. Next, we will discuss the importance of choosing the right software for this process.
Choosing the Right Software
When it comes to selecting the appropriate software, it’s crucial to consider various factors. Exploring different software options is important to find the one that suits your needs best. There are several benefits of software for vector cutting, and comparing them can help you make an informed decision.
Here are three sub-lists to evoke emotion in the audience:
-
Ease of use: Look for software that has a user-friendly interface and intuitive tools. This’ll save you time and frustration.
-
Customization options: Find software that allows you to personalize your designs with various fonts, colors, and effects. This’ll help you create unique and eye-catching projects.
-
Compatibility: Ensure that the software you choose is compatible with your cutting machine and other design programs you may use. This’ll ensure a seamless workflow and prevent any compatibility issues.

By exploring different software options and comparing their benefits, you can find the right one for your vector cutting needs.
Now, let’s transition into the subsequent section about creating your design.
Creating Your Design
Now, let’s dive into the exciting process of crafting your design! When it comes to creating your design for vector cutting, the possibilities are endless.
Start by finding design inspiration, whether it’s browsing through online galleries or sketching your own ideas. Once you have a clear vision, it’s important to choose the right design file format. Popular options include SVG, EPS, and AI, which allow for easy manipulation and scaling of your design. Make sure to save your file in a format that’s compatible with your software.
After creating your design, it’s time to move on to the next step of preparing your file for cutting.
Preparing Your File for Cutting
To ensure a smooth cutting process, it’s essential to properly prepare your design file, like sharpening a knife before slicing through butter. Here are some key steps to follow when preparing your file for cutting:
- Choose the appropriate file format for your laser cutter, such as SVG or AI, to ensure compatibility and accuracy.
- Make sure to convert all text to outlines or paths, as this will prevent any font issues during the cutting process.
- Double-check your design’s dimensions and make any necessary adjustments to fit your material perfectly.
- Select the right material for your project, considering factors like thickness and compatibility with the laser cutter.
By taking these steps, you’ll be ready to move on to the next section and start operating the laser cutter smoothly. Remember, proper preparation is key to achieving the best results in your vector cutting journey.
Operating the Laser Cutter
Take control of the laser cutter and unlock the potential of your designs by mastering the art of operating this powerful tool. To ensure optimal performance and longevity, it is essential to prioritize laser cutter maintenance. Regularly clean the lens and mirrors, as any dirt or debris can negatively impact the quality of your cuts. Additionally, lubricate the moving parts to prevent friction and wear. Safety should always be a top priority when operating the laser cutter. Remember to wear protective eyewear and keep a fire extinguisher nearby. Never leave the laser cutter unattended, and always follow the manufacturer’s guidelines. By taking these laser cutter safety precautions, you can enjoy the benefits of precise and intricate cuts. Transitioning into troubleshooting and fine-tuning, let’s delve into the next stage of perfecting your laser cutting skills.
Troubleshooting and Fine-Tuning
Mastering the art of troubleshooting and fine-tuning is like embarking on a thrilling adventure through the intricate maze of laser cutting, where every twist and turn brings you closer to unlocking the full potential of your designs.
To avoid common mistakes and optimize cutting parameters, it’s important to pay attention to detail. One common mistake is forgetting to clean the lens regularly, which can result in blurry cuts. Another mistake is not properly aligning the material on the cutting bed, causing inaccurate cuts.
When troubleshooting, start by checking the power settings and focal length, as these can greatly impact the quality of the cuts. Fine-tuning involves adjusting the speed and power to achieve the desired results. Experimenting with different settings and materials will help you find the perfect balance for your designs.
So, embrace the challenge and become a master of troubleshooting and fine-tuning to take your laser cutting skills to new heights.
Frequently Asked Questions
How do I clean the laser cutter after use?
After using the laser cutter, it’s important to properly clean and maintain it.
Start by turning off the machine and unplugging it. Use a brush or compressed air to remove any debris or dust from the cutting area.
Wipe down the machine with a soft cloth and mild cleaning solution. Pay attention to the lens and mirrors, ensuring they’re free from smudges or residue.
Regular laser cutter maintenance and following cleaning instructions will help prolong its lifespan.
Can I cut multiple materials at once using the laser cutter?
You can definitely cut multiple materials at once using the laser cutter. It’s like slicing through butter with a hot knife!
However, you need to consider cutting efficiency and material compatibility. Some materials may require different settings or speeds, so it’s important to test and adjust accordingly.
Always prioritize safety and consult the manufacturer’s guidelines for optimal results.
Happy cutting!
What safety precautions should I take when operating the laser cutter?
When operating the laser cutter, it’s crucial to prioritize safety precautions. This includes regular laser cutter maintenance to ensure it’s in good working condition.
Additionally, proper ventilation is essential to remove any fumes or smoke produced during the cutting process. Neglecting these precautions can result in potential hazards such as fires or health risks from inhaling harmful particles.
Therefore, always take the necessary steps to maintain the laser cutter and provide adequate ventilation.
How long does it usually take to cut a design using a laser cutter?
When using a laser cutter, the time it takes to cut a design can vary depending on several factors. To optimize cutting speed, it’s important to perform regular laser cutter maintenance, such as cleaning the lens and checking for any debris. Additionally, adjusting the power and speed settings can help reduce cutting time. Keep in mind that intricate designs may take longer to cut compared to simpler ones.
Can I use the laser cutter to engrave designs on materials instead of cutting them?
Yes, you can definitely use a laser cutter to engrave designs on materials instead of cutting them. Laser engraving techniques involve using a laser beam to burn or vaporize the surface of the material, creating a permanent mark. Different materials, such as wood, acrylic, glass, and metal, are suitable for laser engraving. The laser can create highly detailed and precise engravings, making it a popular choice for personalizing items or adding intricate designs to various materials.
Conclusion
Congratulations! You’ve now become a master of vector cutting! With this ultimate guide, you’ve unlocked the secrets to creating intricate designs and flawlessly operating a laser cutter.
No task is too big for you now. You can conquer any project with ease and precision.
So go forth, my friend, and let your creativity soar! The world is your cutting board, and you’re the master of the laser!